This will be another beefy write up, lots to say…
The Context
To start, this build has the potential to be my best build ever, but it certainly isn’t yet. That said, this is another build that will be getting a remaster. In fact, the remaster is well on the way. If you stick around (or skip ahead) to the end, you will find I have implemented many changes which have greatly improved the build already.
Now, seeing as how this was a BioCup build, there was a theme to base the build on. The theme for this round was “Welcome to the Shuffle”. Each group of 4 people got one of the 4 suits, with my suit being Clubs. Like the past two rounds, I had absolutely no idea what to do. One take away I’ve had from BioCup is that I need to be a lot more creative with my concepts going forward.
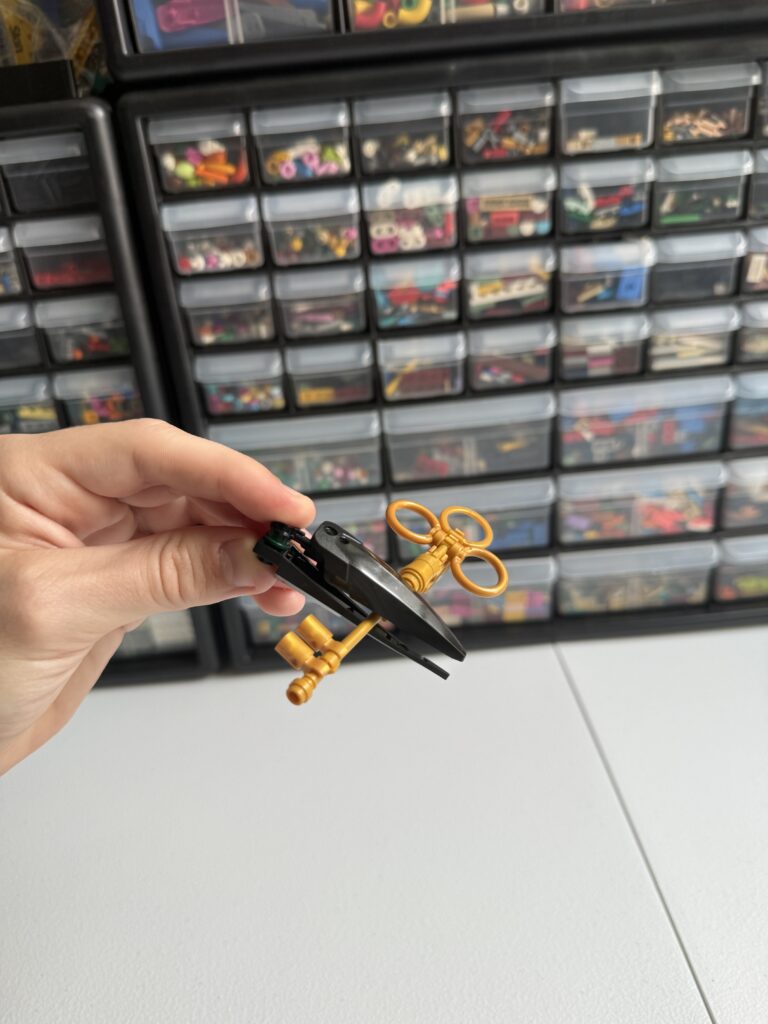
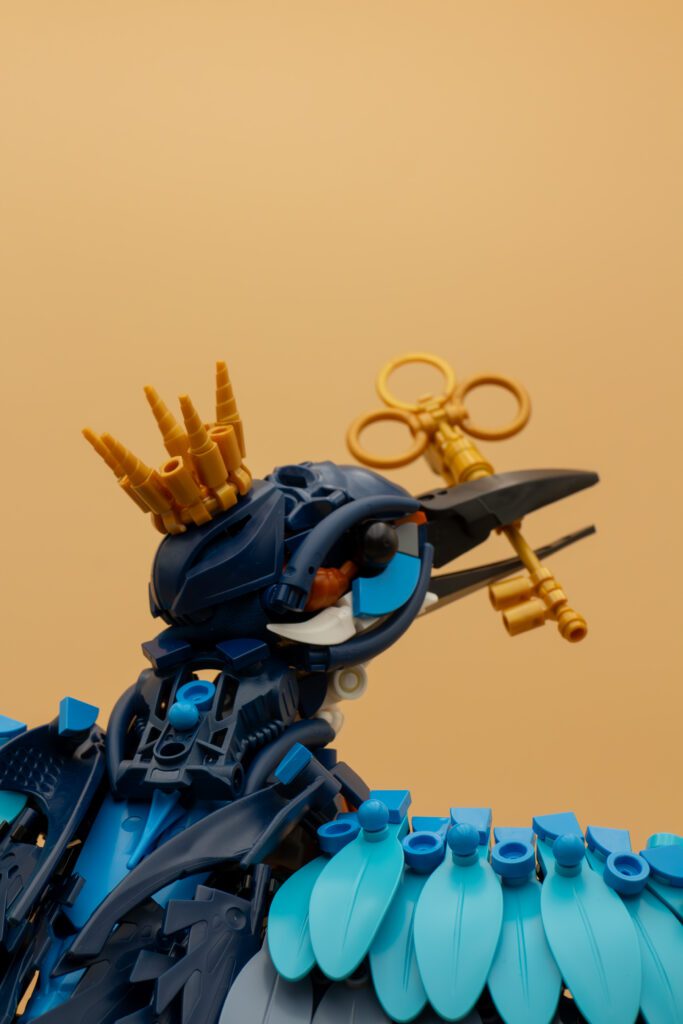
Before I go any further, it’s important to address what motivated me this round. That would be the competition, and the judges. For this semifinal match up, I was up against The Maestro™ (Max). Already accepting defeat, I figured I needed to go big or go home for this round to have a chance. So, with the Bird Master Patrick Biggs judging, I figured what better way to go than to build a bird. In my mind, I would rather death by slightly inaccurate bird than to just get whooped by Max, so I went the fun route. After a day or two of concept design, I settled on my idea. I wanted to use a Kingfisher due to the “King” obviously being a card in the deck. The idea for this mostly came from a Pinterest post which depicted a Kingfisher on a King playing card. To connect this to clubs, I used an idea from a different post which revolved around a club shaped key. Looking back, this was a very weak connection to the theme which let me down.
With the scene now set, and a high standard to hit, we can now get into the build process!
Some Assistance
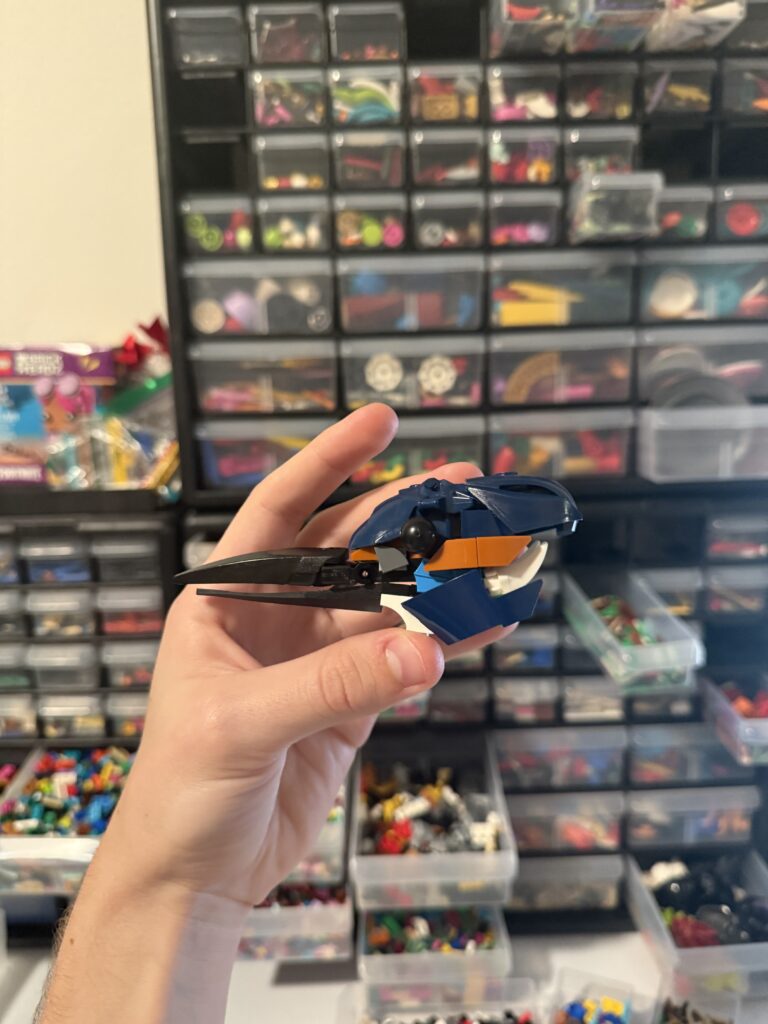
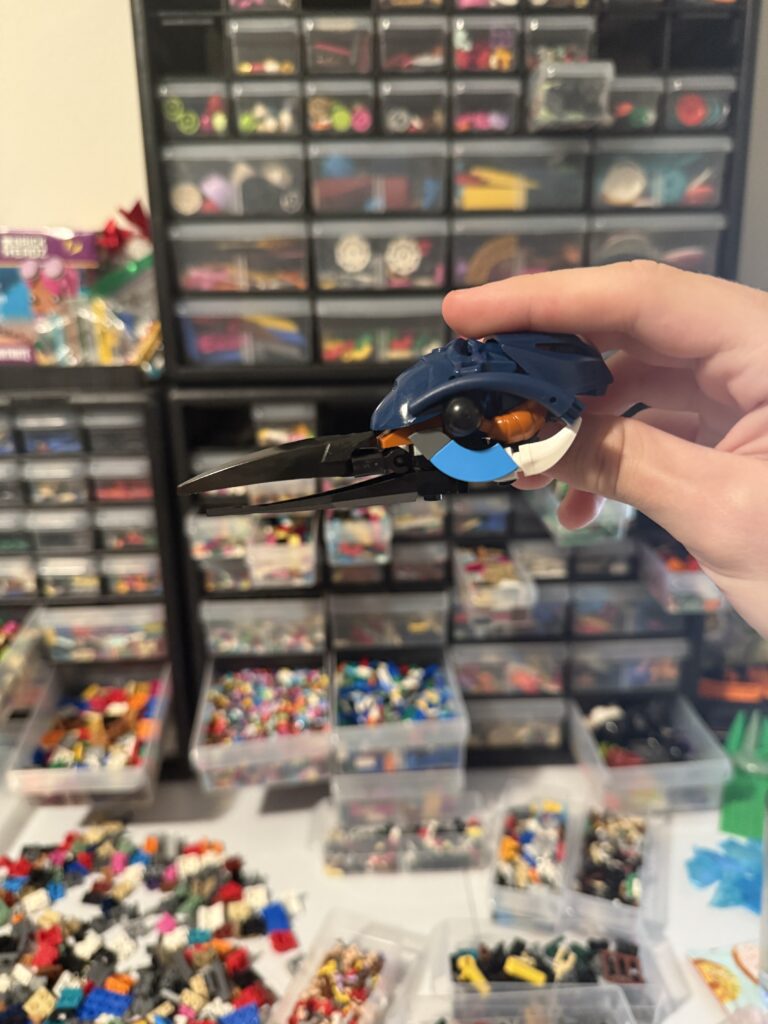
Unfortunately, I must credit the first, and what was likely the best, part of the build to Nathan (@Woomy.World). The head design was the first thing I started with and certainly the area I got the most help in. Though my initial design wasn’t terrible, it relied on a lot of system parts like wedge slopes and arches, similar to the actual Lego Kingfisher set. This unintentionally gave the build a ton of 90-degree angles, which really held the build back. Nathan pointed this out to me and suggested a few part alternatives which really reshaped the vision for the head. Namely, he suggested a mac tile below the eye like he uses on many of his bird builds, a croissant as a nice dark orange curved part, and as always, dino tails. The implementation of these made an instant noticeable impact and really helped push this build to a higher standard. I have carried this lesson in organic curvature over to my current builds, including a new bird I am working on!
Flight
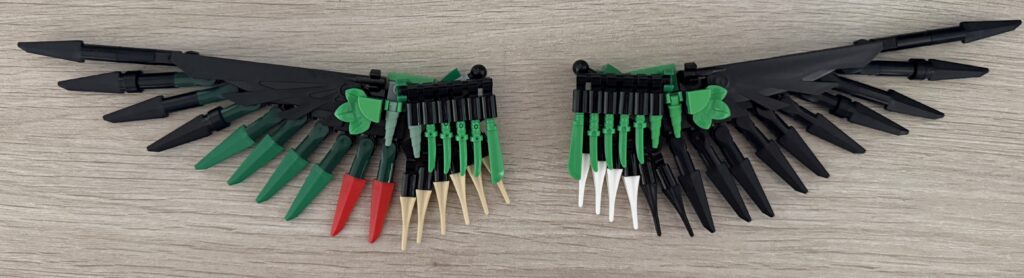
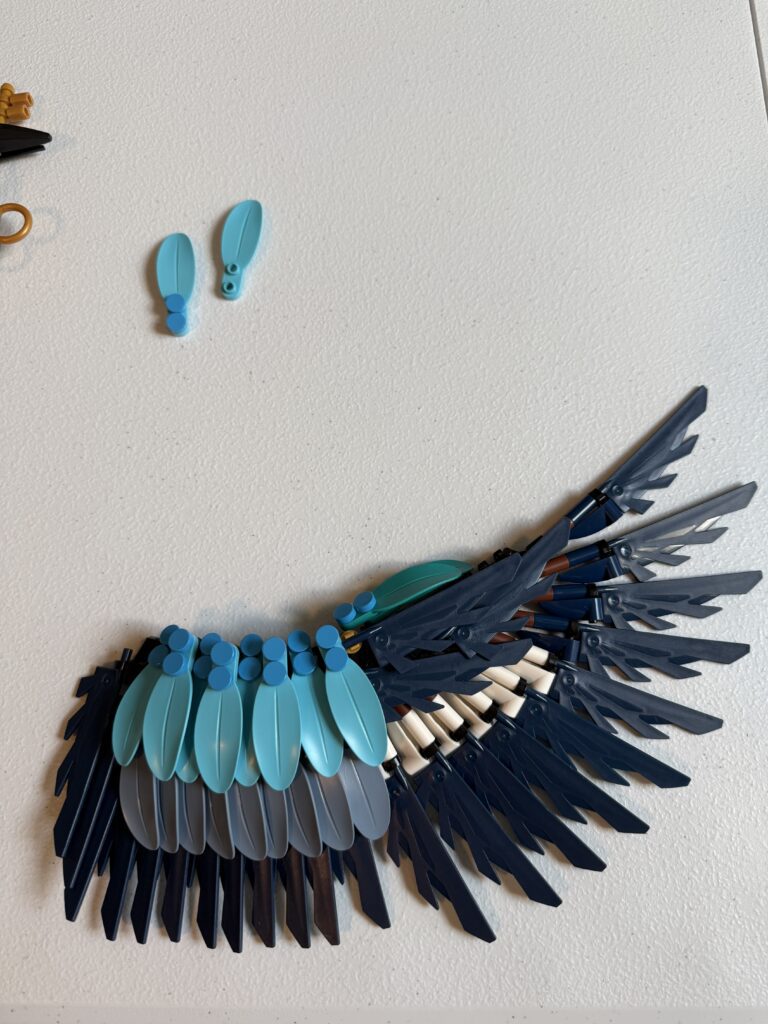
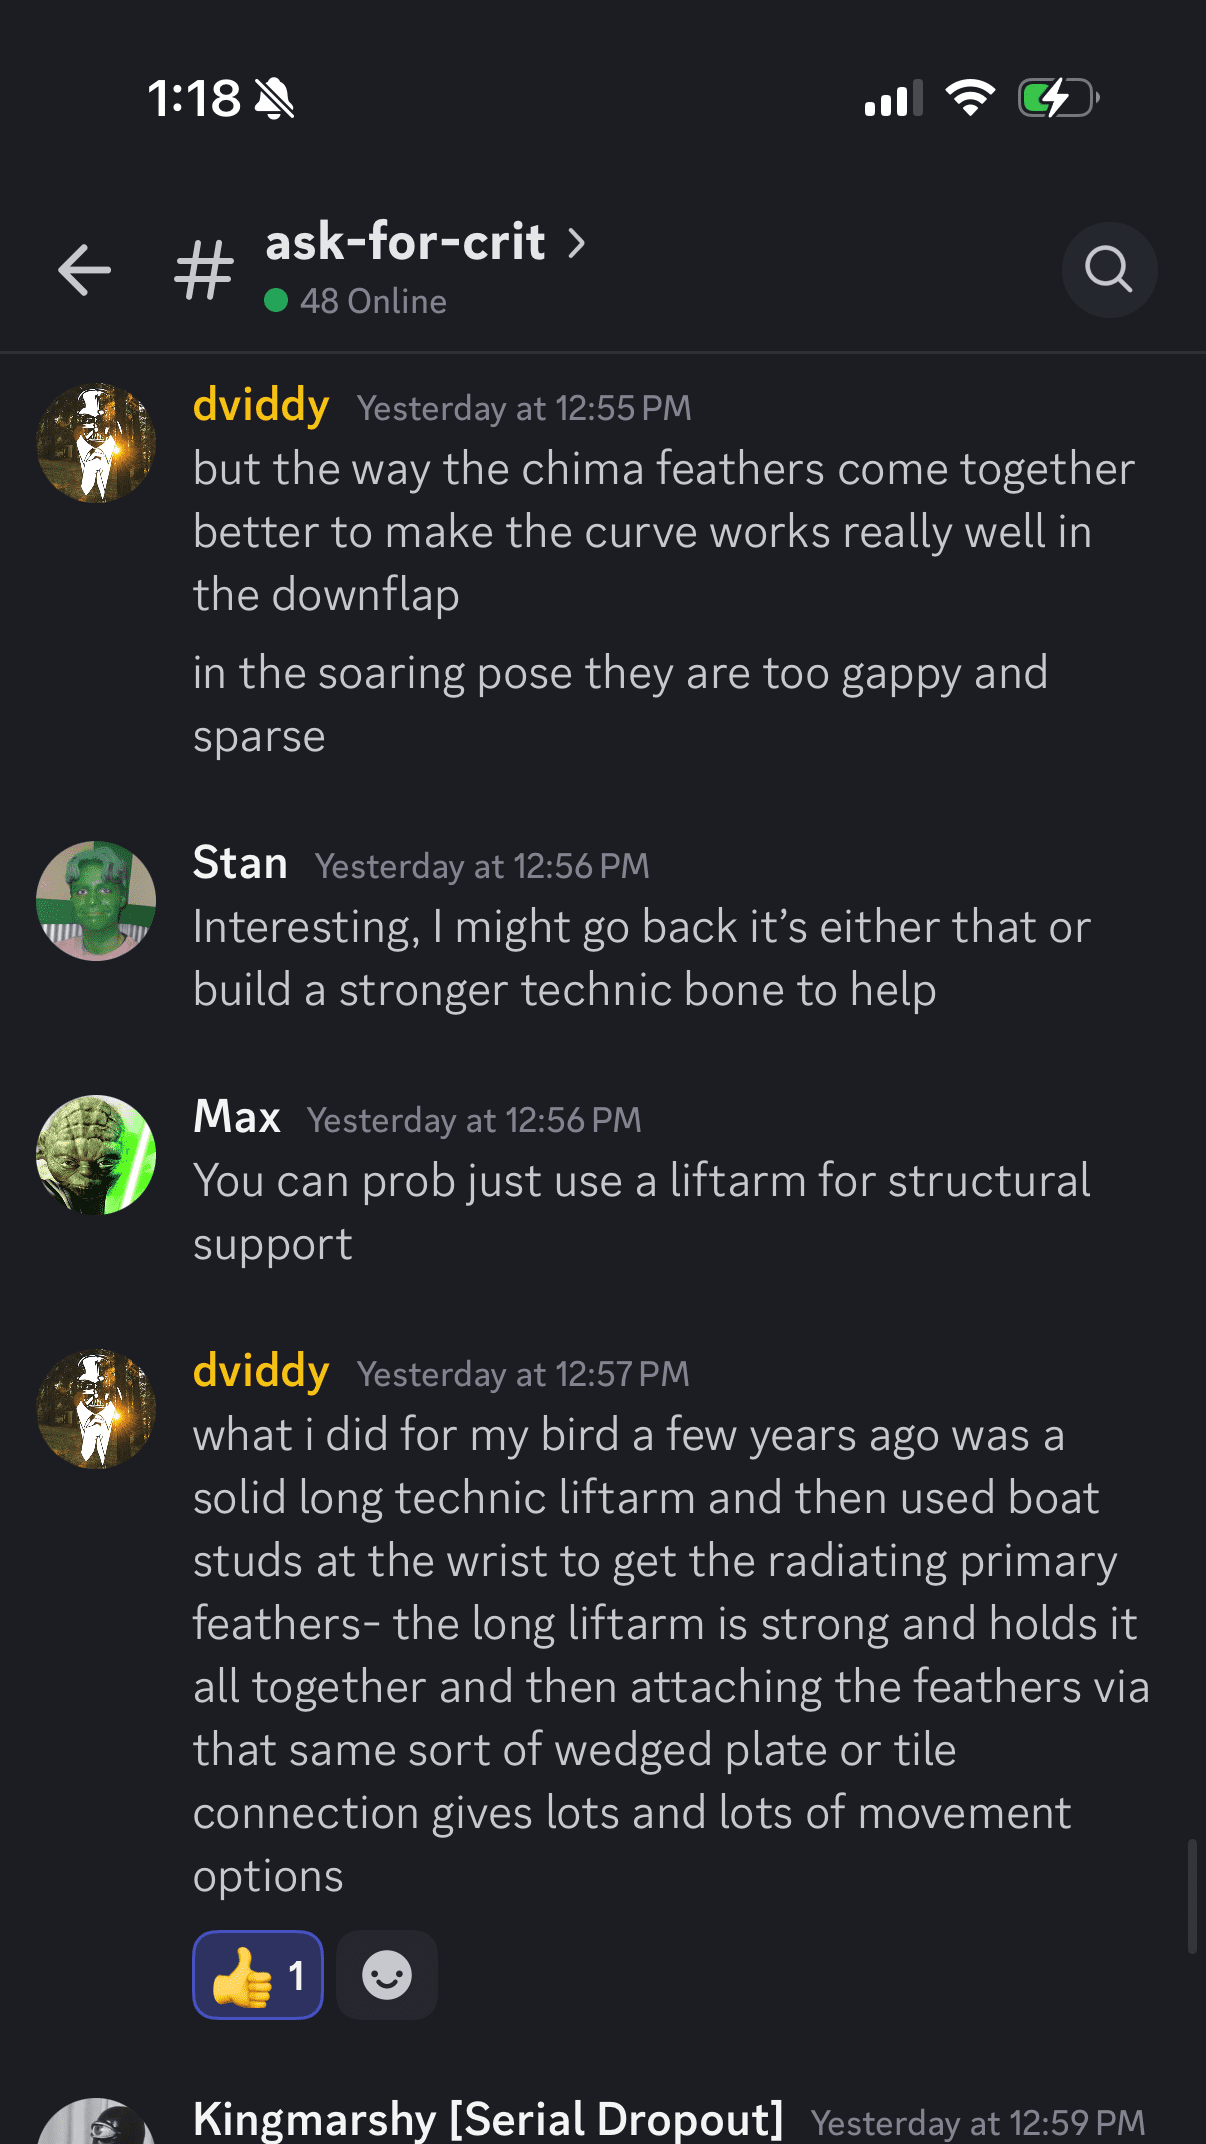
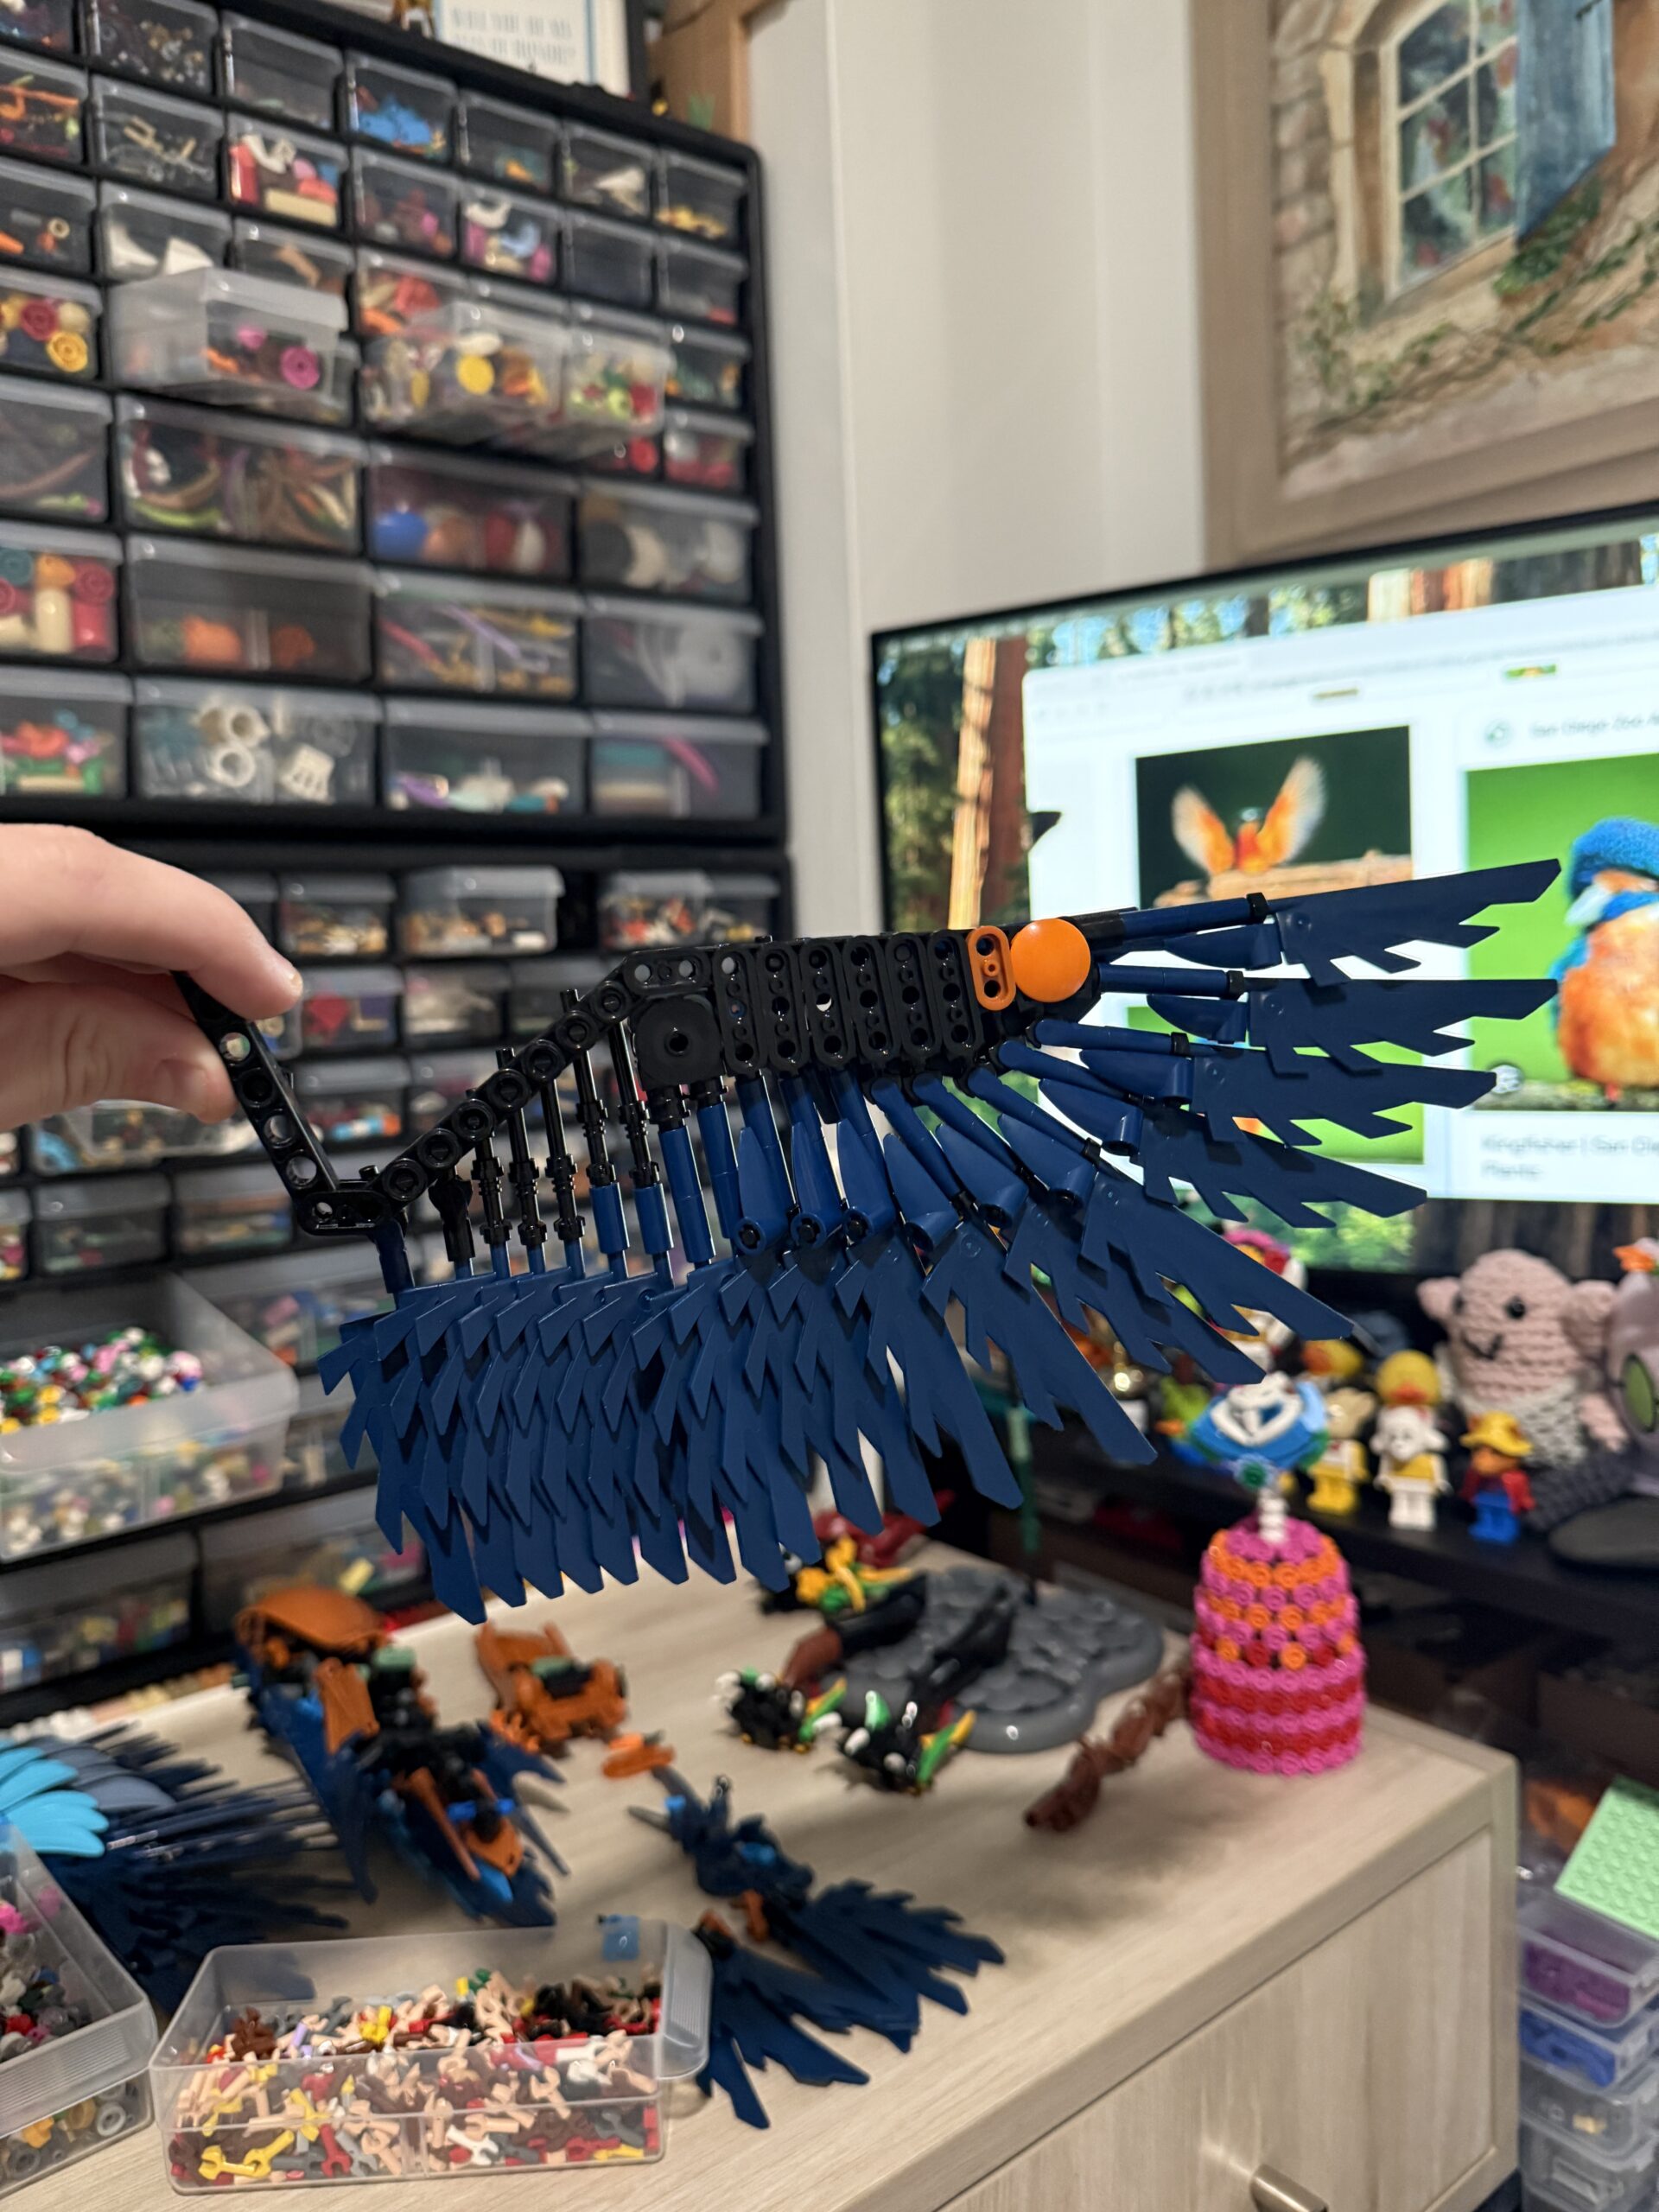
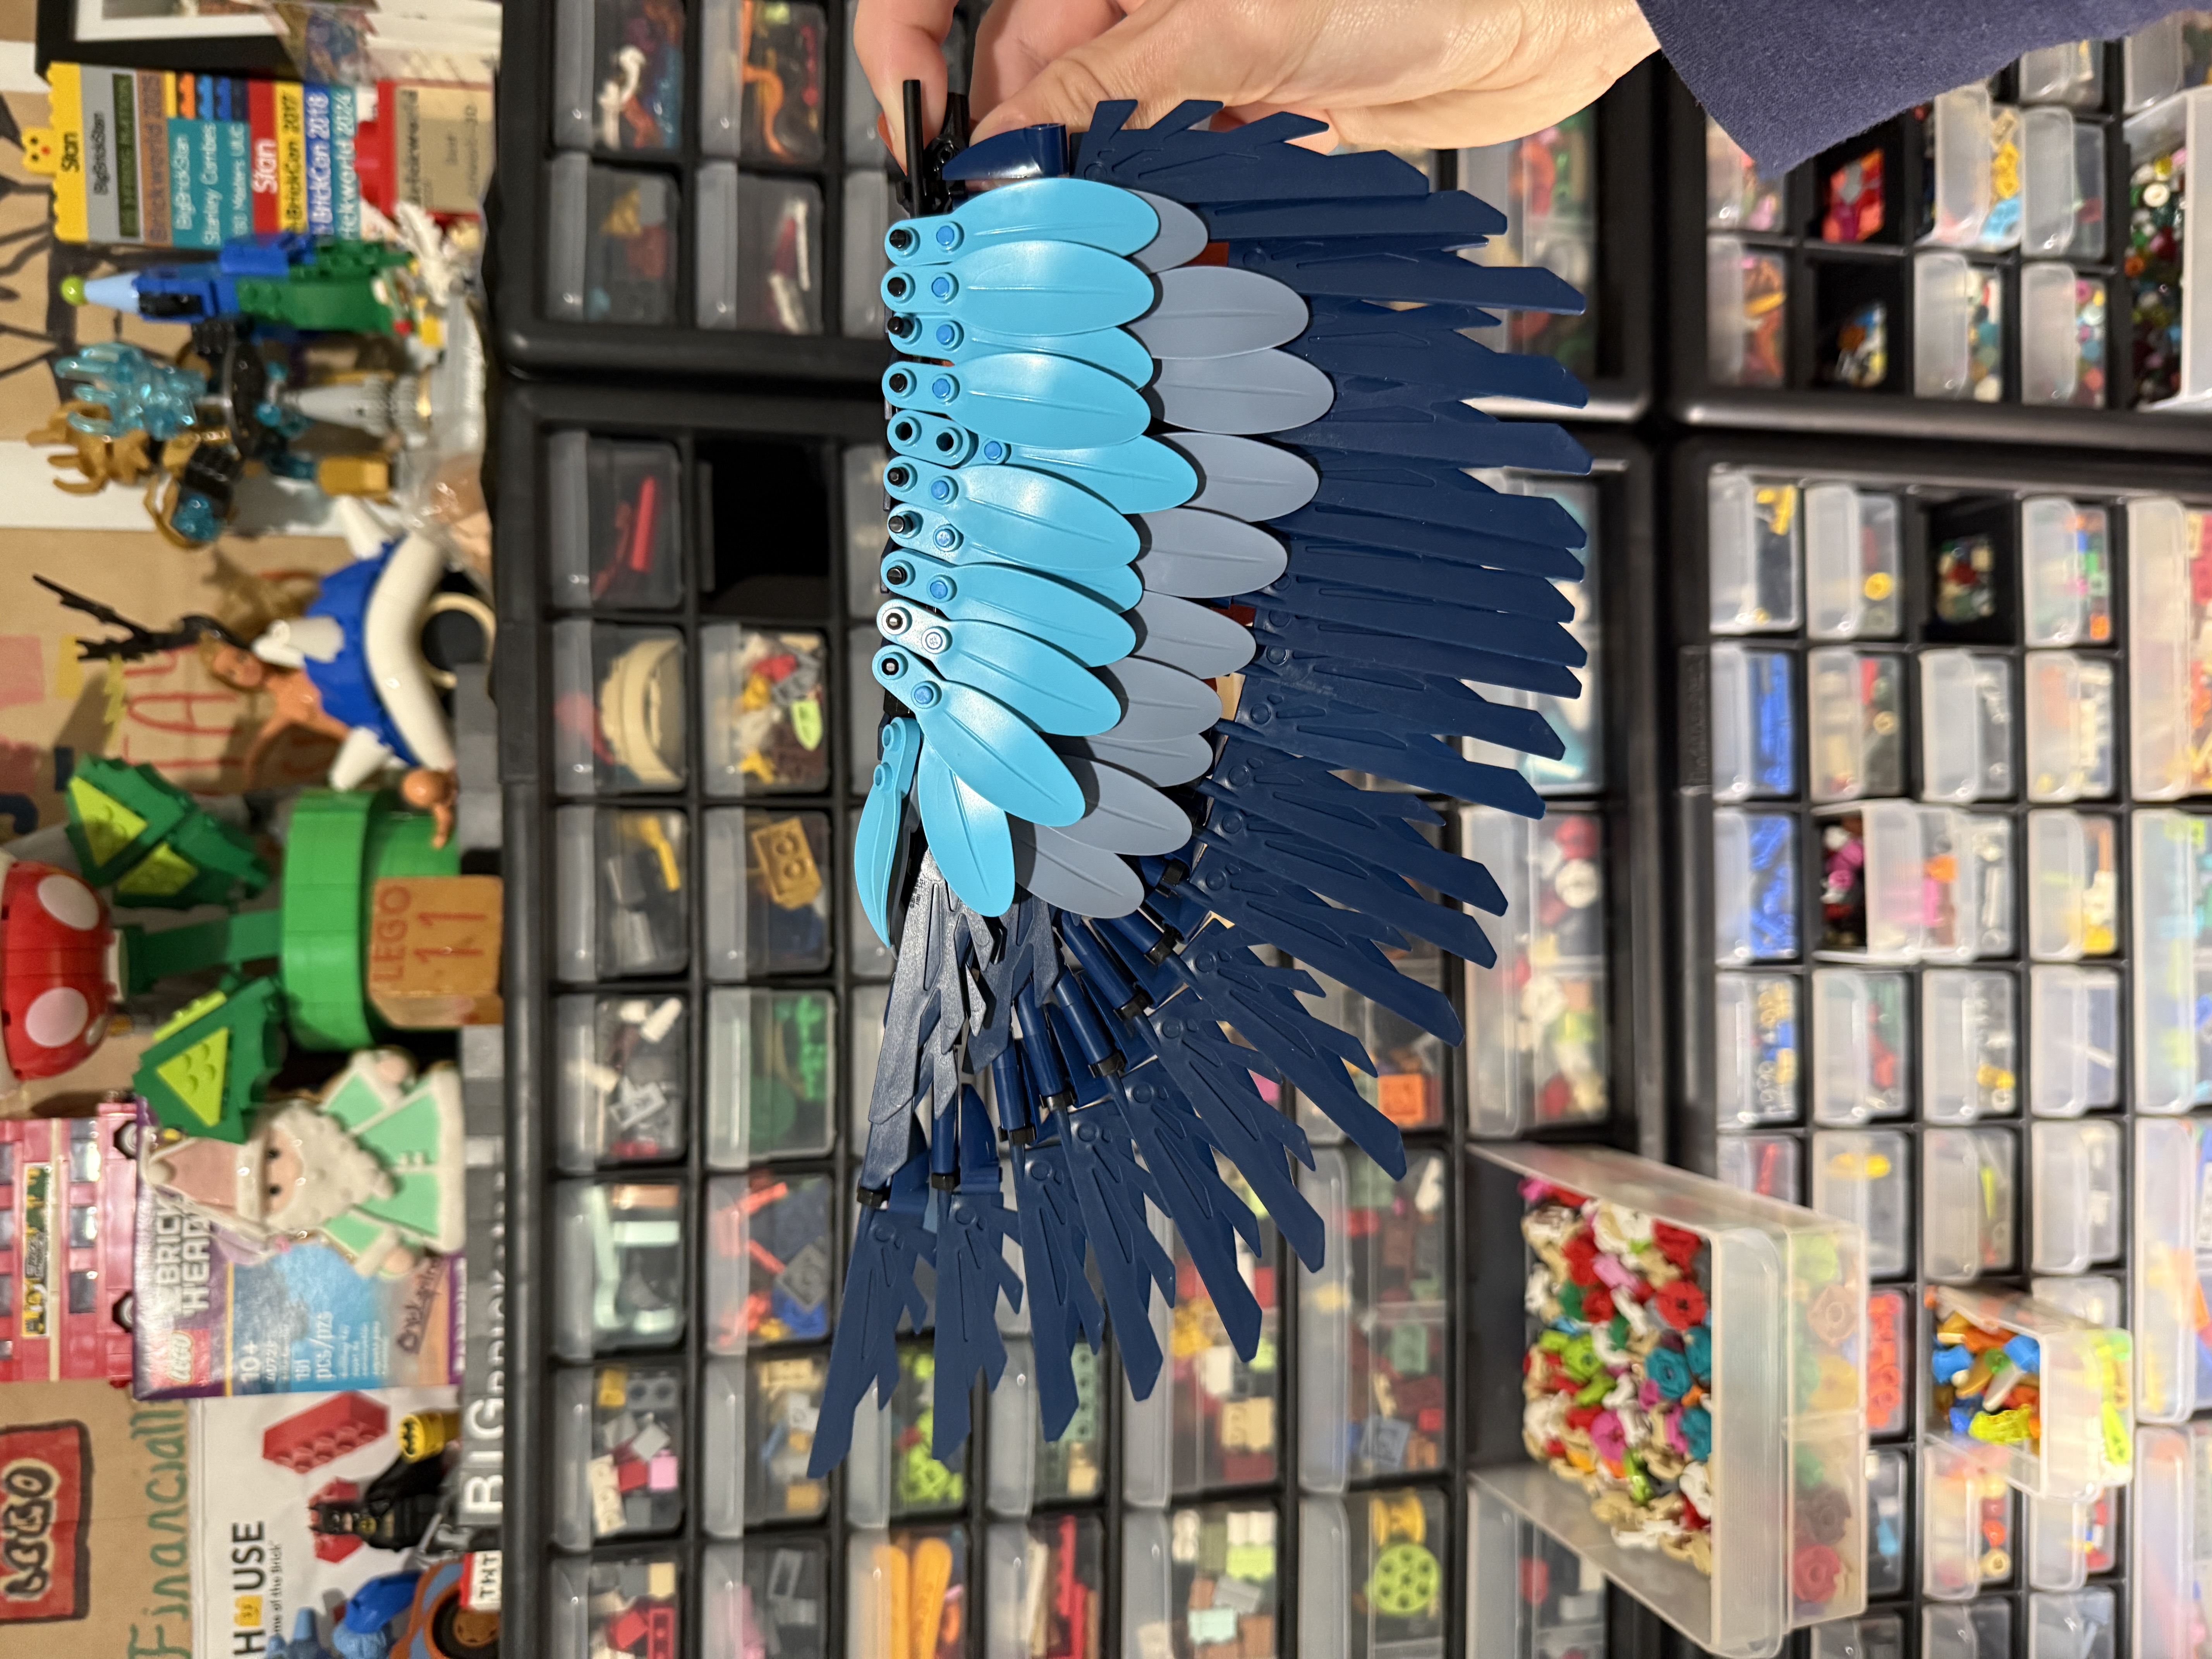
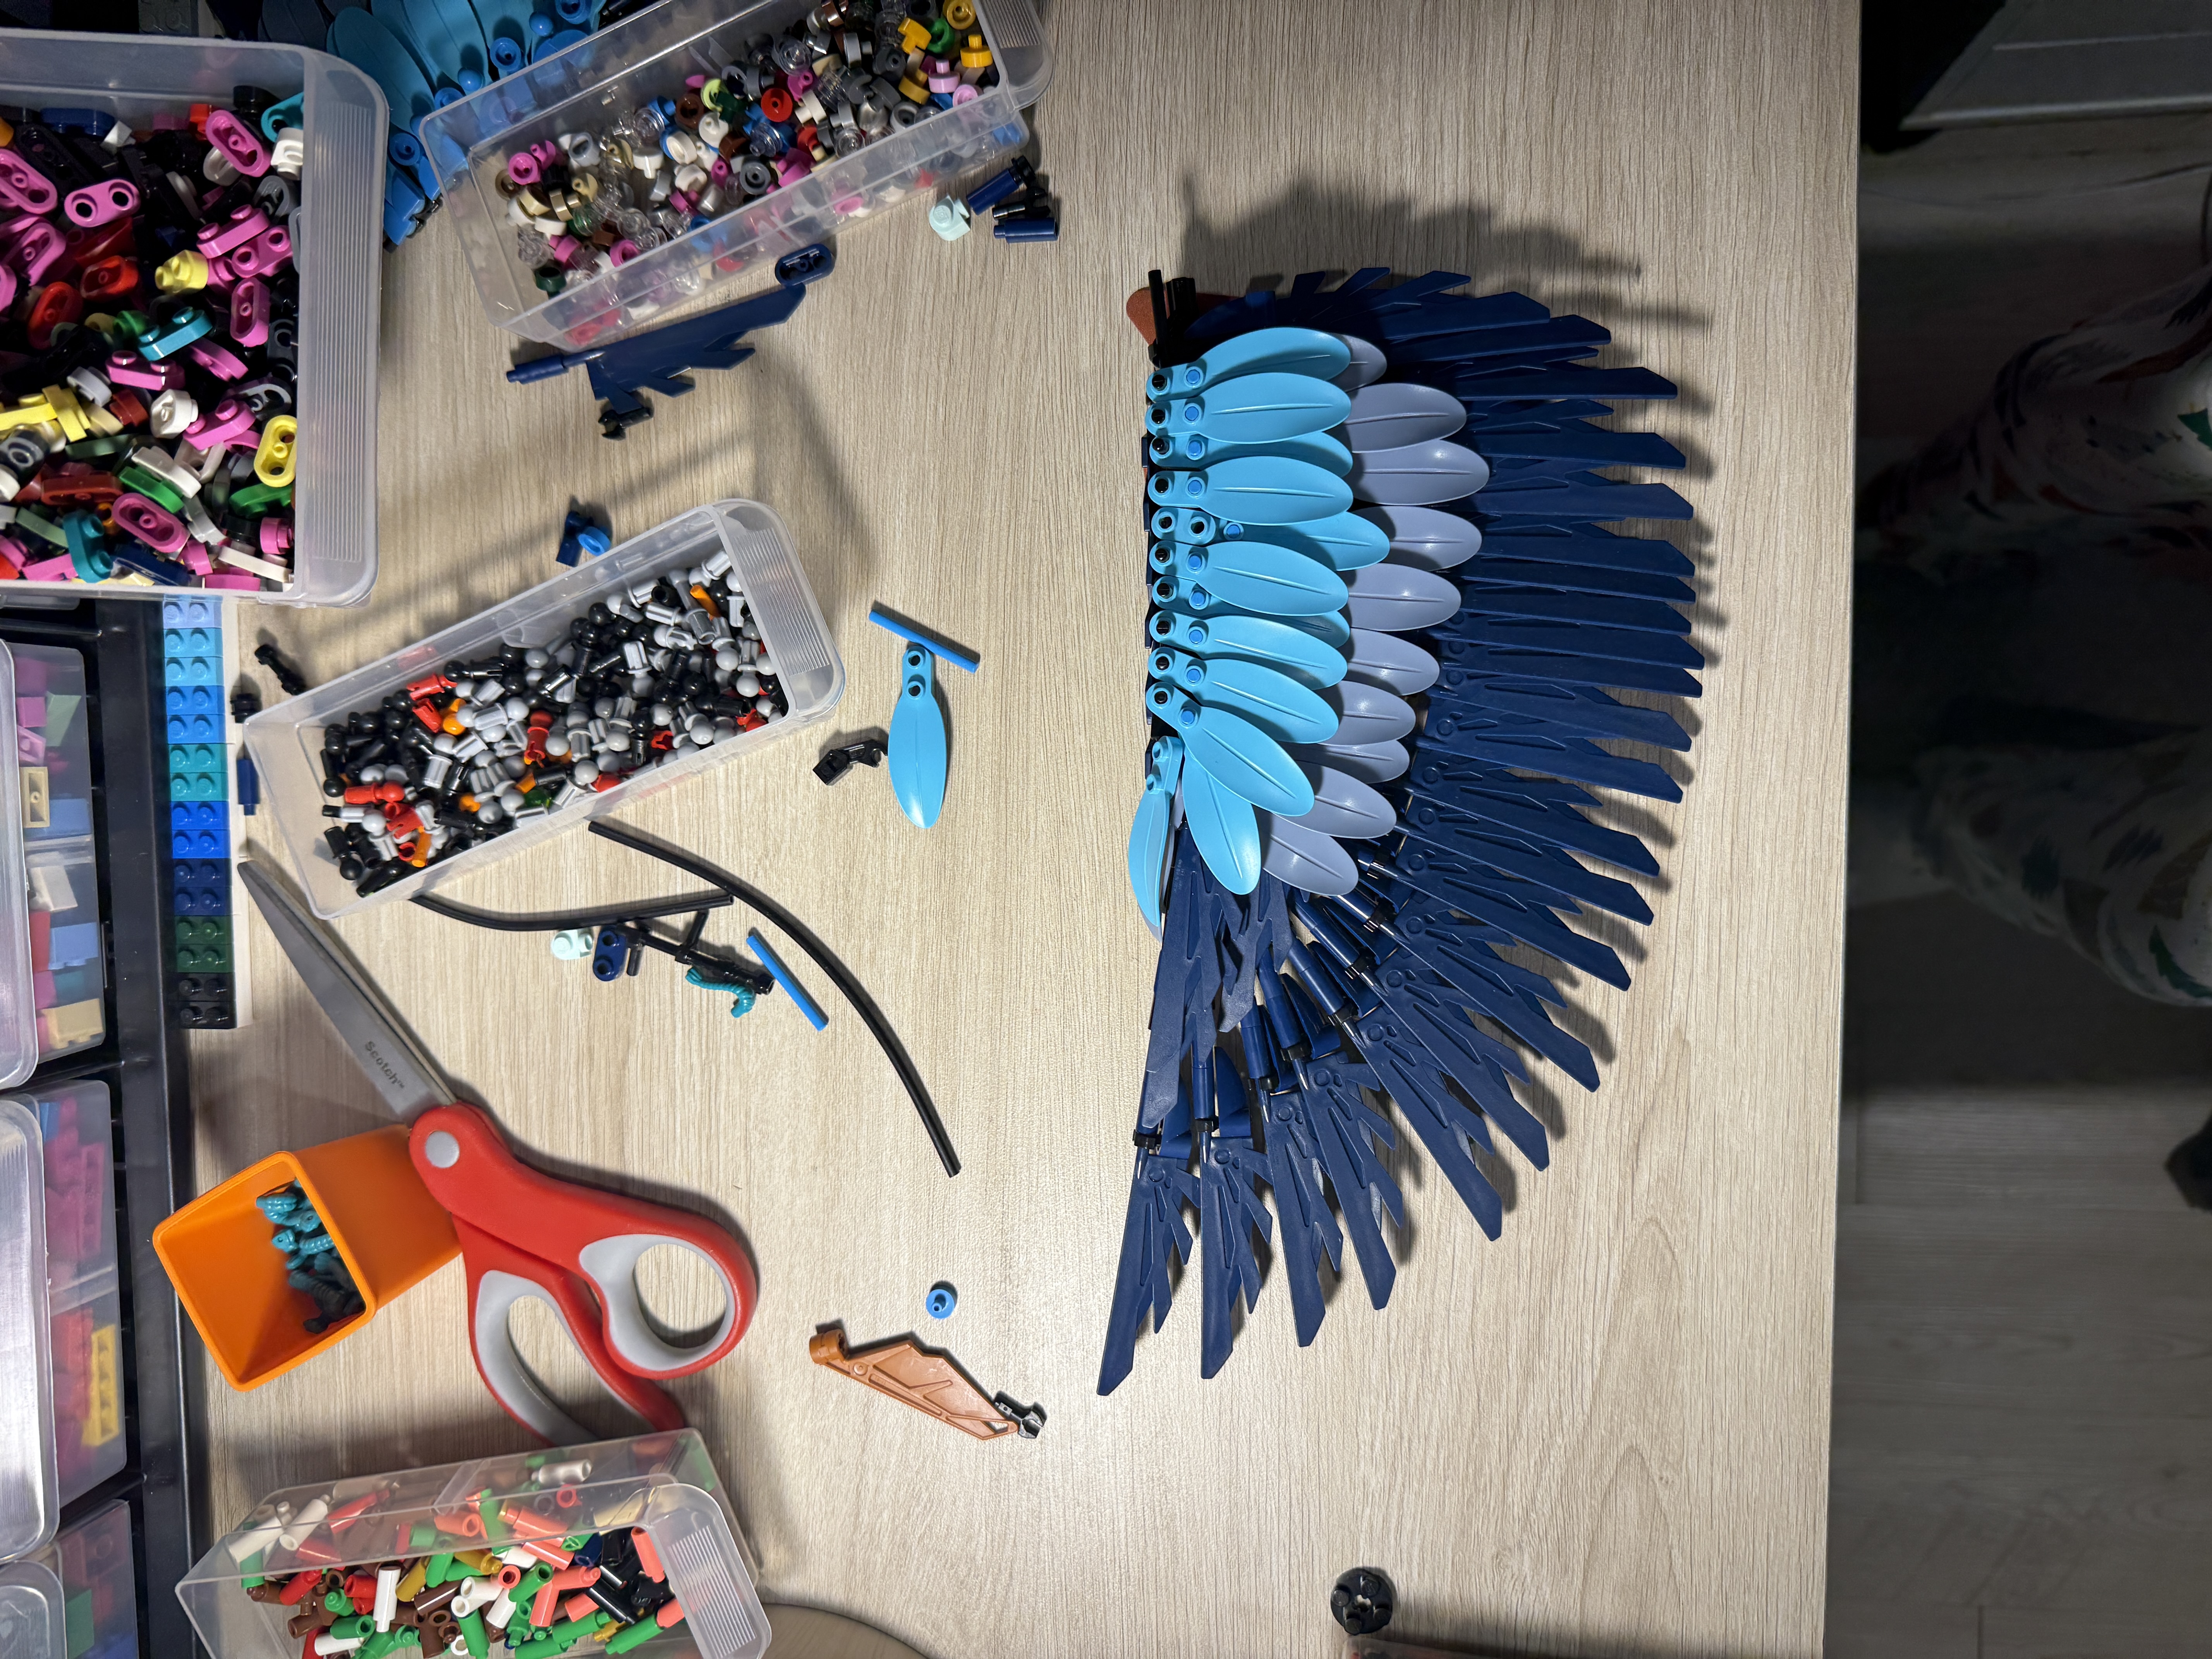
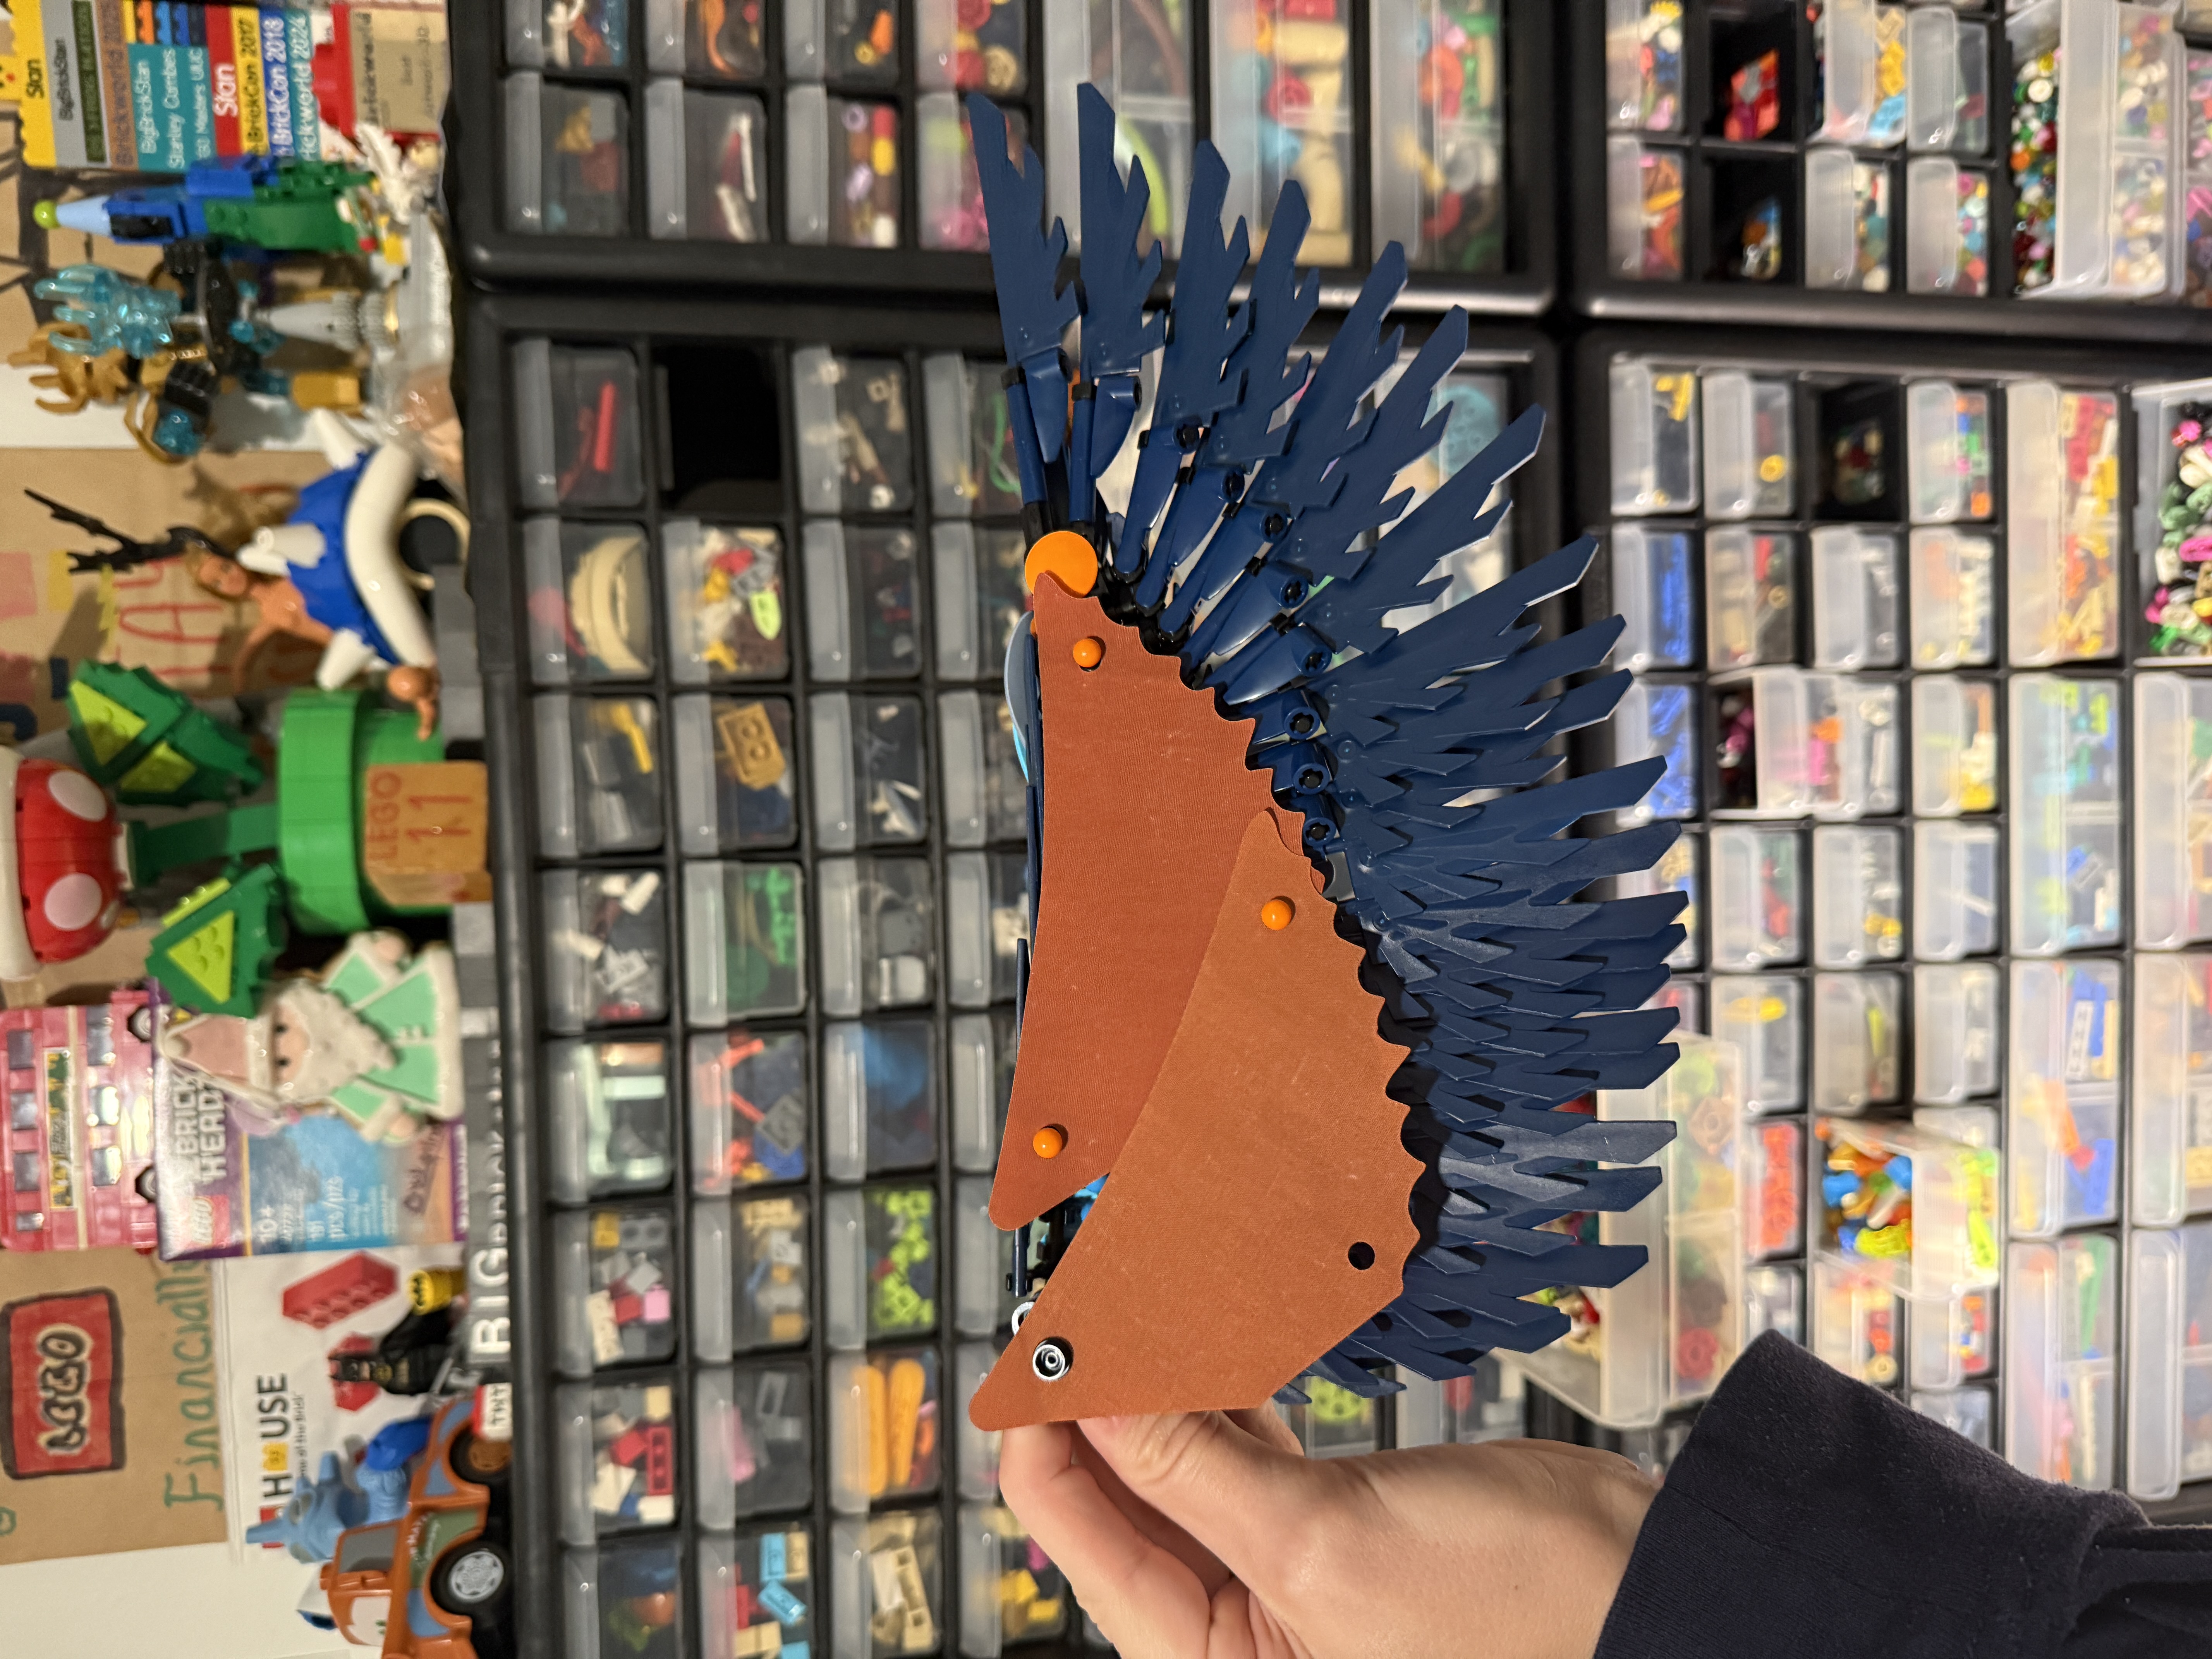
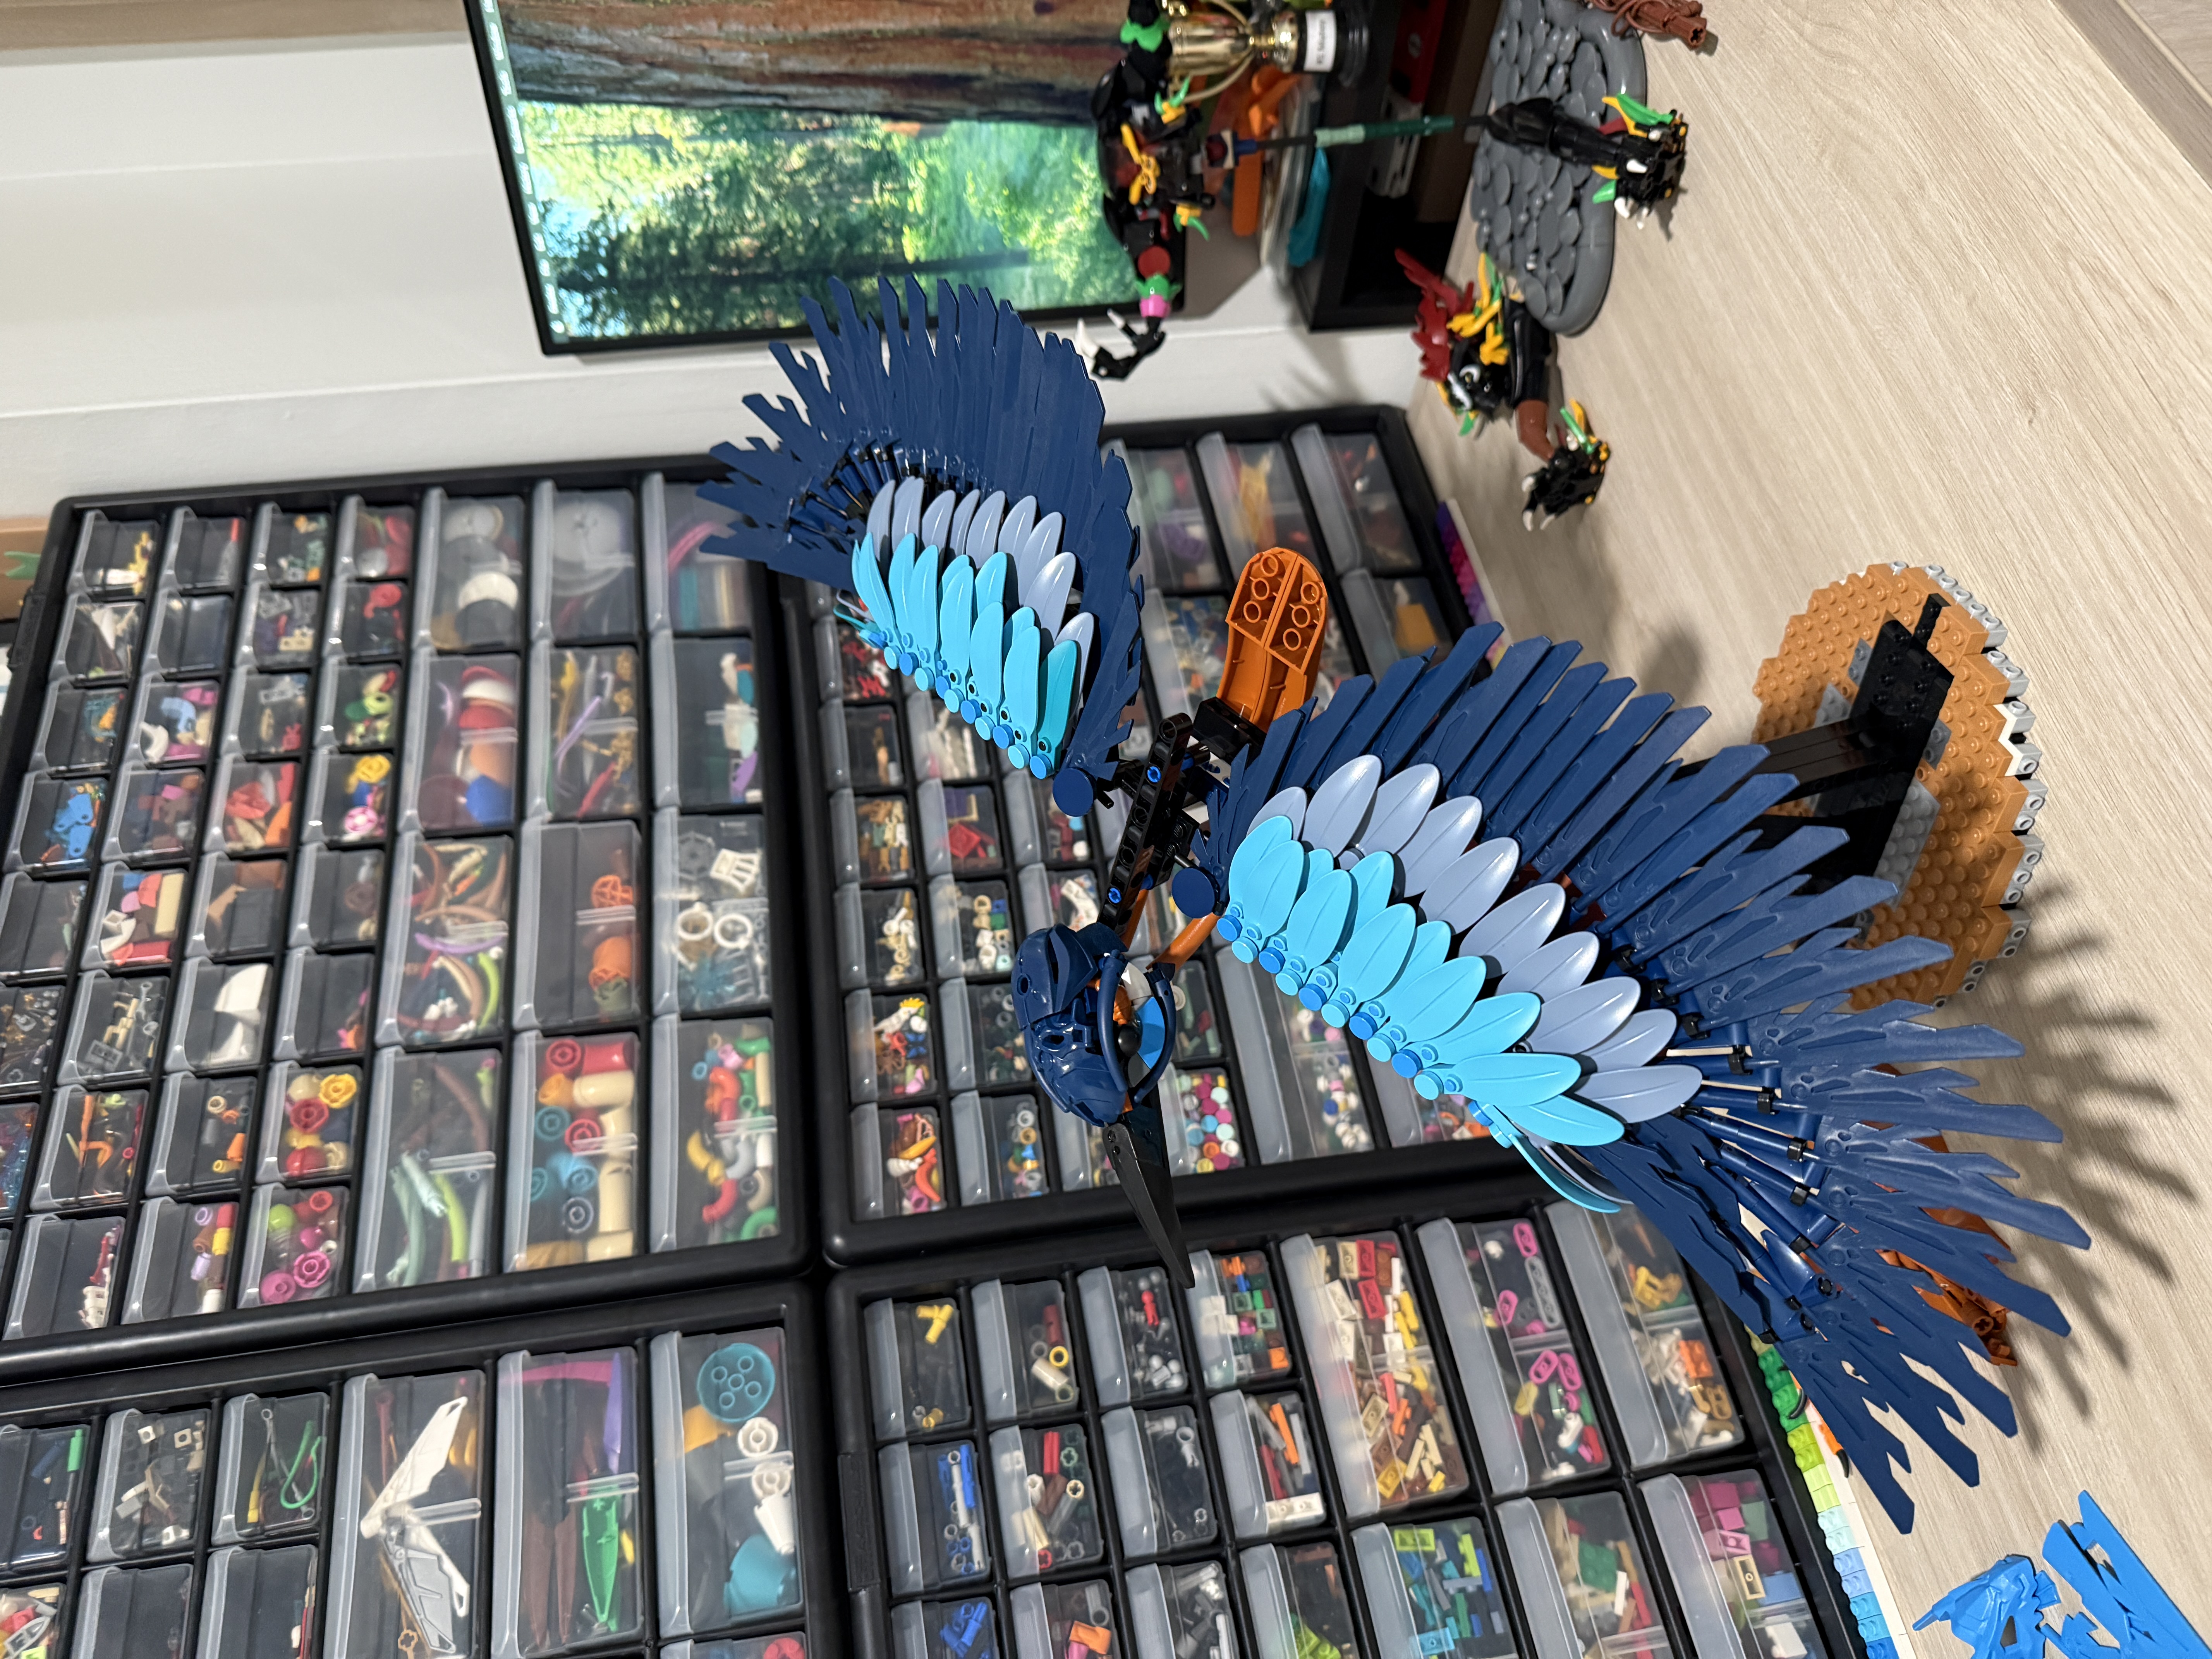
The next main challenge to tackle was obviously the wings. This was where I knew I would meet my demise by Pats standards, but I am still proud of the effort I put in. The most research I did during this part of the build was on the feathers that birds have. Although this was important, what I should’ve focused on was the bones. Regardless, having placed heavy emphasis on proper feathers really helped me get a close to accurate wing. I have a ton of pictures of the process here, so I just dumped a bunch below. For better information on the wings, please feel free to skip to the end where I have upgraded them to include a proper bone structure (they look much better)!
Liftoff
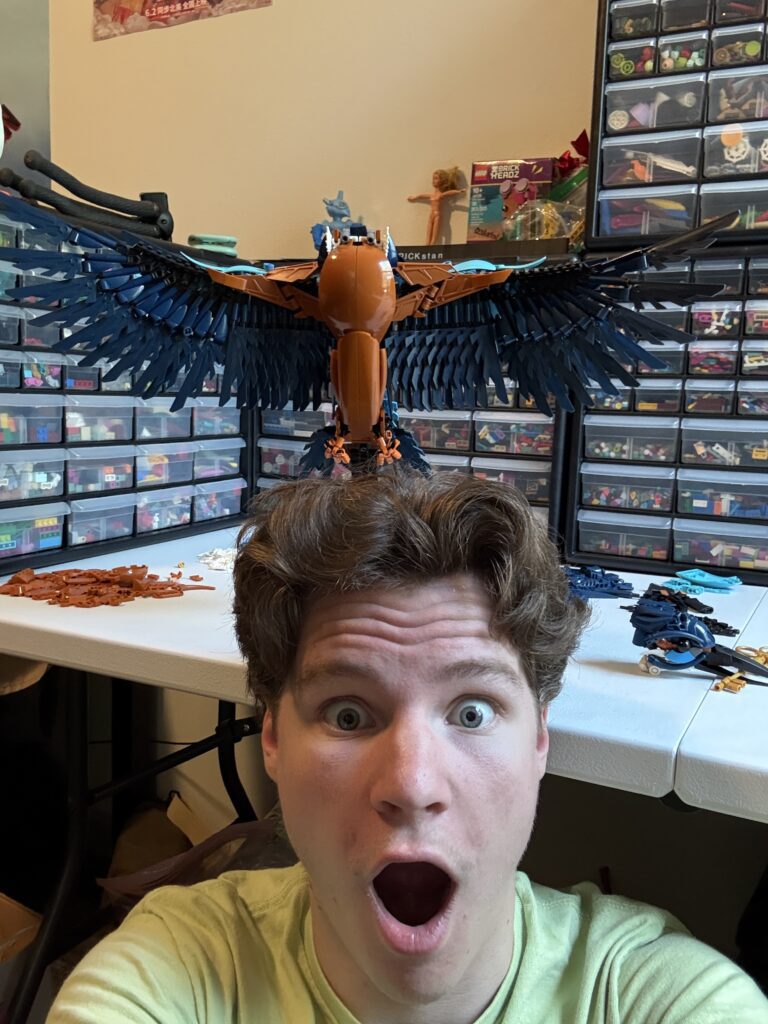
After I got the wings and head *done*, it was time to get this thing in flight. To do so, I build a strong Technic structure. This initial draft also faces a few issues, however. Mainly, the stand made the bird very static. Although it was clear it was taking off, this stand forced the bird into a very on grid pose, something Aiden really tore me apart for. Nevertheless, I did get very excited seeing it finally come together, especially because the build ended up being much bigger than I had imagined.
Struggles
I hate to bash every part of this build, especially since I am actually very proud of it, but the struggles didn’t end there. Building on a 2-week time crunch however meant I kind of just had to neglect a lot of things I would’ve like to have improved, hence why I was so intent to go back and improve this build. Anyway, the list of struggles at this point expanded, as I had a hard time shaping the back, rigging a new stand design, and posing the wings. It was really pick your poison at this moment, and I certainly struggled to get everything exactly how I wanted. In the end, there was jank solutions being implemented left and right. One such example would be the wings, which due to my genius engineering of building the whole wing on one flex tube (don’t do this), had a big drooping issue. To remedy this, I just stuck a 24L botanical axle through on the side that wouldn’t be seen by the camera. Am I proud of it? No. Did it work? Also, not really.

The Middle
Like how this blog post is going so far, the whole build was very rushed. In the end, I managed to get something I was pretty happy with, but even the photo ended up being a struggle as well. I encourage you to read past this however, because this build is well on its way to being my proudest achievement. Here was the “end” product I submitted to BioCup.
Feedback
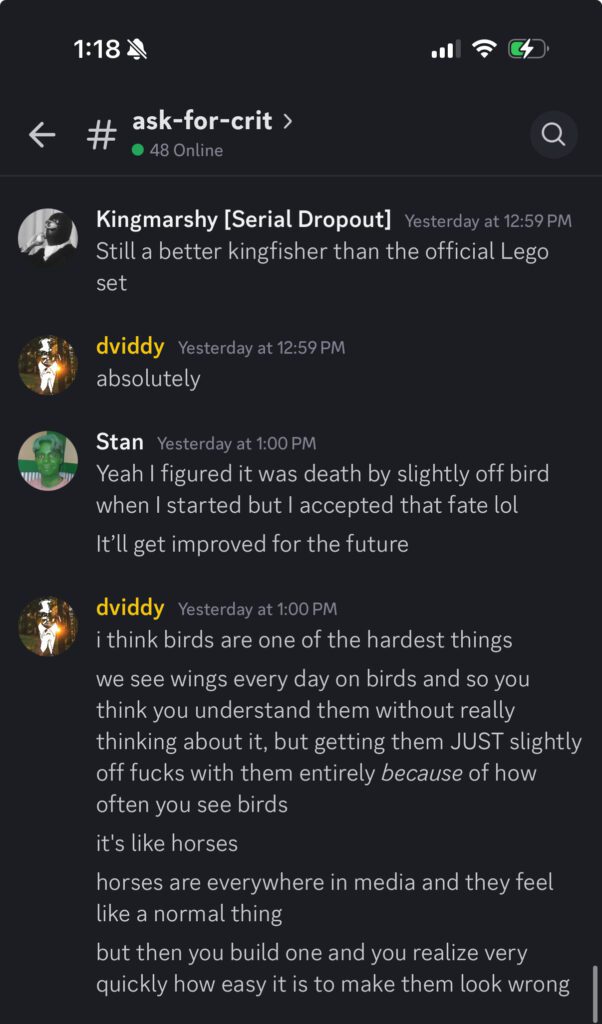
As expected, I couldn’t beat The Maestro™. Also as expected, I died a painful death by slightly inaccurate bird to Pat. This however was the plan (well, not the losing part I guess). The reason I say this is due to the incredible feedback and help I got after! Not just from Pat, but also from Max, Nathan, Michael, and many other friends who all wanted to see me improve. This was incredible to me because it was very motivating to know I was on the right track. I would highly recommend anyone trying to build a bird read the advice from Pat below, as I could really tell he put his heart into providing thoughtful feedback.
The Remaster
Now, we can begin the build process! Jokes aside, after a couple months away from my Lego and away from the Kingfisher, I had been itching to give it another attempt. This time, I will give much more serious insight into my exact technical thoughts while building rather than just my mindset.

The Wings
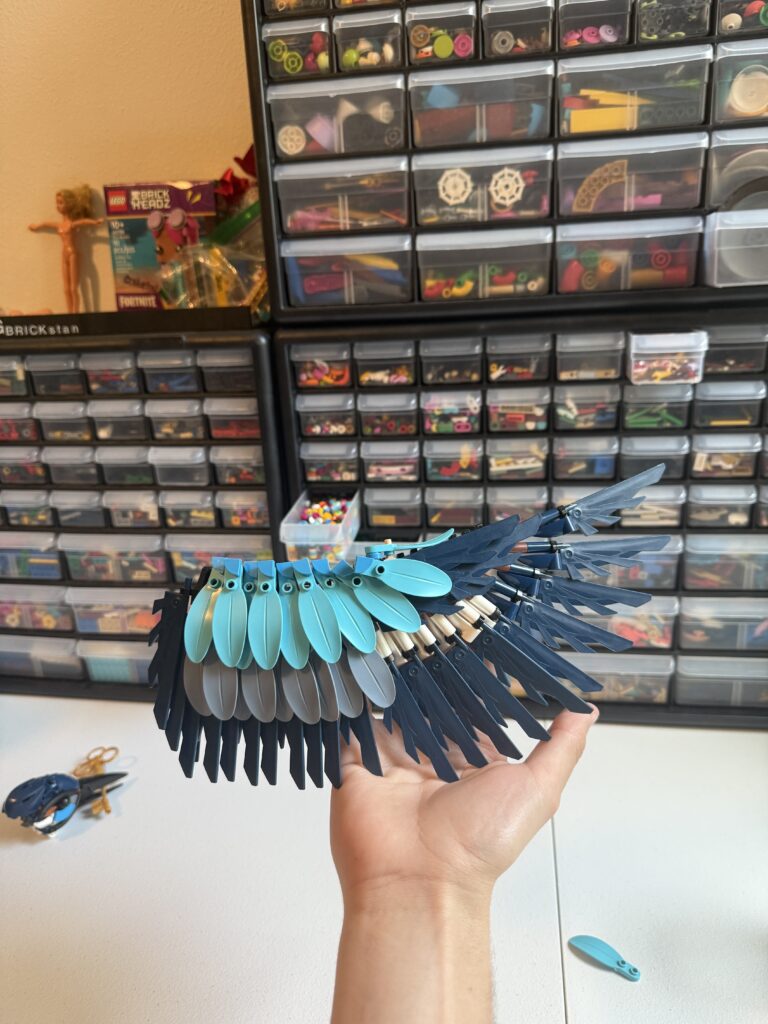
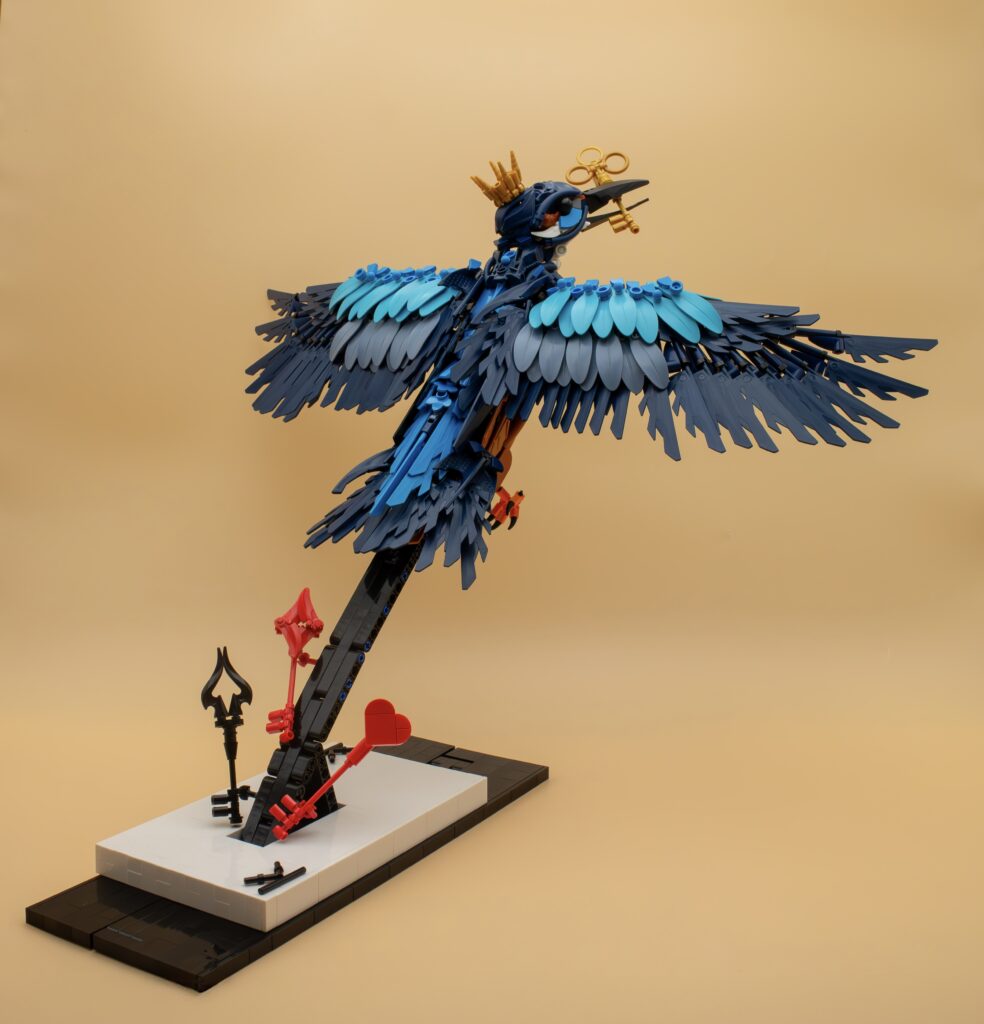
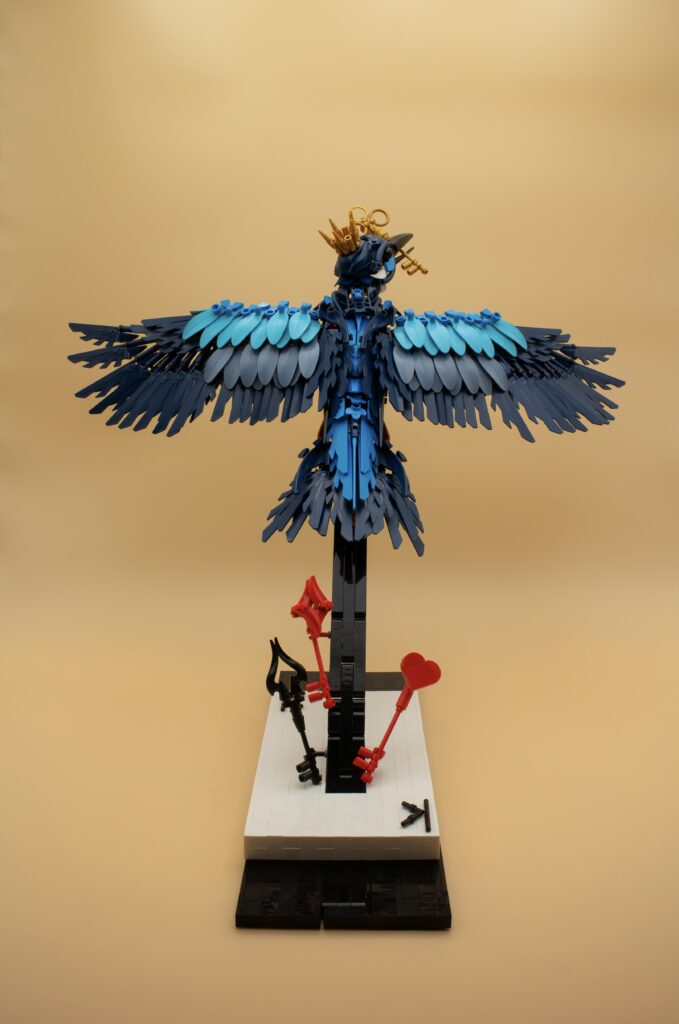
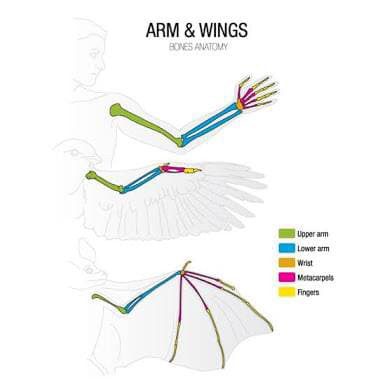
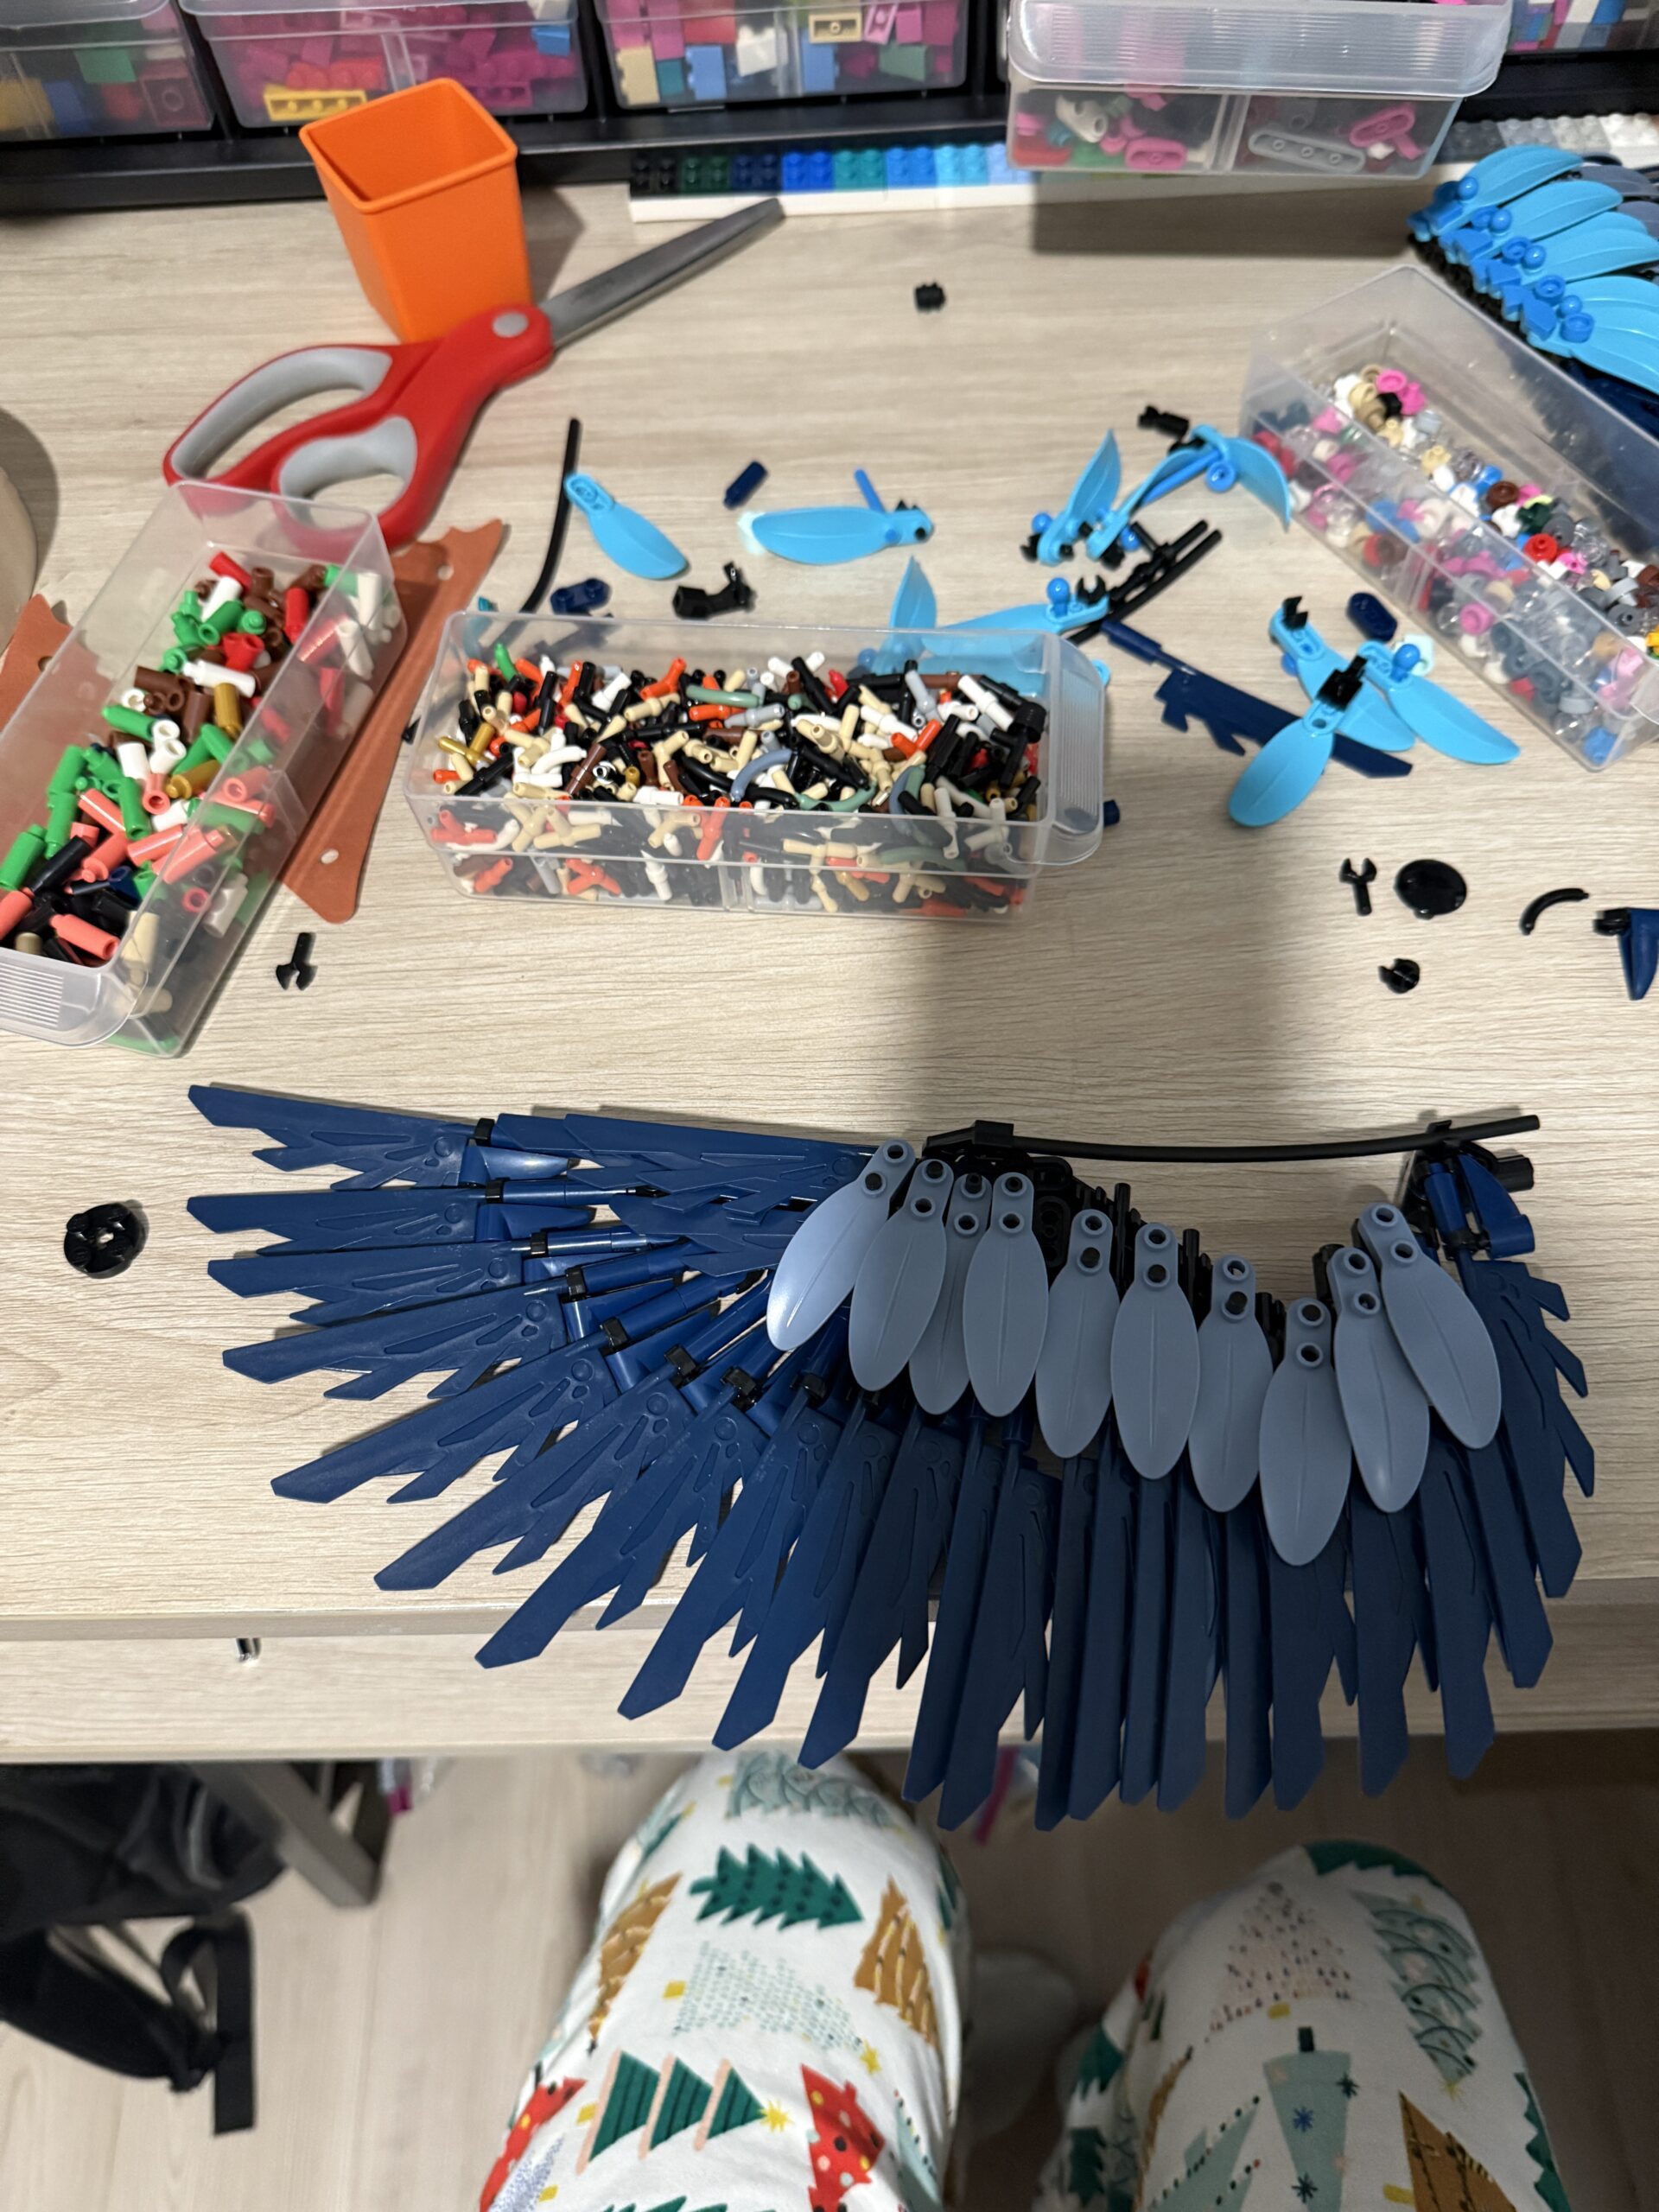
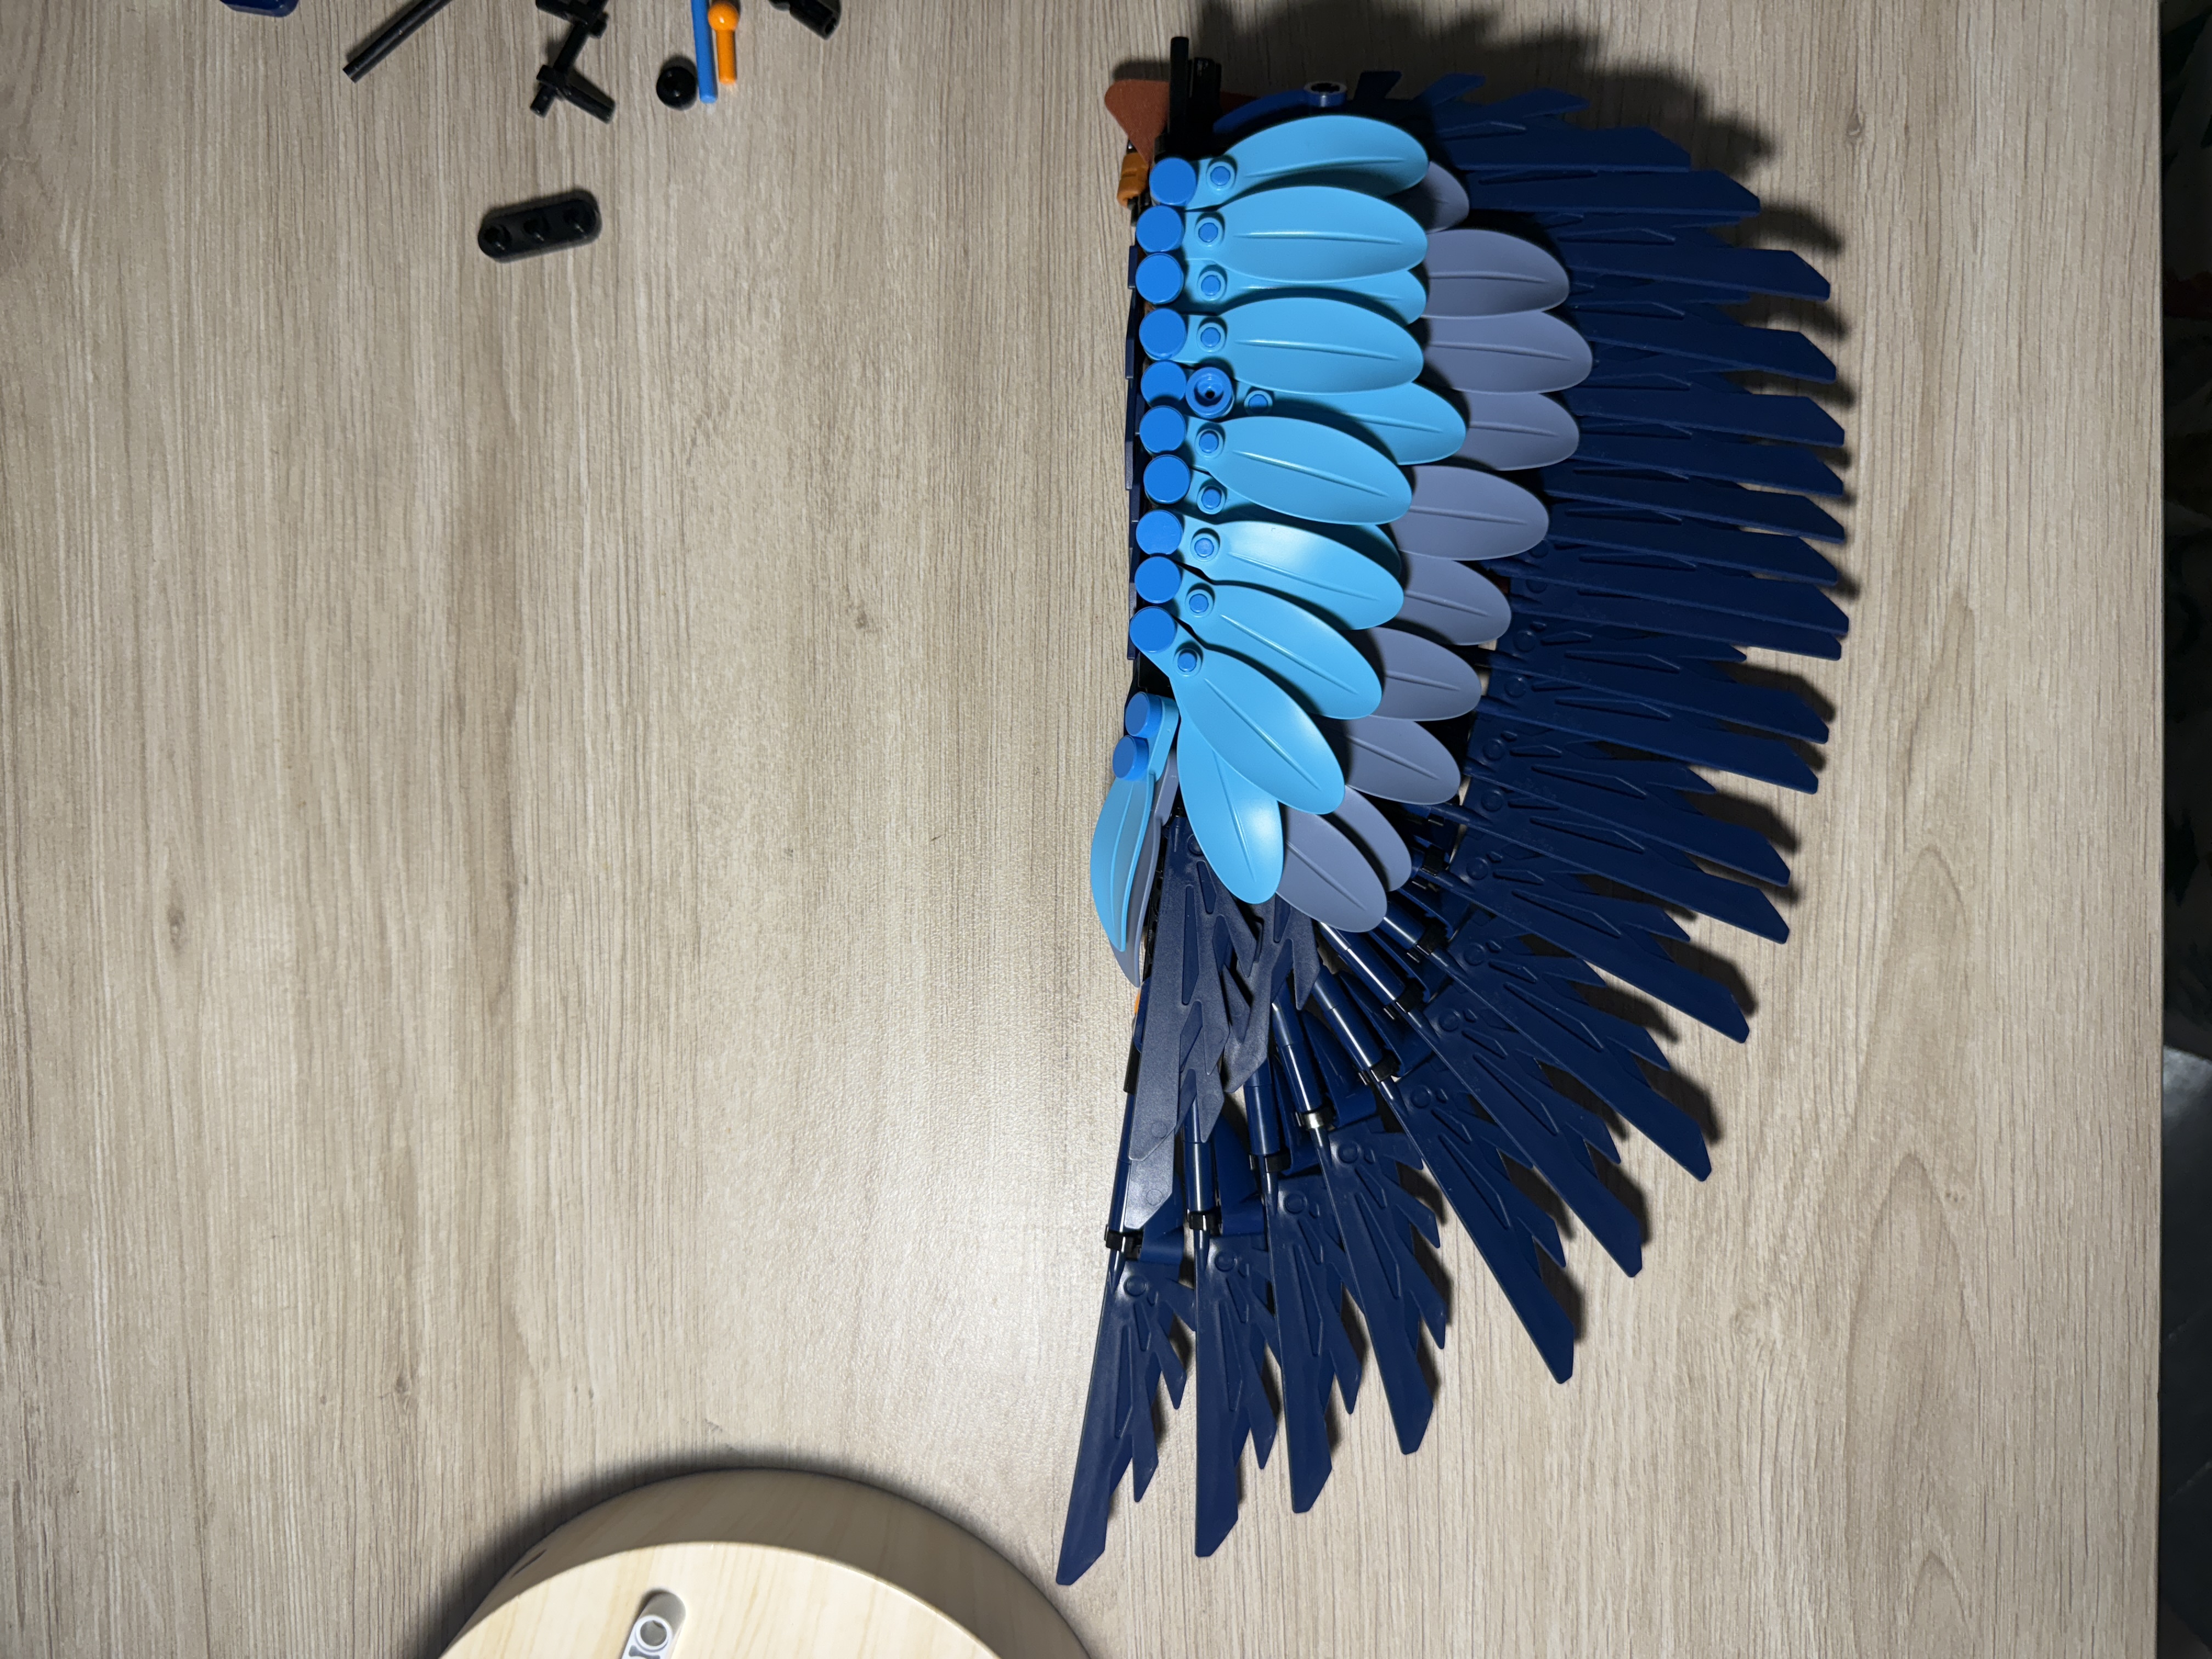
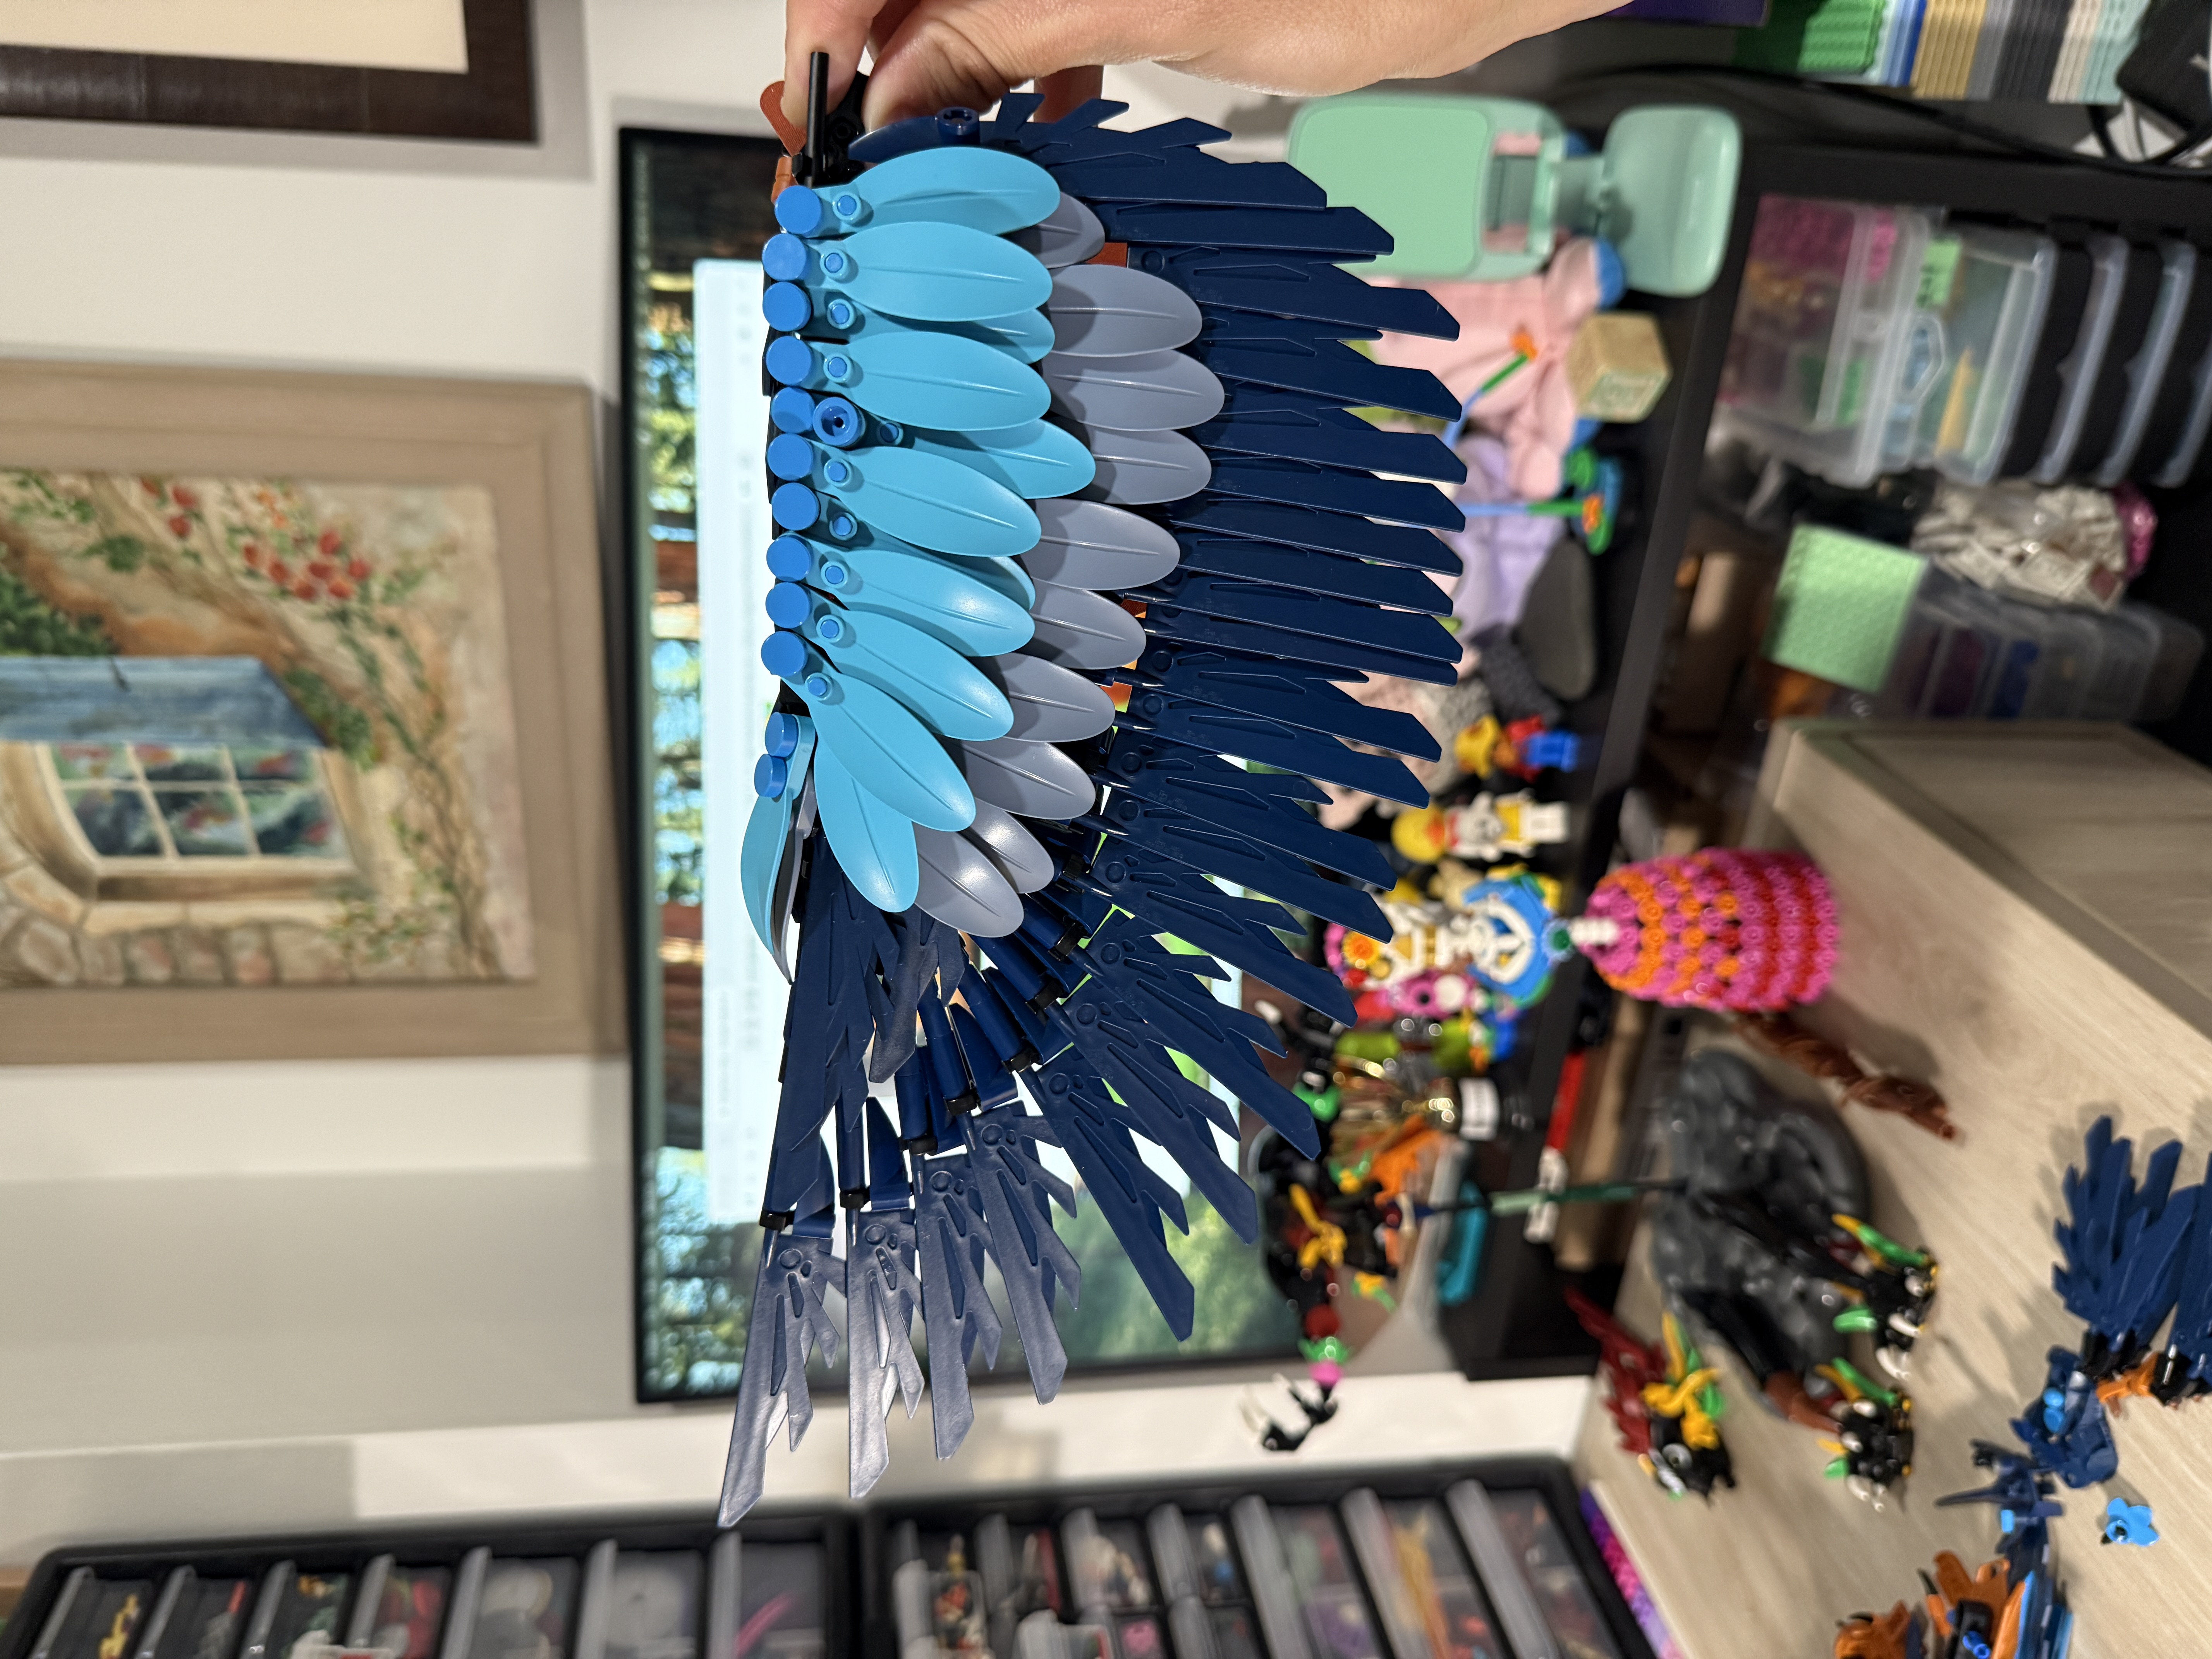
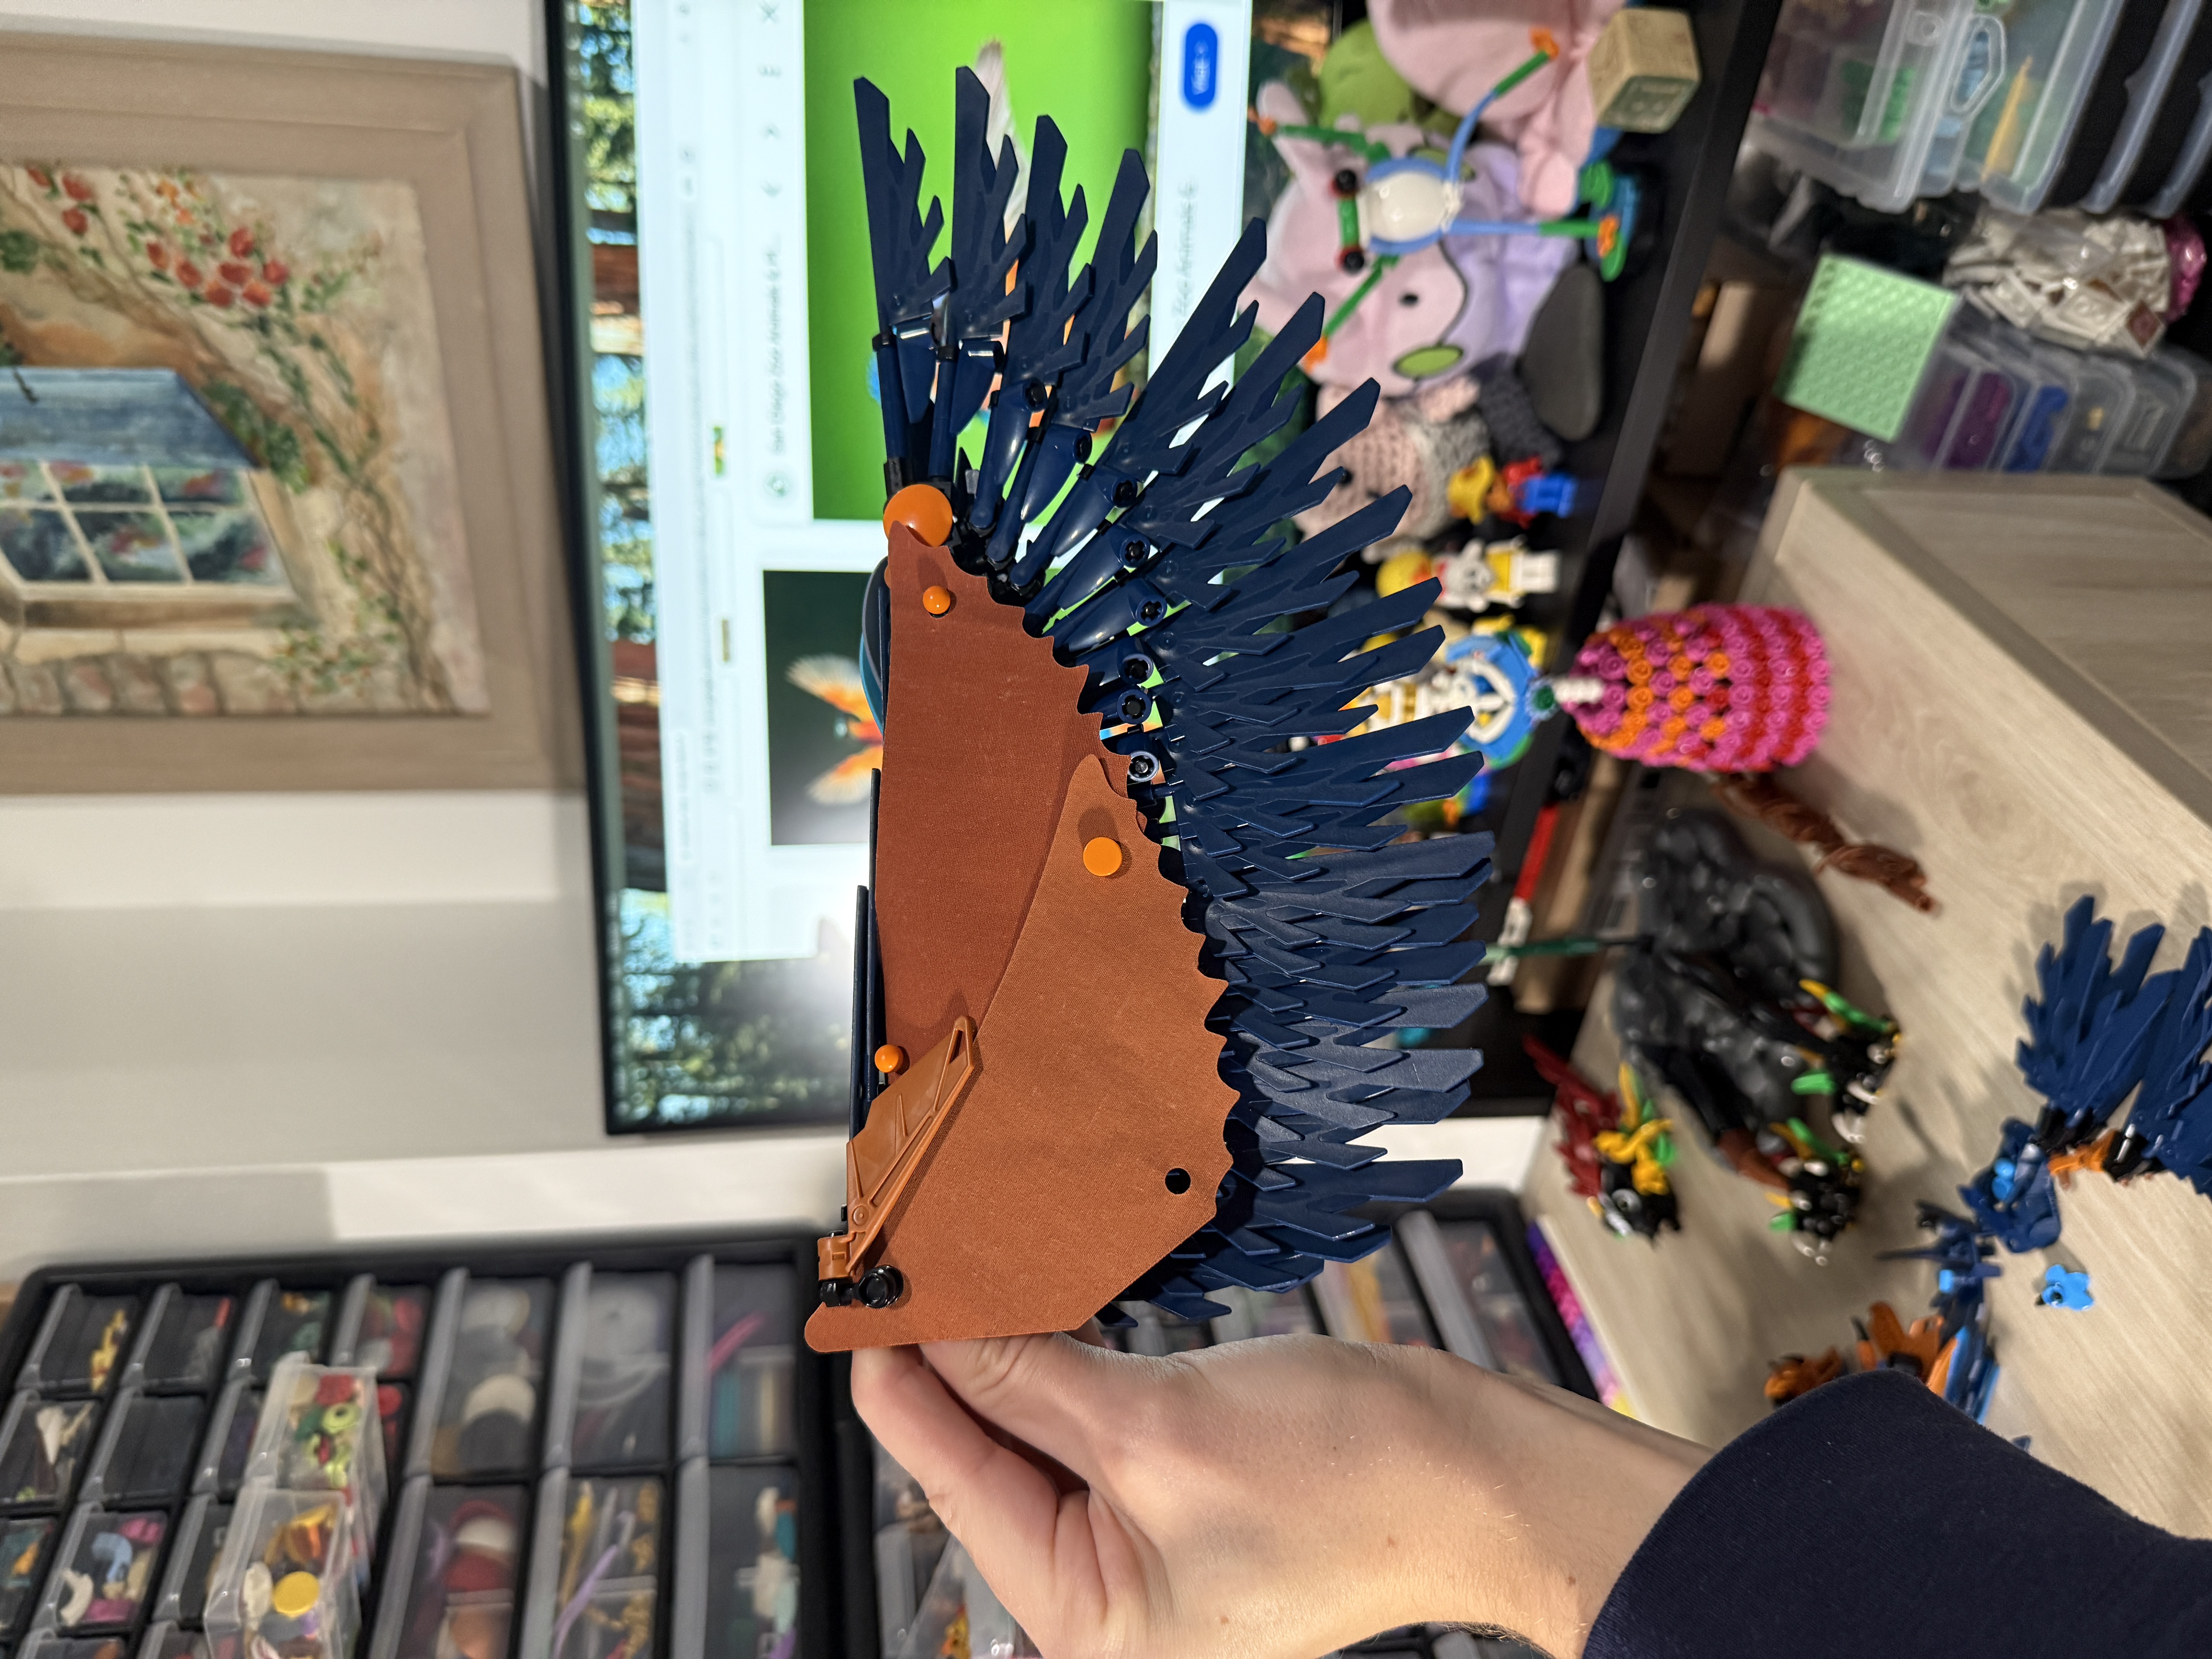
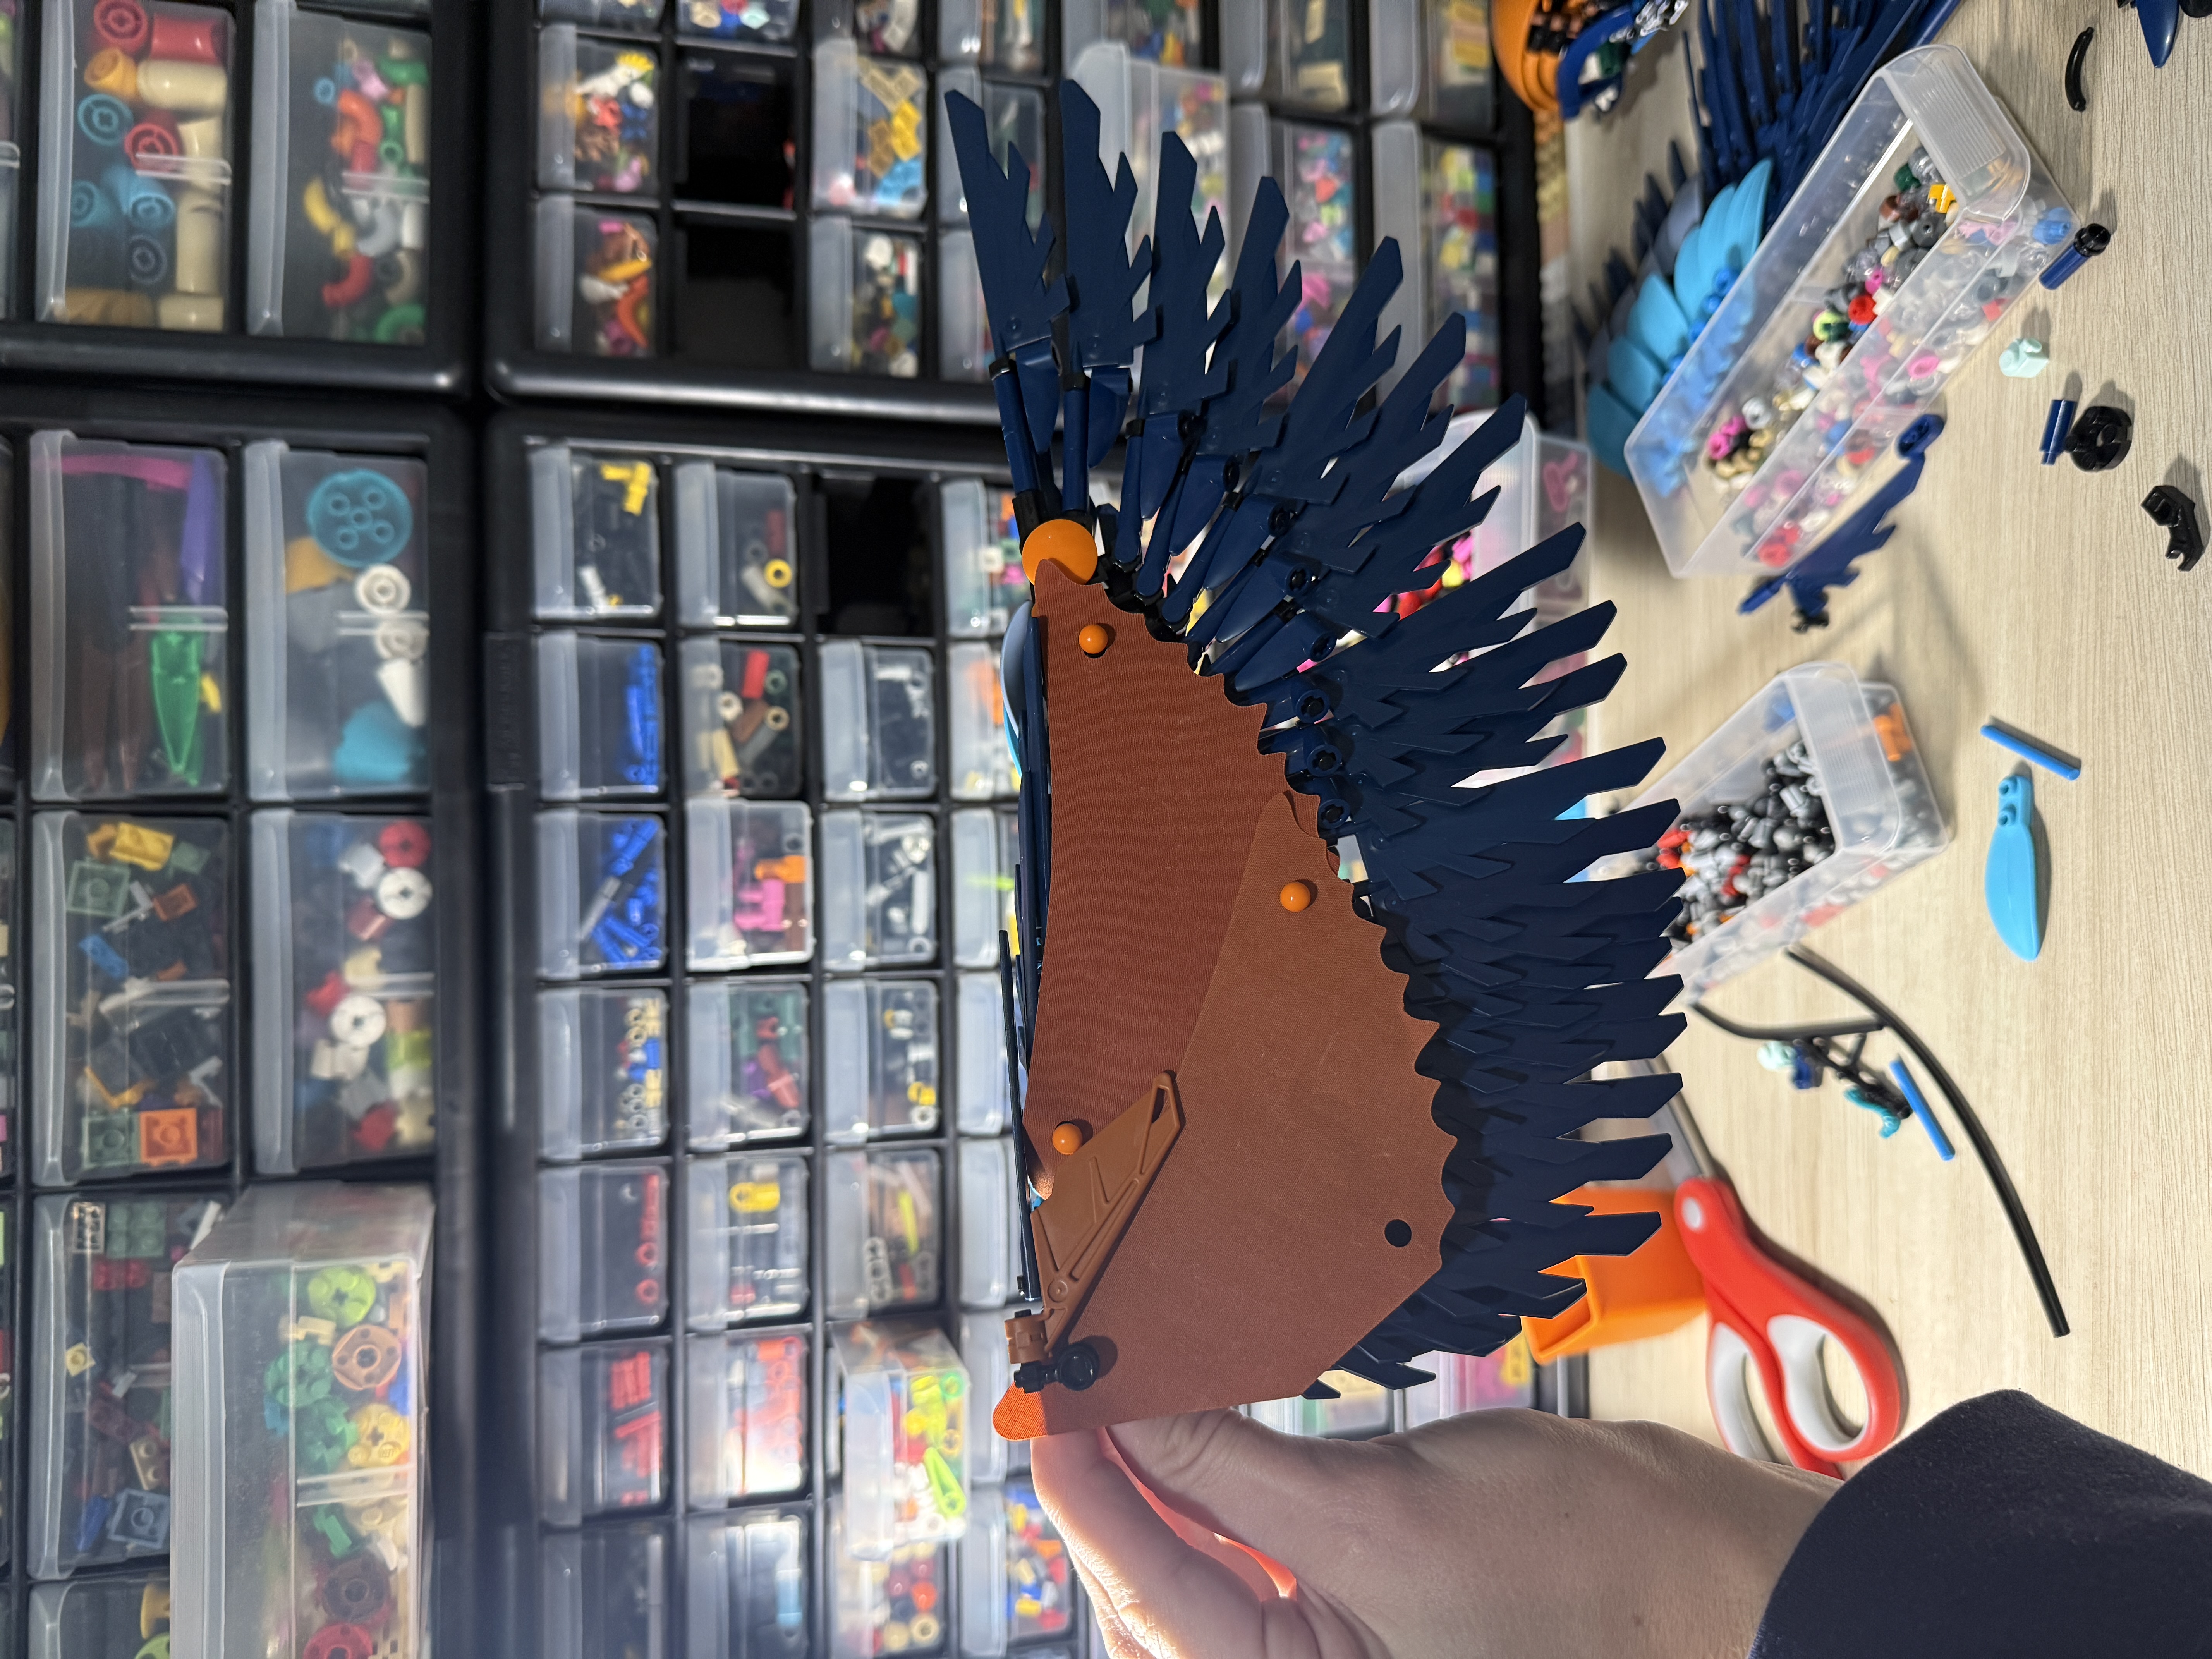
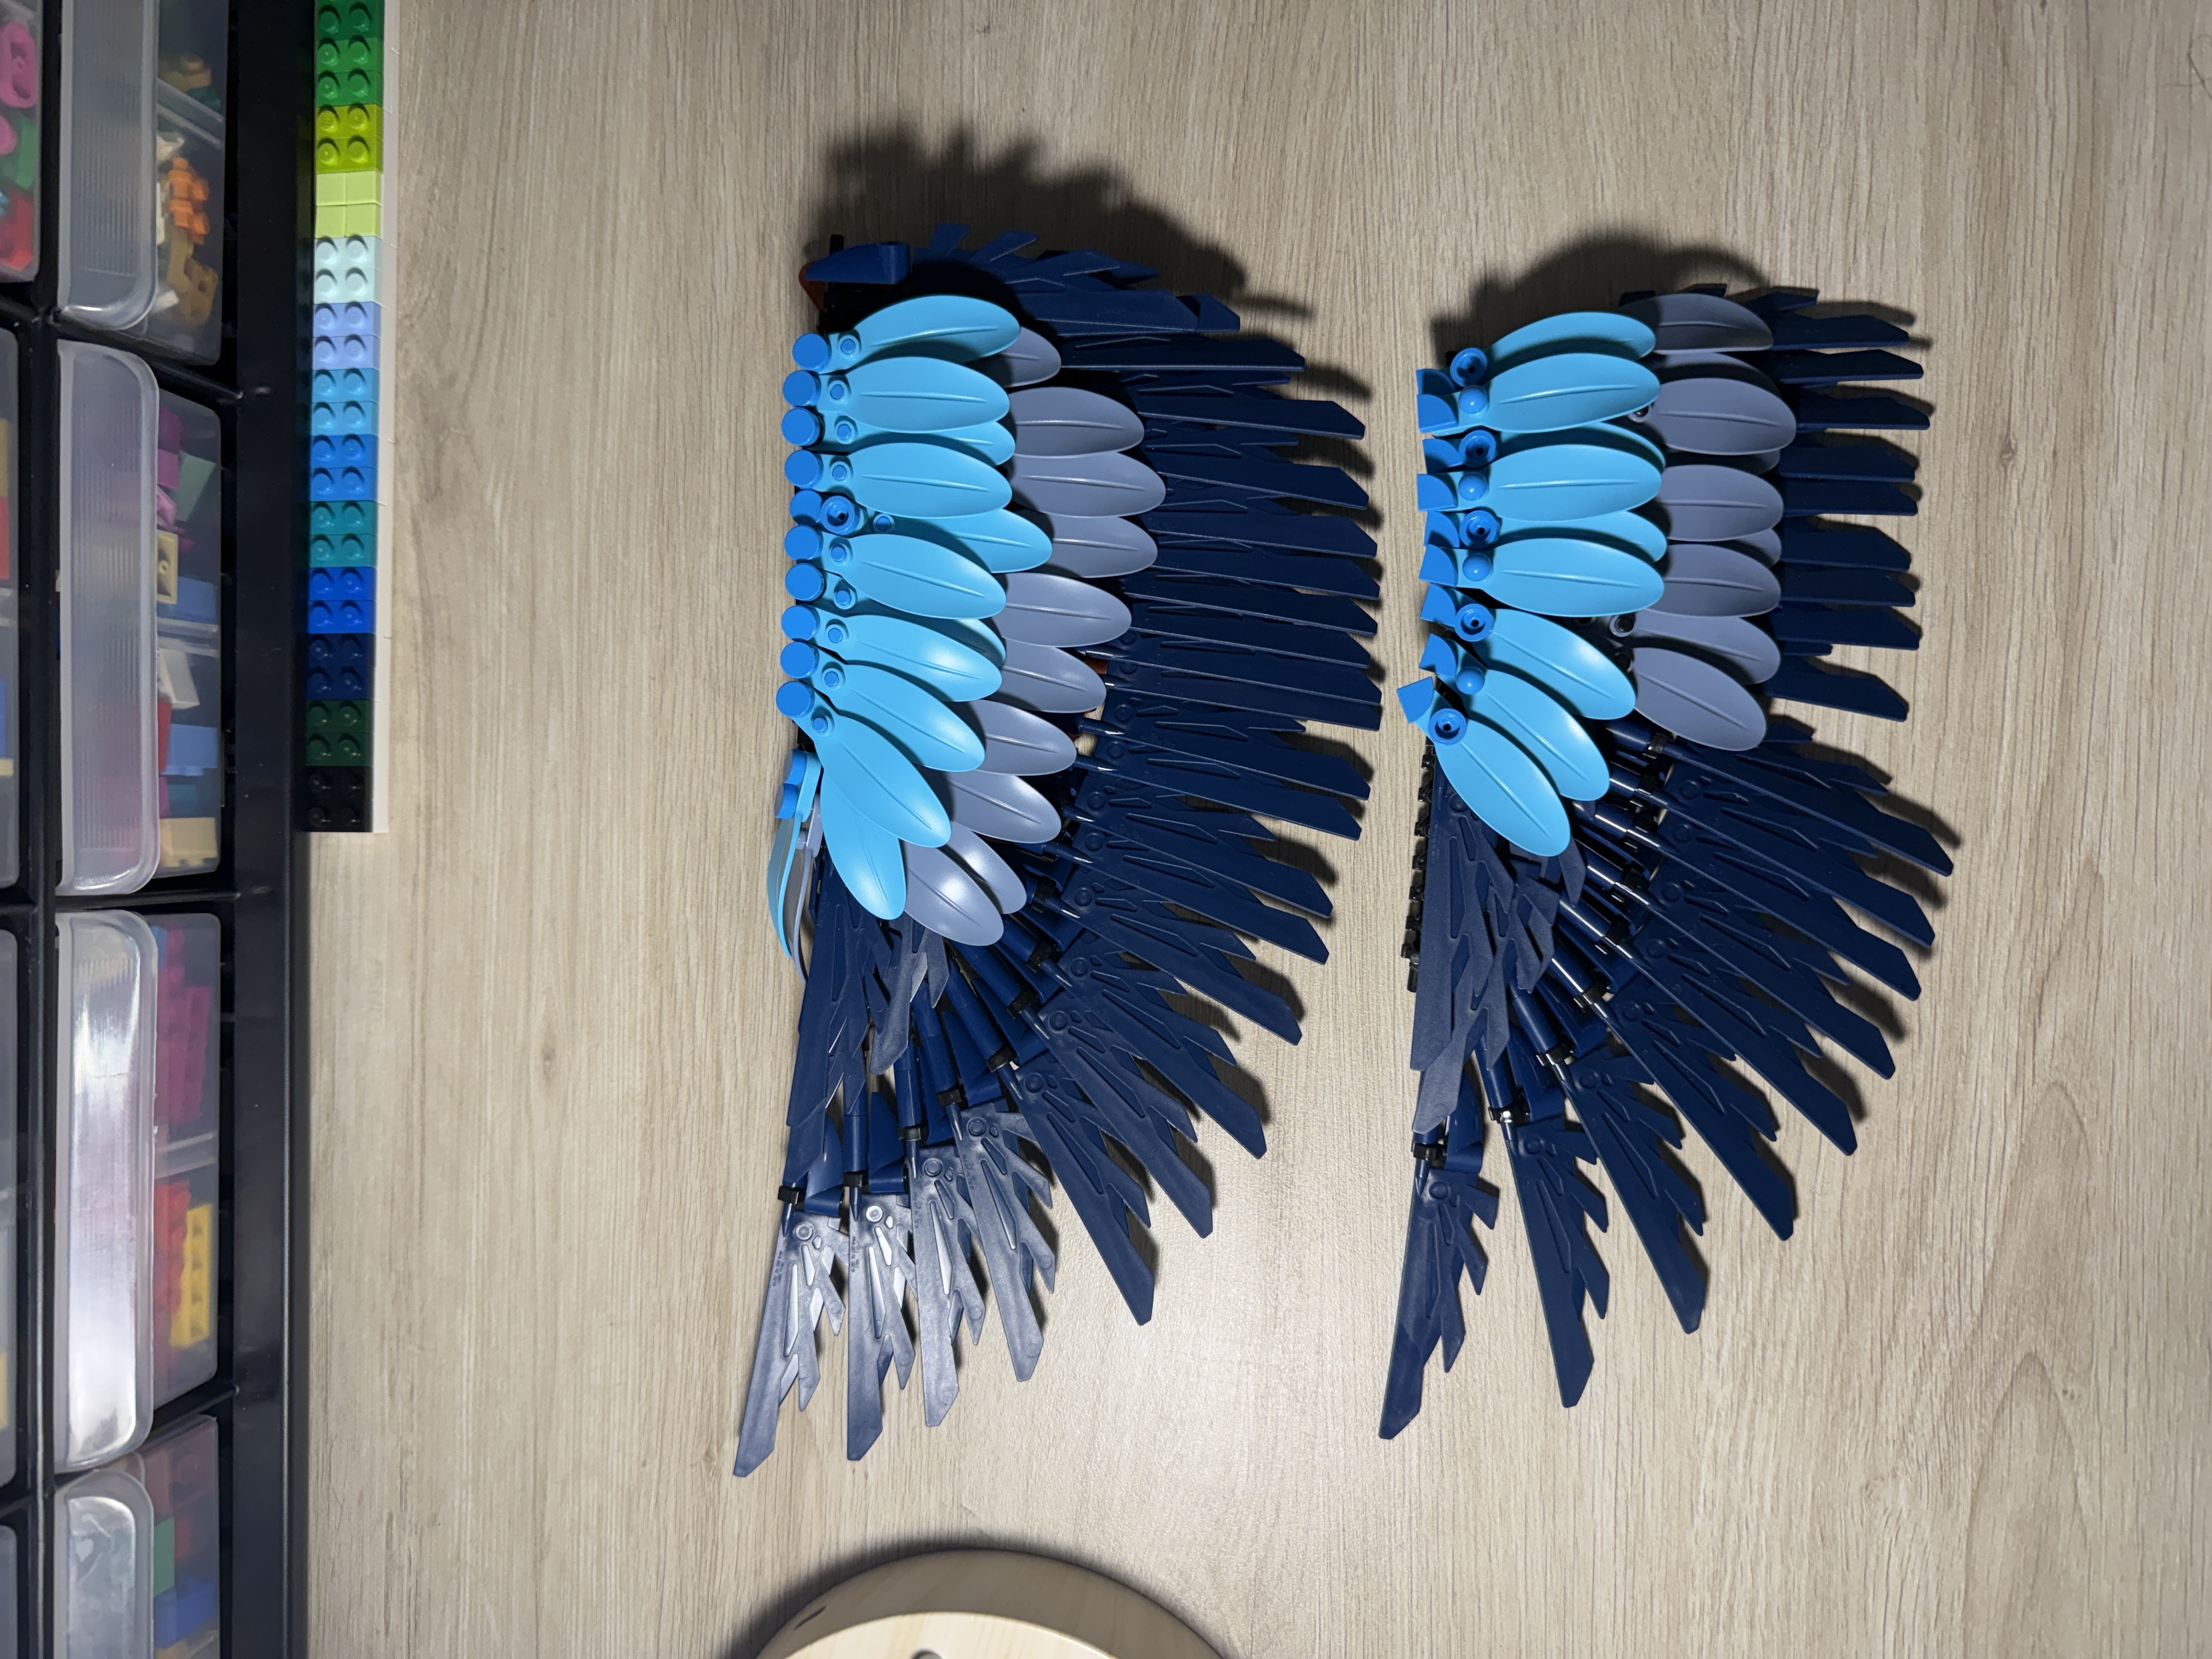
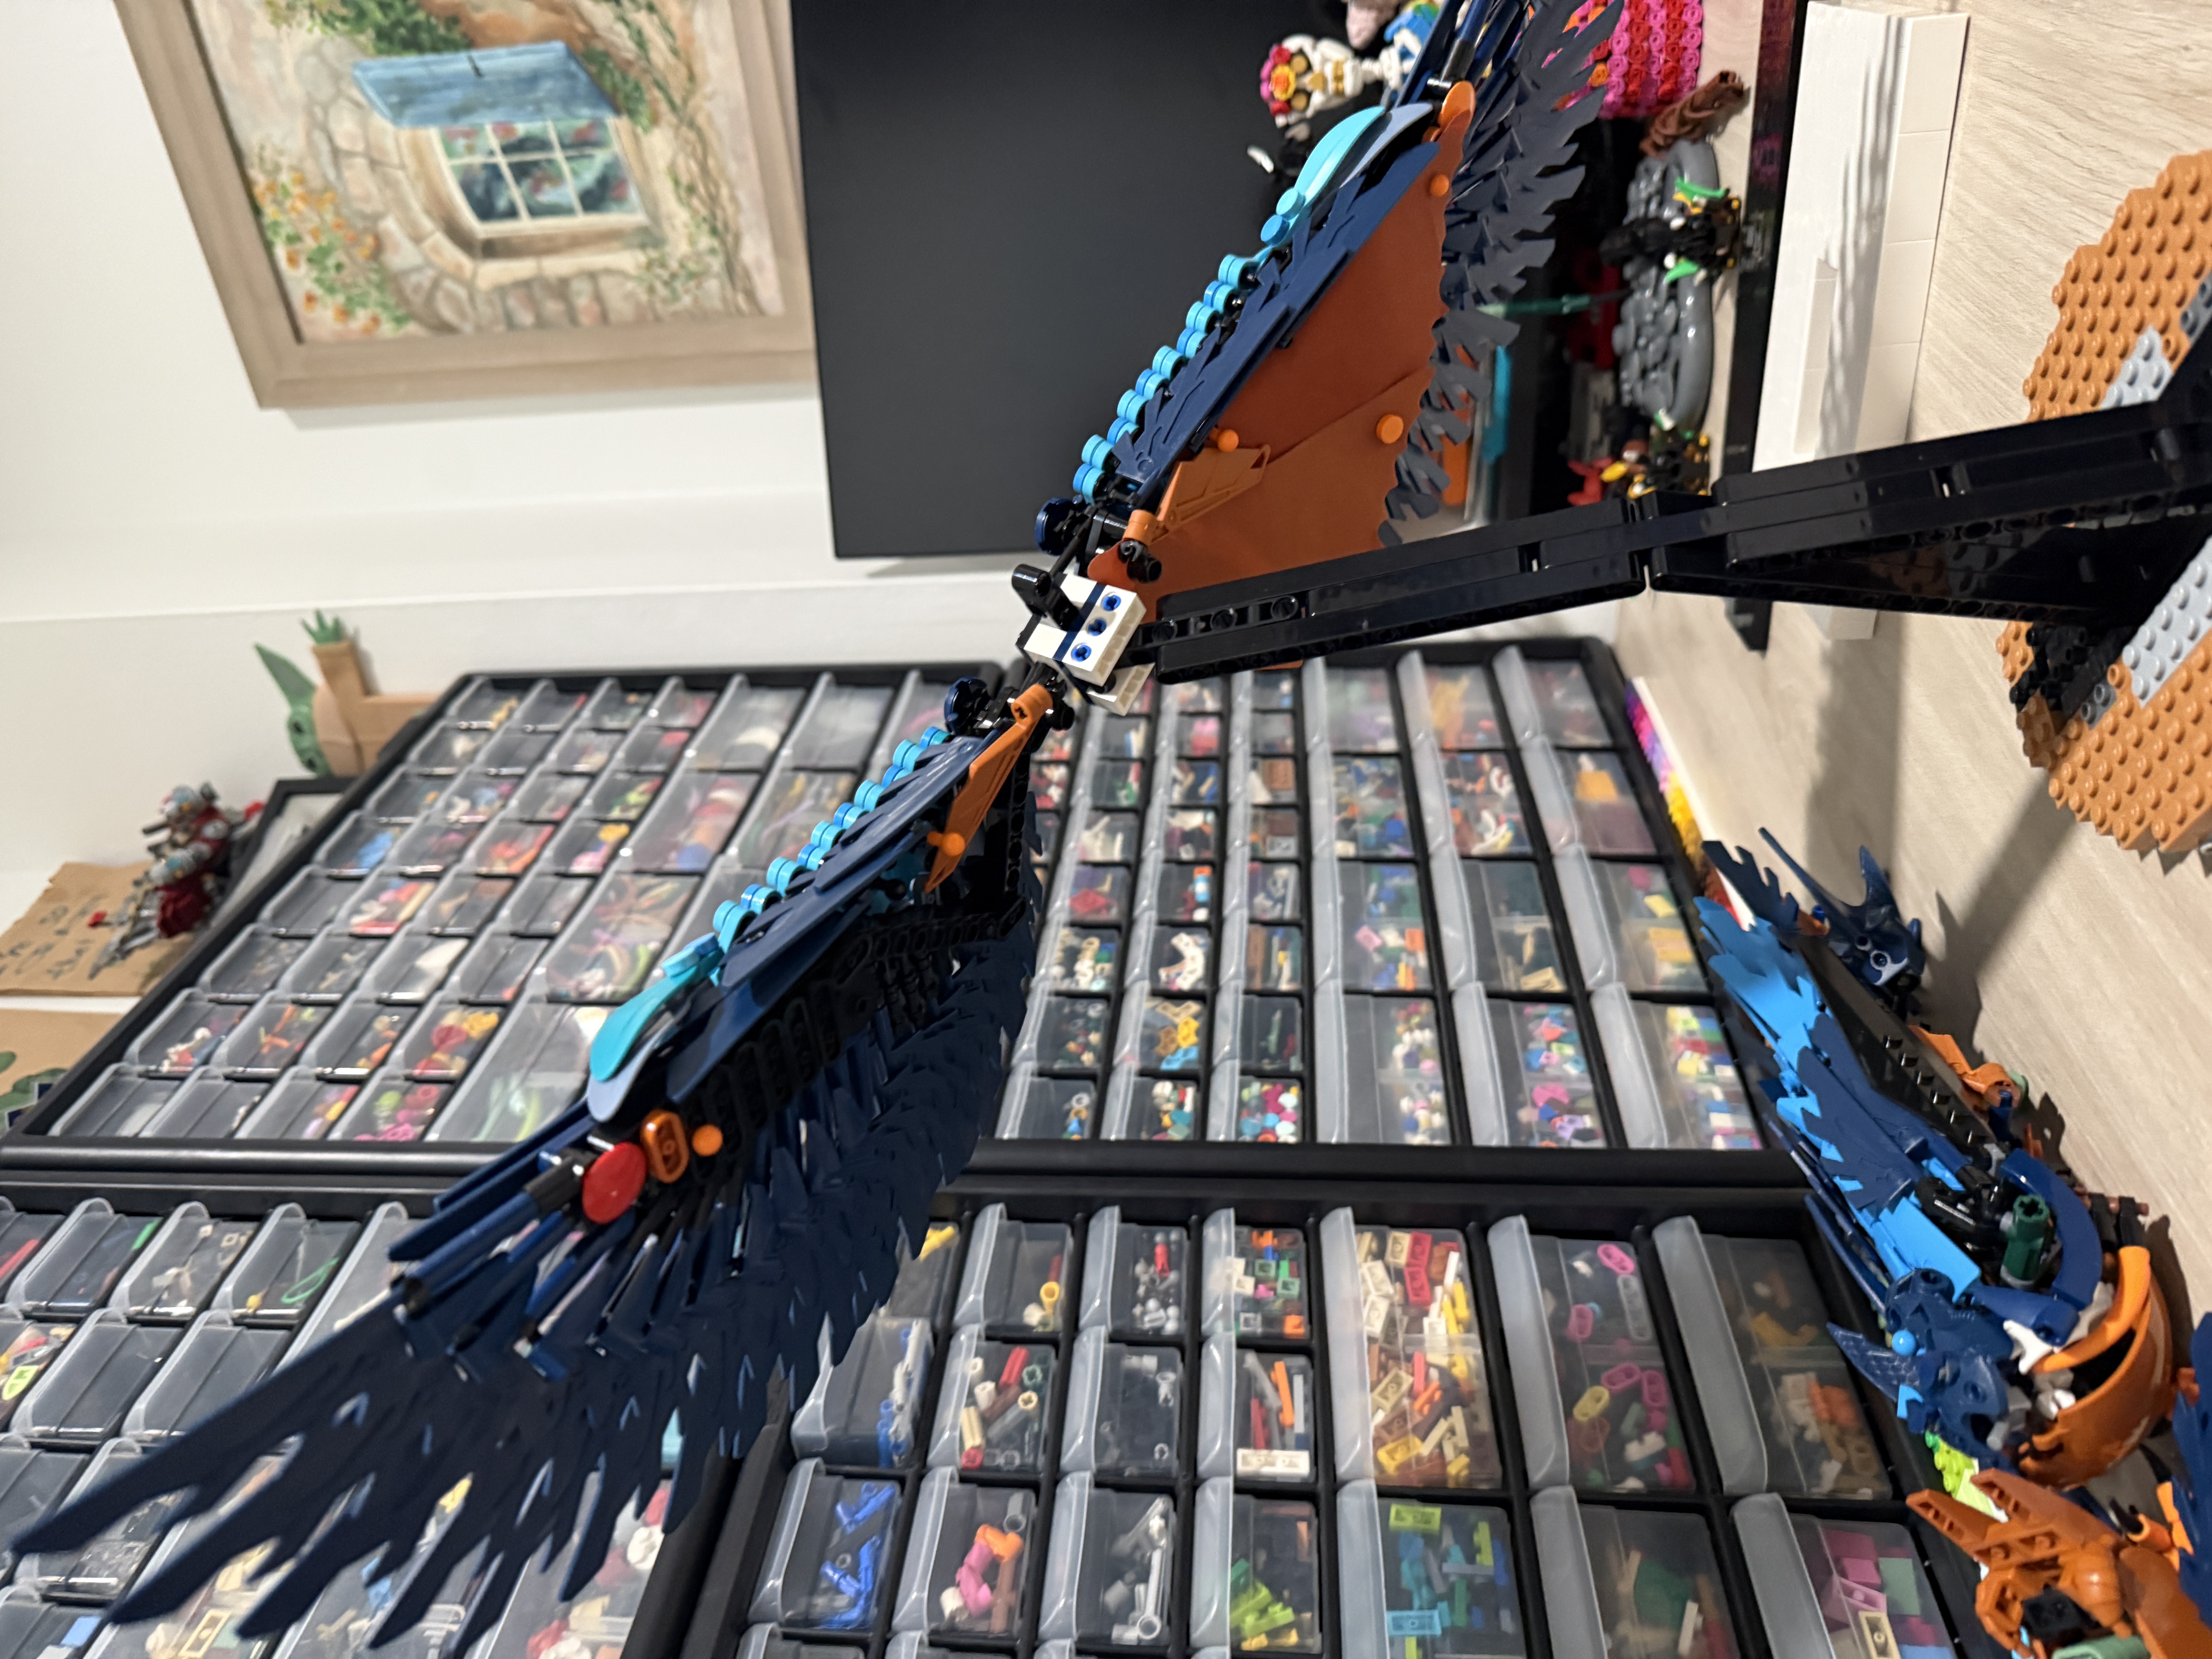
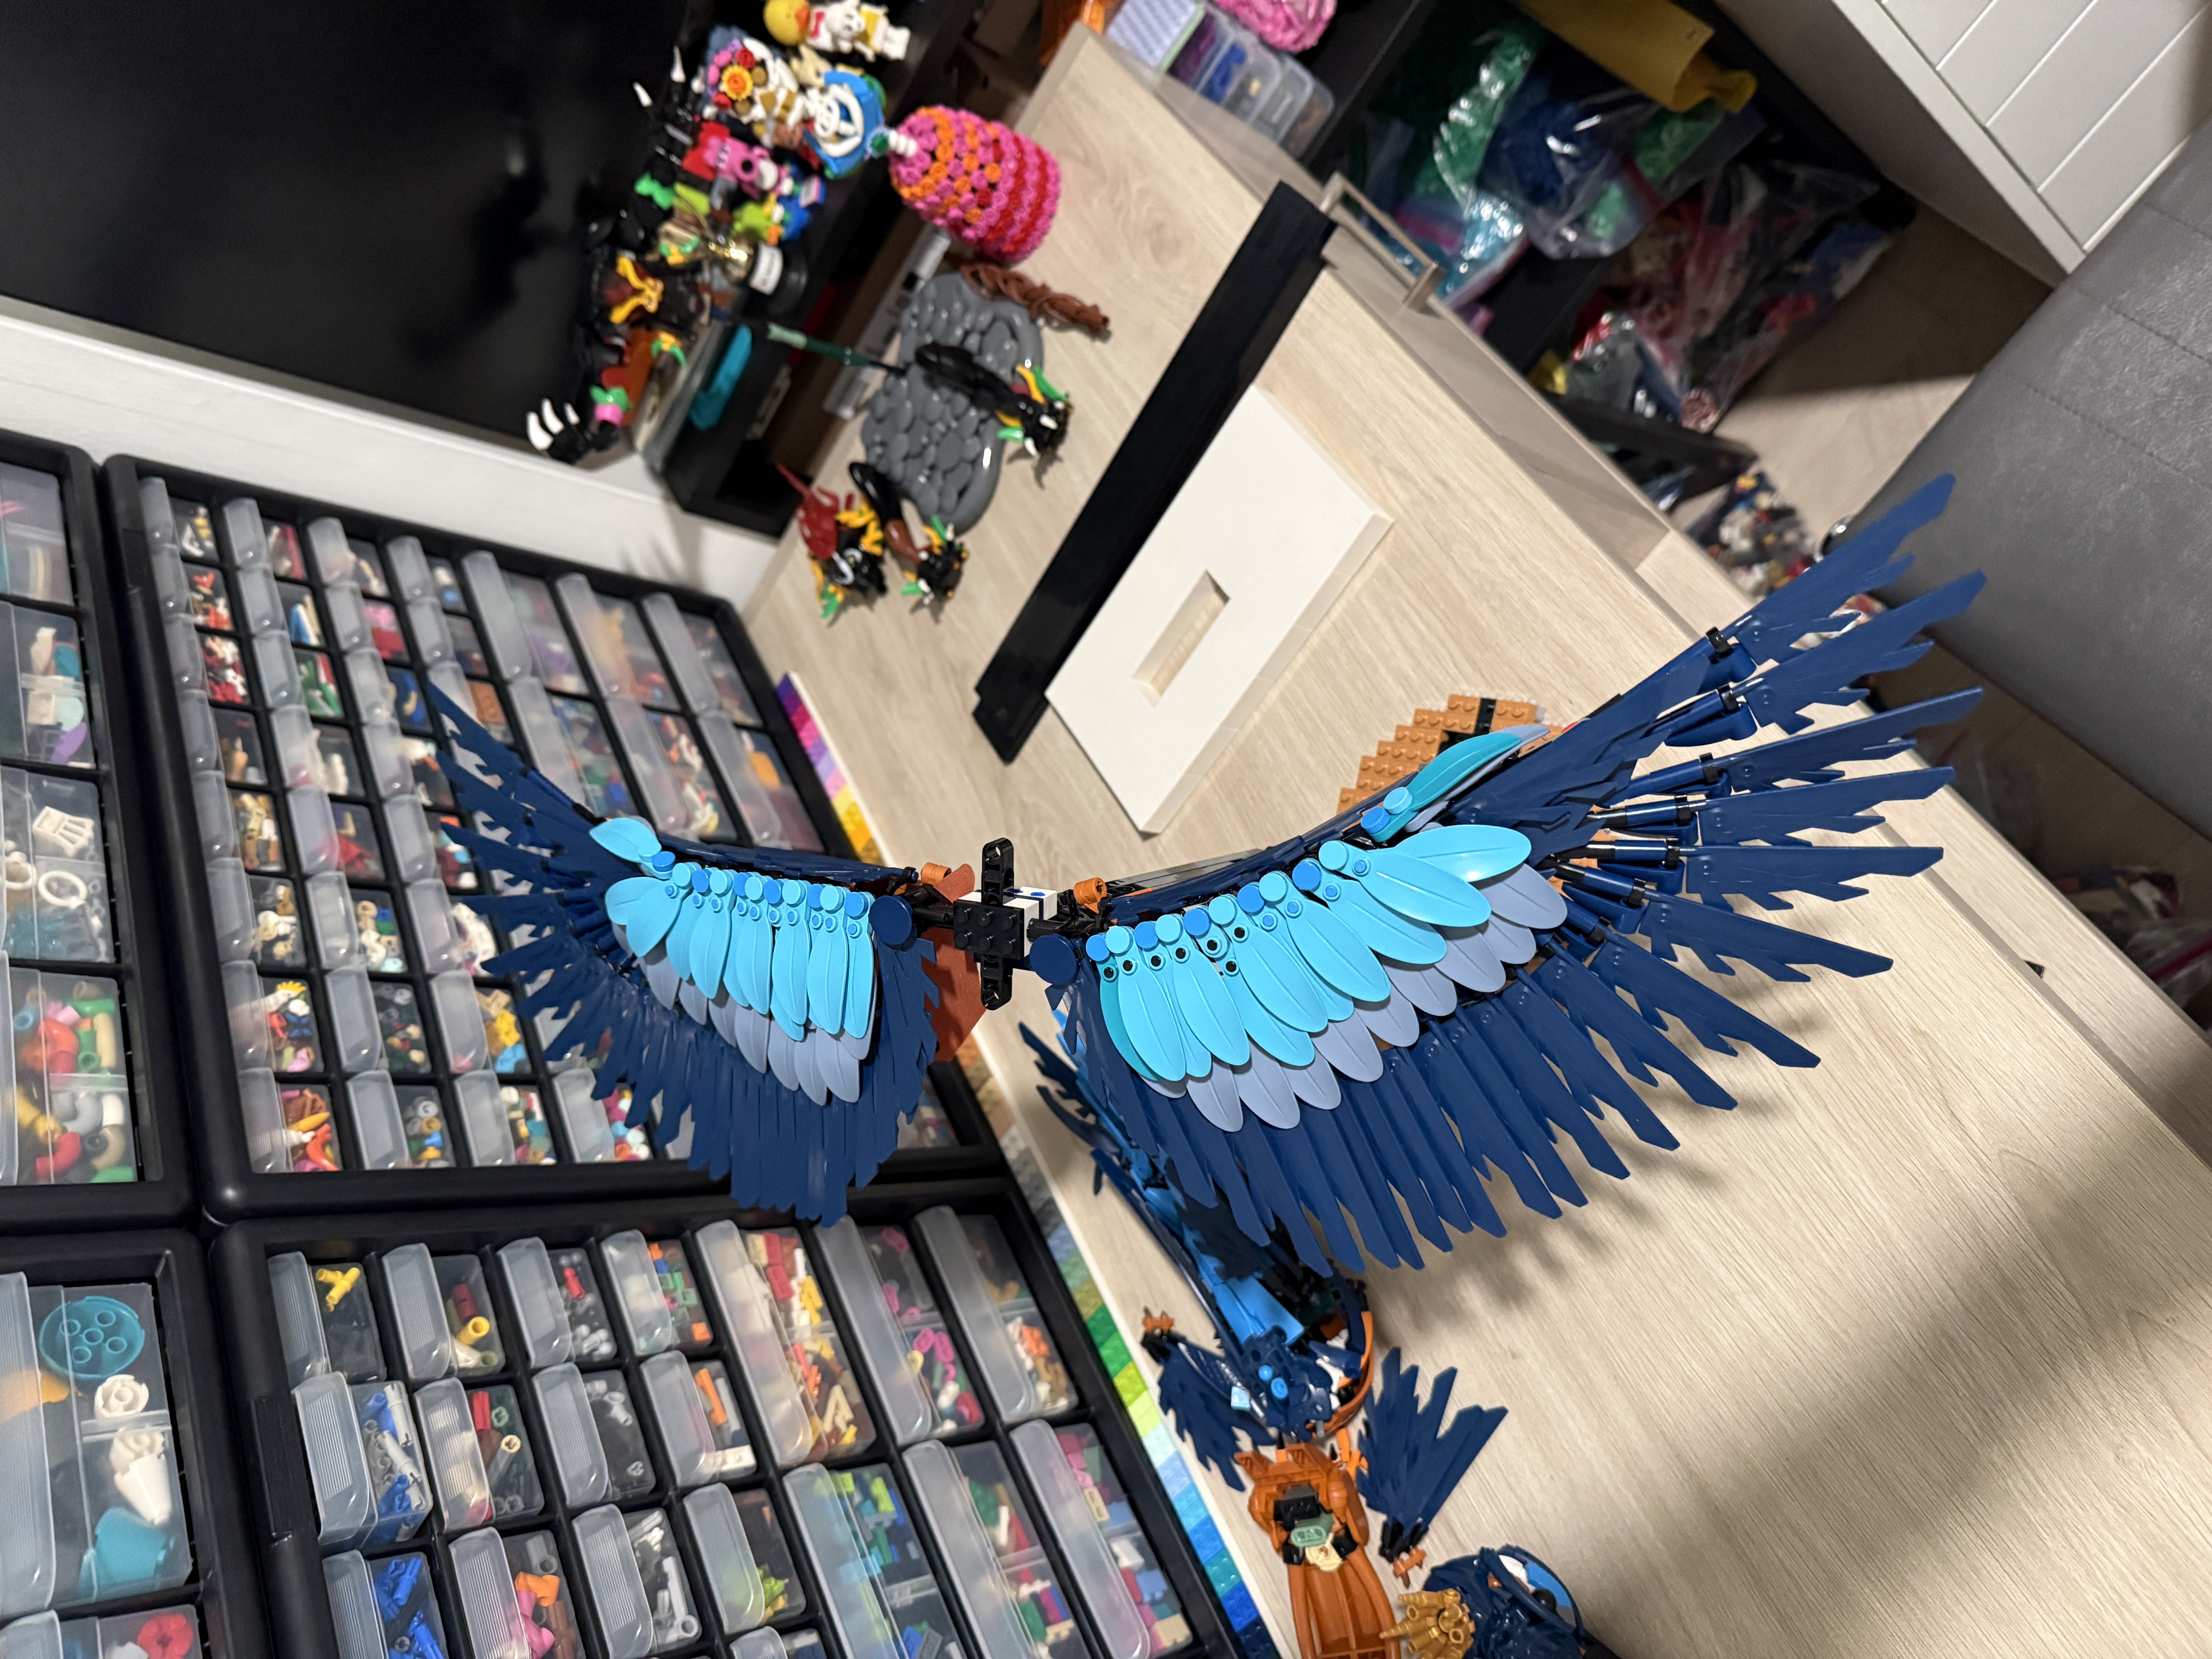
The most important place to start was the wings. This time, I focused on implementing the bone structure mentioned by Pat and Max, with a particular emphasis on making it strong using Technic lift arms. On top of that, the improved bone structure helped me curve the wing better as opposed to relying on flex tube to do the job. I used a blown-up image of the Kingfishers wing skeleton on my monitor to make sure I got the bone-ratios right. Some details I was very proud of in the new version was the curvature of the Alula feather going over the edge of the wing, the radiating primary feathers from the wrist, and the layering of the different coverts. To get these details, I went layer by layer when building the wing, always considering anatomic accuracy. Beyond that, I had made an incredible BrickLink find around the time in the Ewok Glider Wings. During the initial build, I was really frustrated I couldn’t capture the dark orange inside wing. The types of thin dark orange parts were just too limited and hard to connect without making the wing too chunky, so I angled the build where it wouldn’t be seen. That said, discovering this dark orange cloth was a game changer, as when I paired up two of them, it made the perfect inner wing coloring. I am super proud of the current state of these wings, so I put layer by layer images of them below. If Pat ever reads this, hopefully he approves!
Soaring
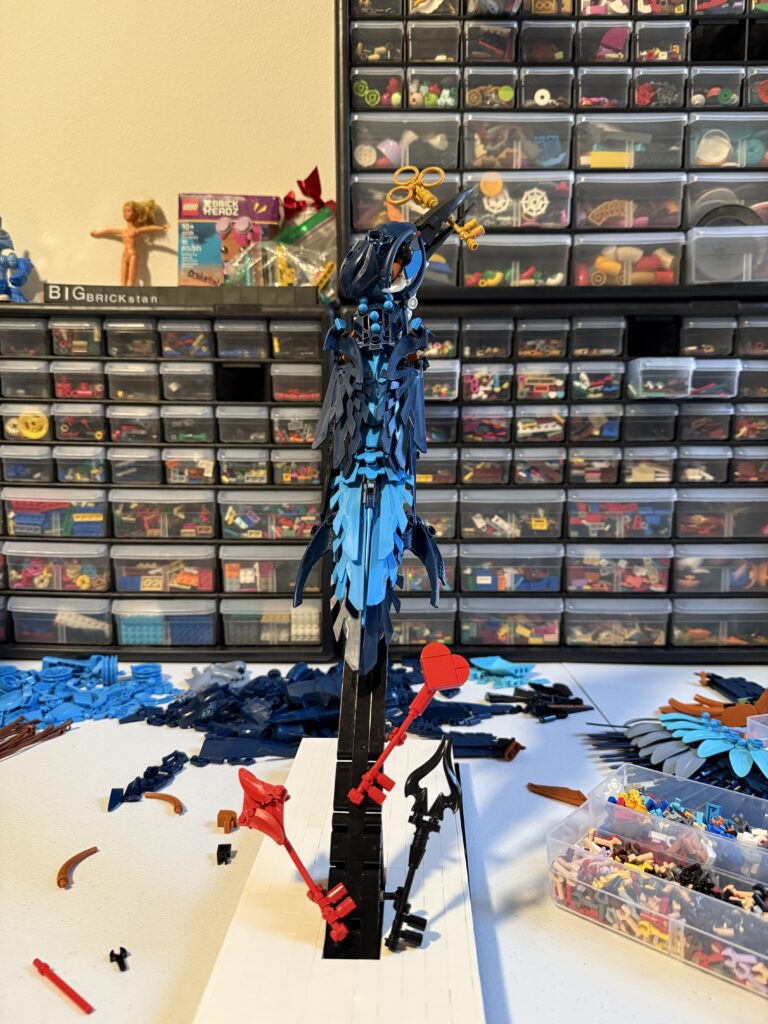
The next fix to make was inspired by Aiden, that being the stand. When designing the stand the second time, I knew it needed to be stronger, more centered, and angled/tilted. I really wanted to capture the in-flight look, with enough tilt to get the whole build off grid. To do so, I rigged an all-new Technic stand which much better connects to the body, allowing it to tilt on its axis. I got really giddy when I attached both wings on this new stand, as I could see the improvement right away.
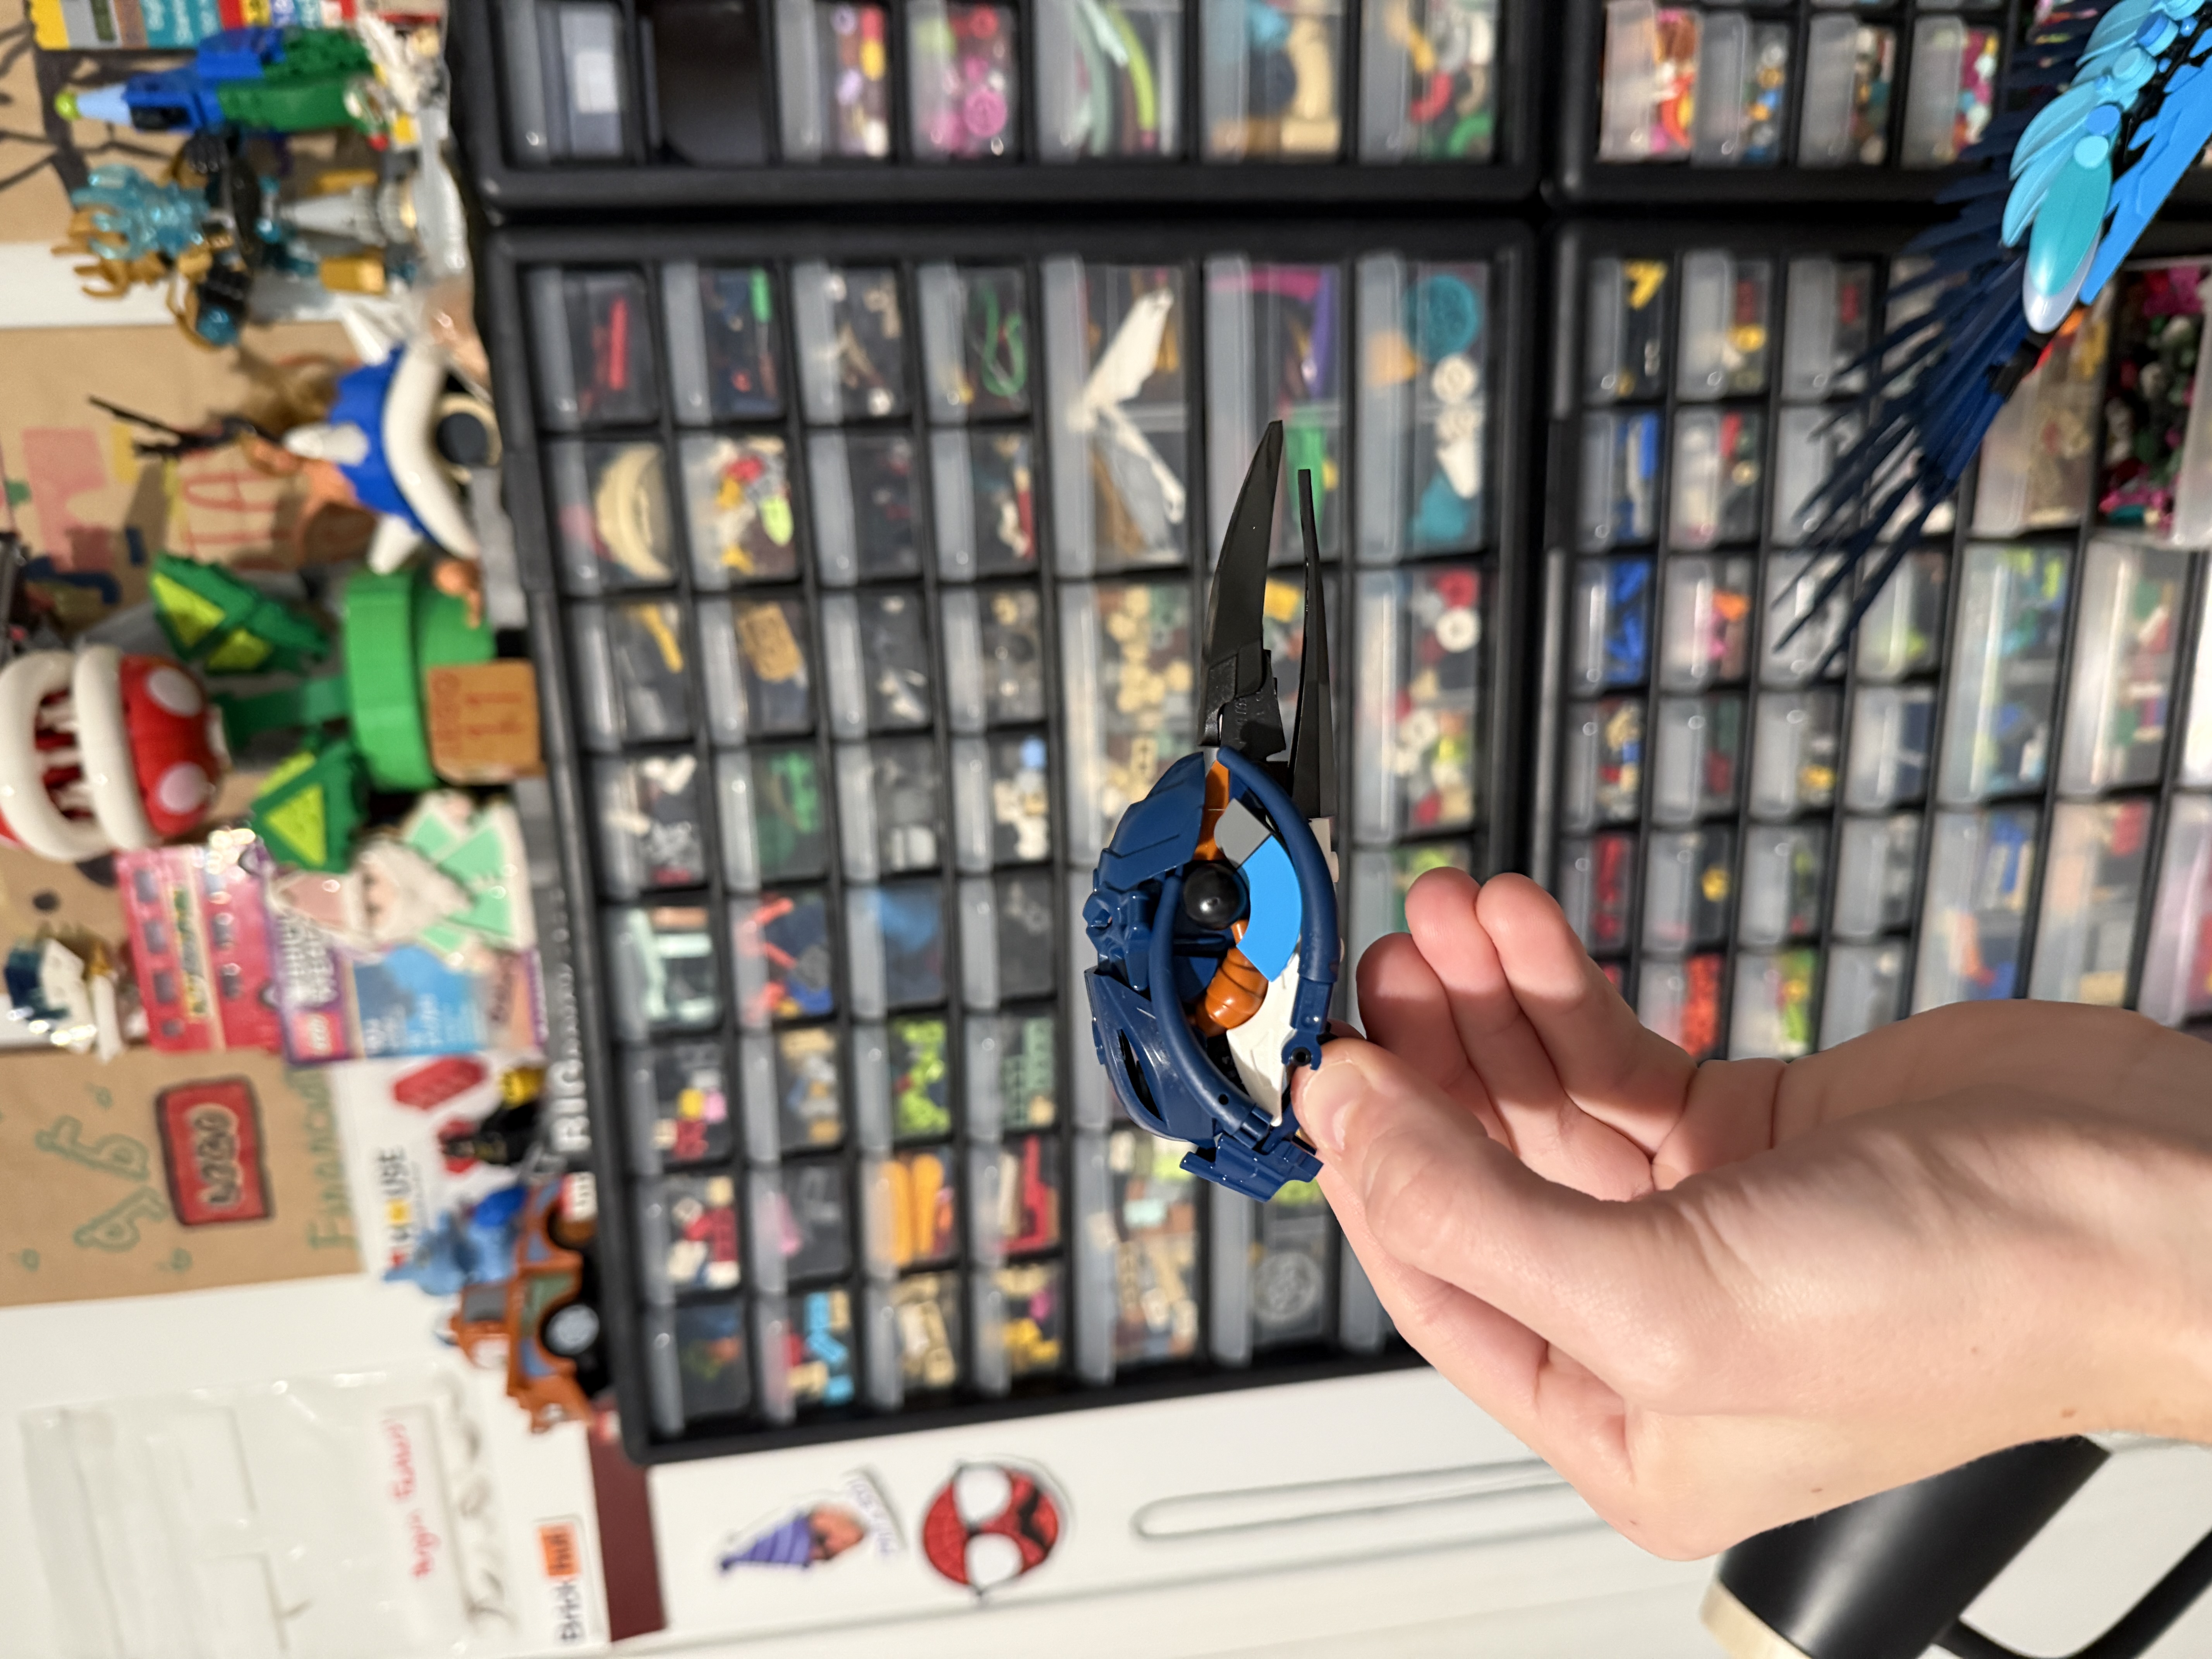
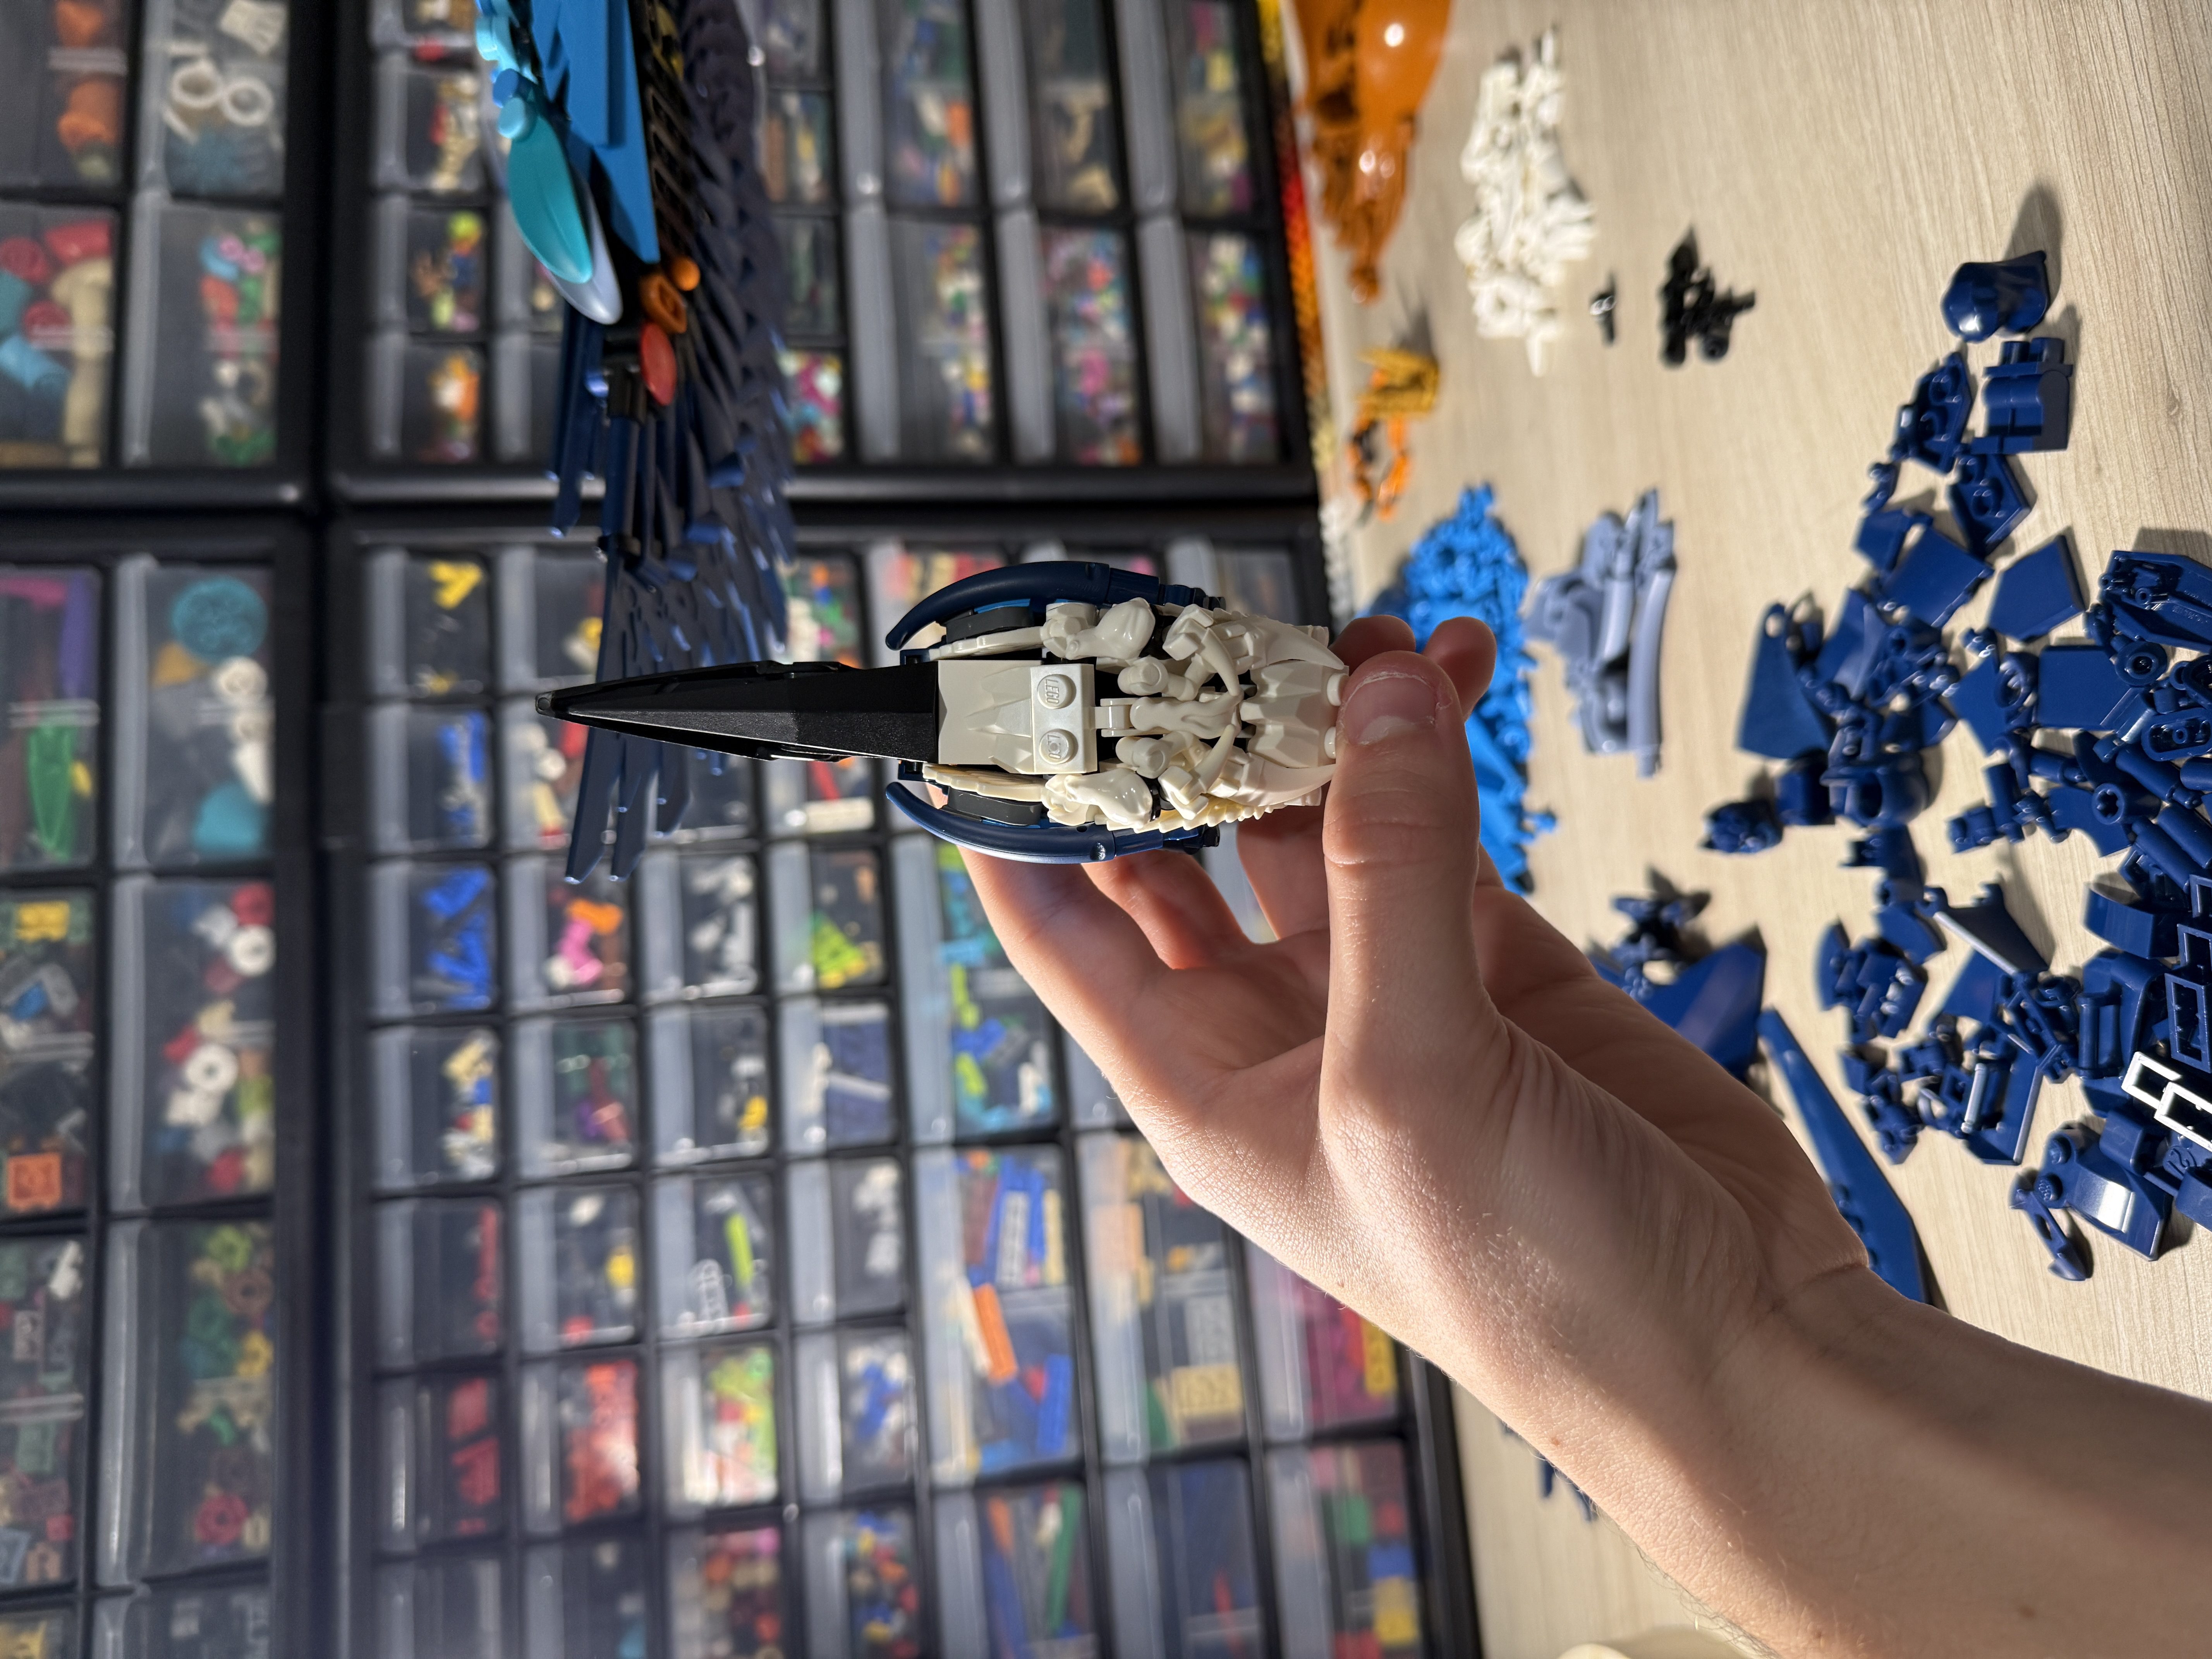
New Noggin
The last part of this build I’ve come back to already has been the head. Although it was the best part of the initial build, two main parts bothered me. Those being the gap in the white barb behind the eye, and the ruffle in the front. Starting with the gap, I found what I believe to be an incredible solution using the Technic tooth. This piece meshed with the curve of the croissant better than I could’ve ever imagined, forming perfect synergy to give the head a lengthier feel. Then for the ruffle, I wanted to add a lot more feathery coded parts. The perfect fit for these ended up being the Mario wings, which had the exact texture I had hoped for. To compliment them, I added the ever-faithful rock fingers, as well as white frogs, various barbs, and even a Spiderman web-effect. Overall it might be a little messy, but I really love the look it gives. The biggest current issue is the two small barbs this run the wrong way, but they are what hold the Spiderman part in place so I will keep them for now!
The End?
And that’s where this project stands right now! It is well on its way to being completed, and certainly near the top of my list for 2026. Expect this build to be done by Summer for sure, as I am always very inspired to work on it. Similar to Koraidon (?), I hope anyone reading can see this as a lesson to always be looking to learn. I have a lot of faith that this will be one of my best builds by the time I am fully happy with it, but for now this is all I got.
Post Credit Scene
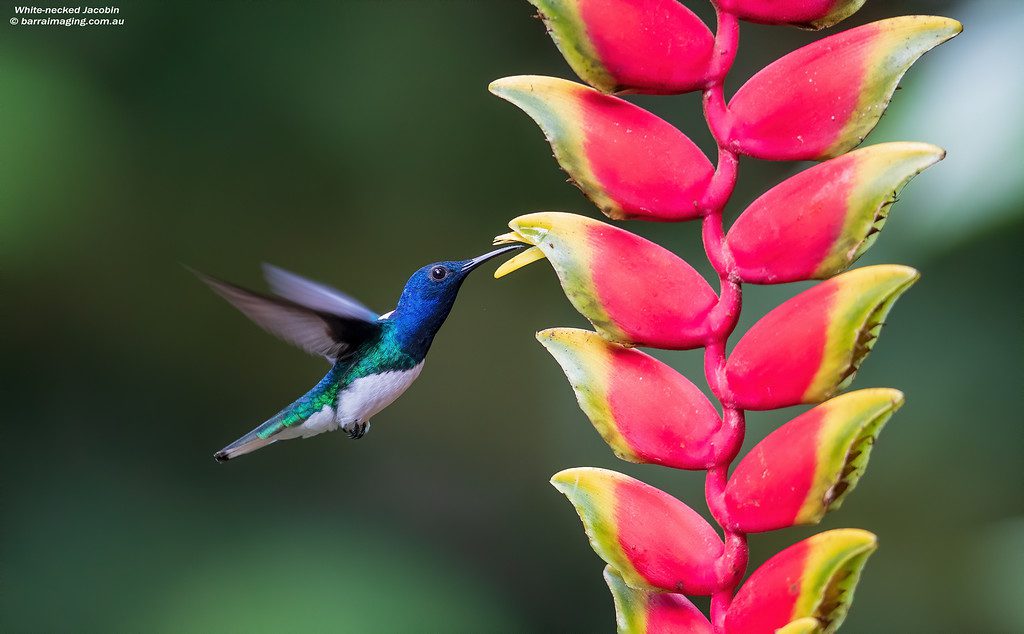
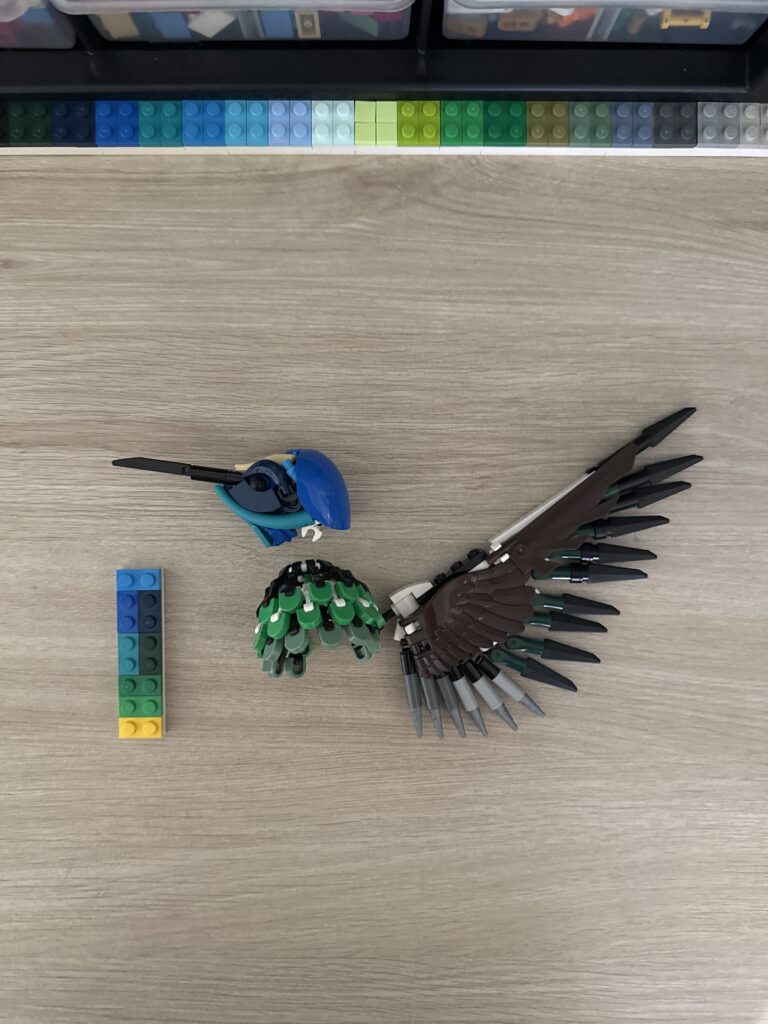
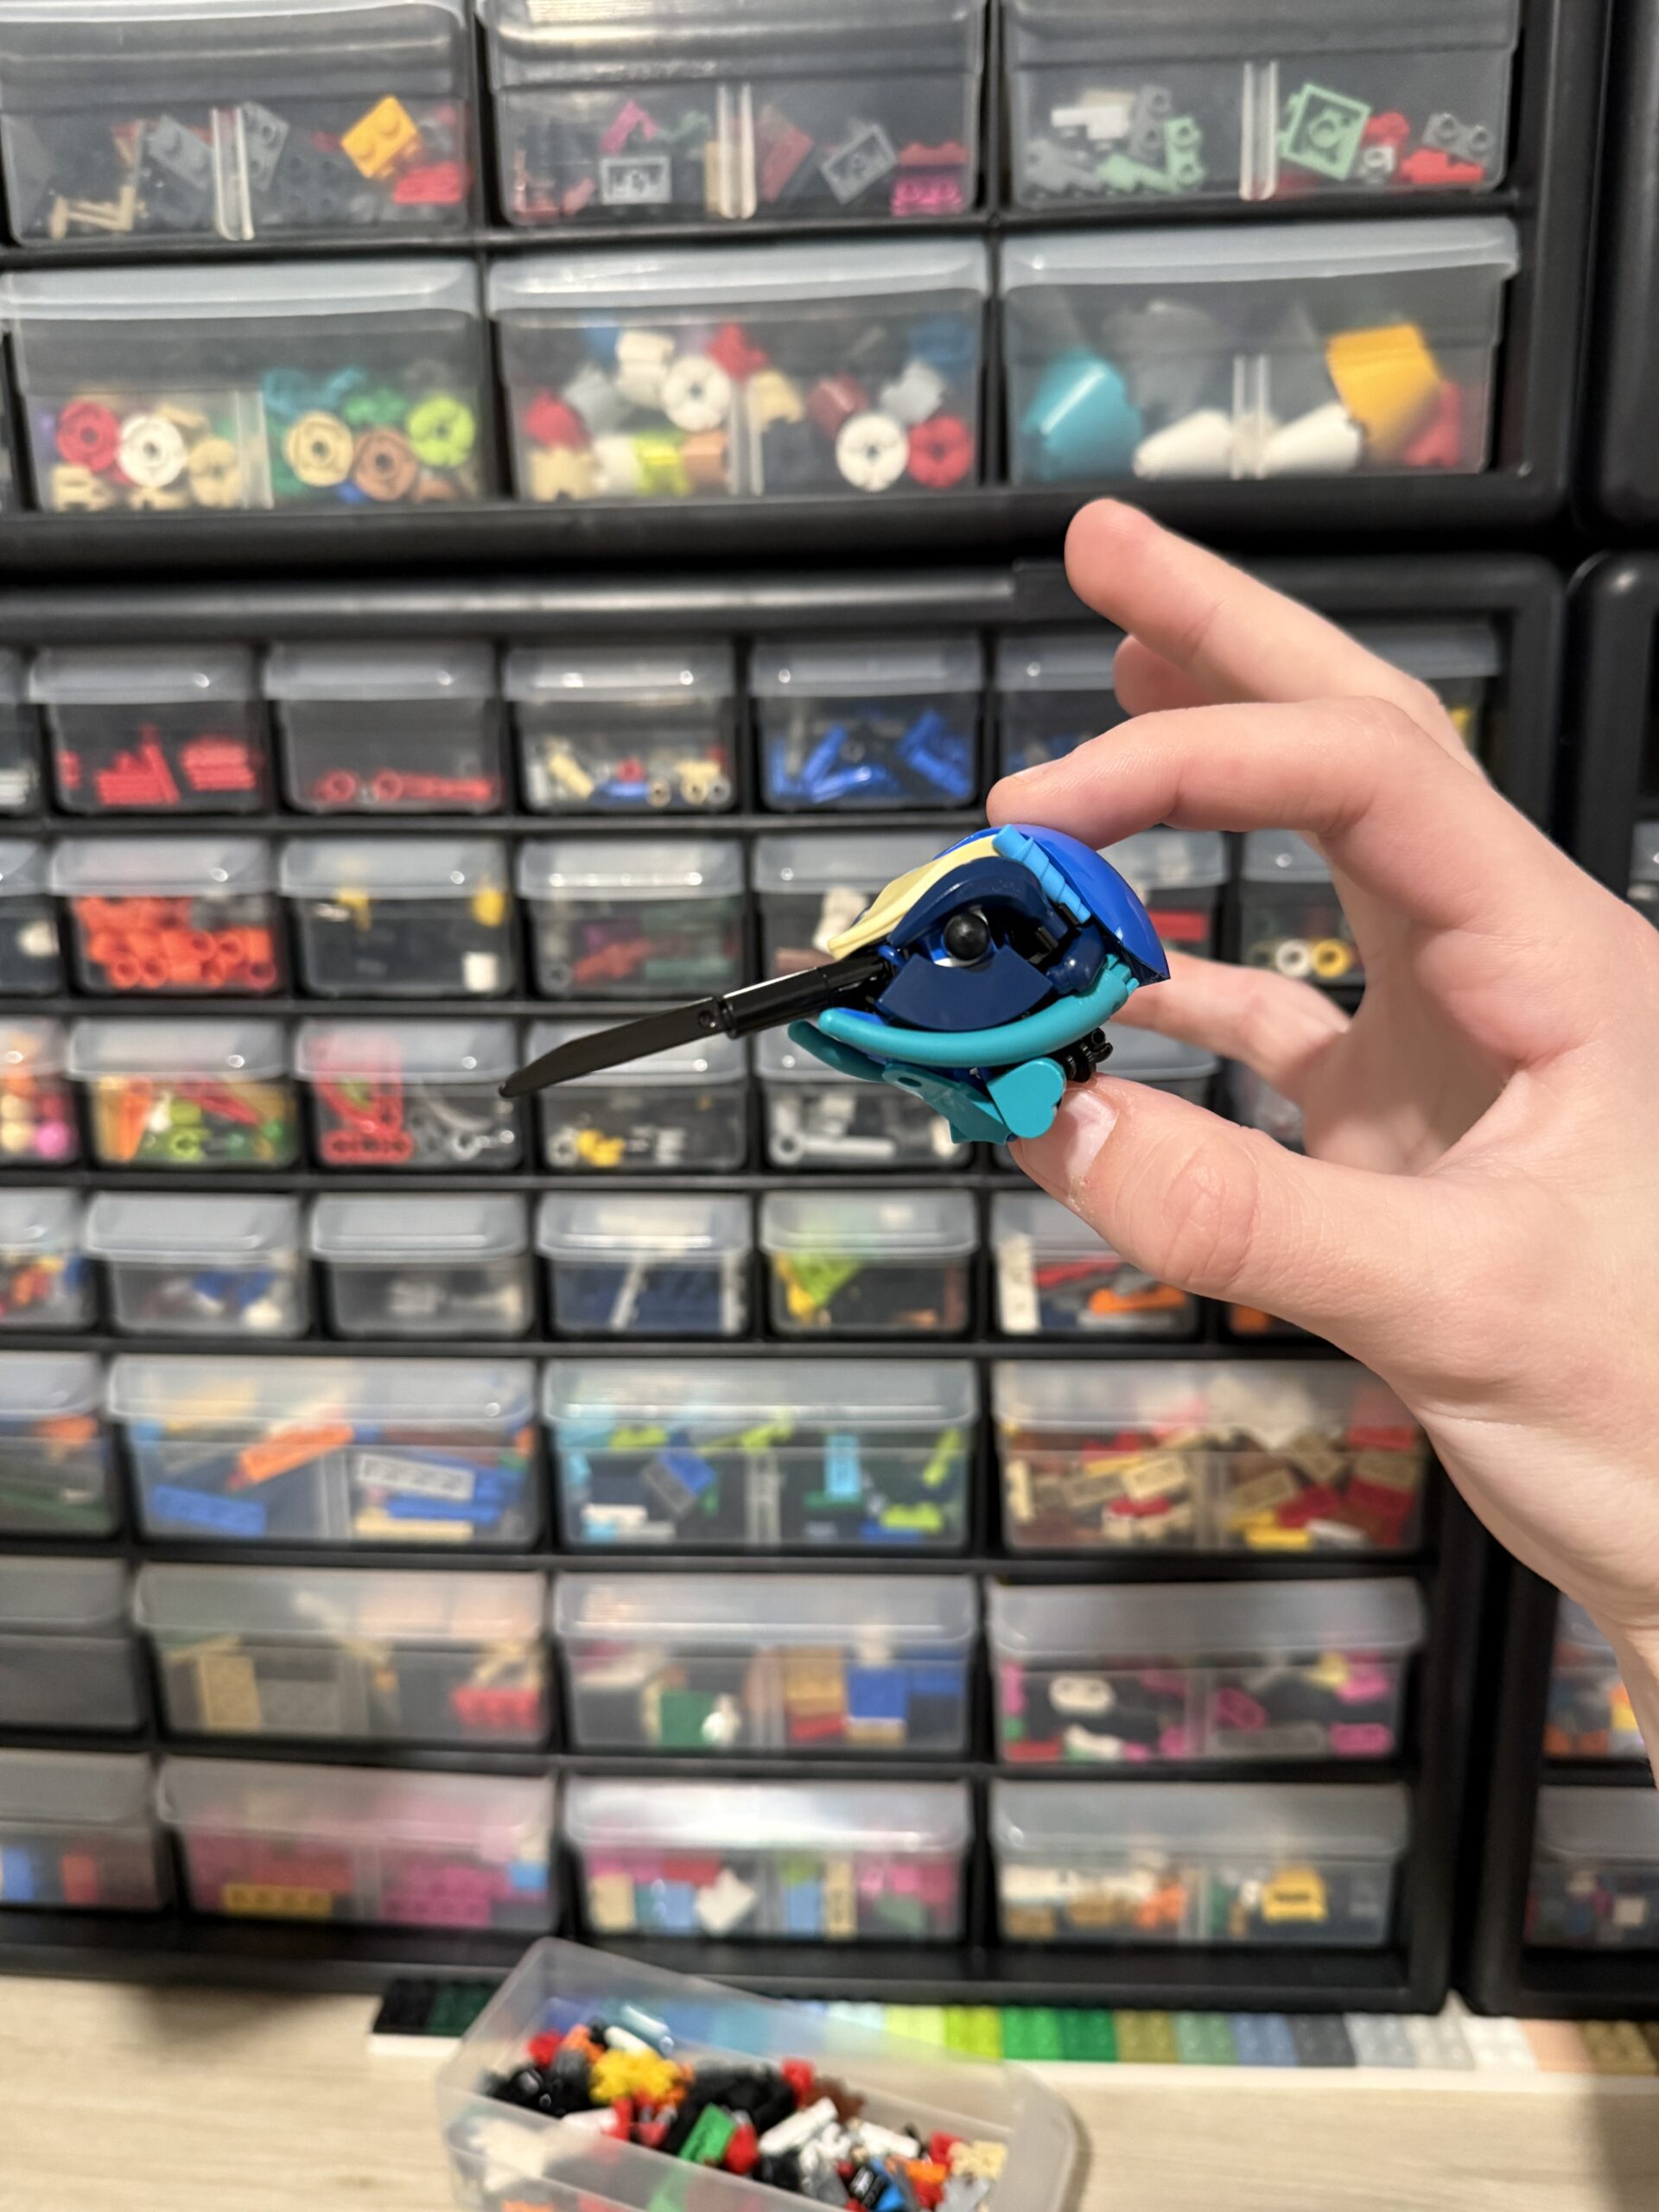
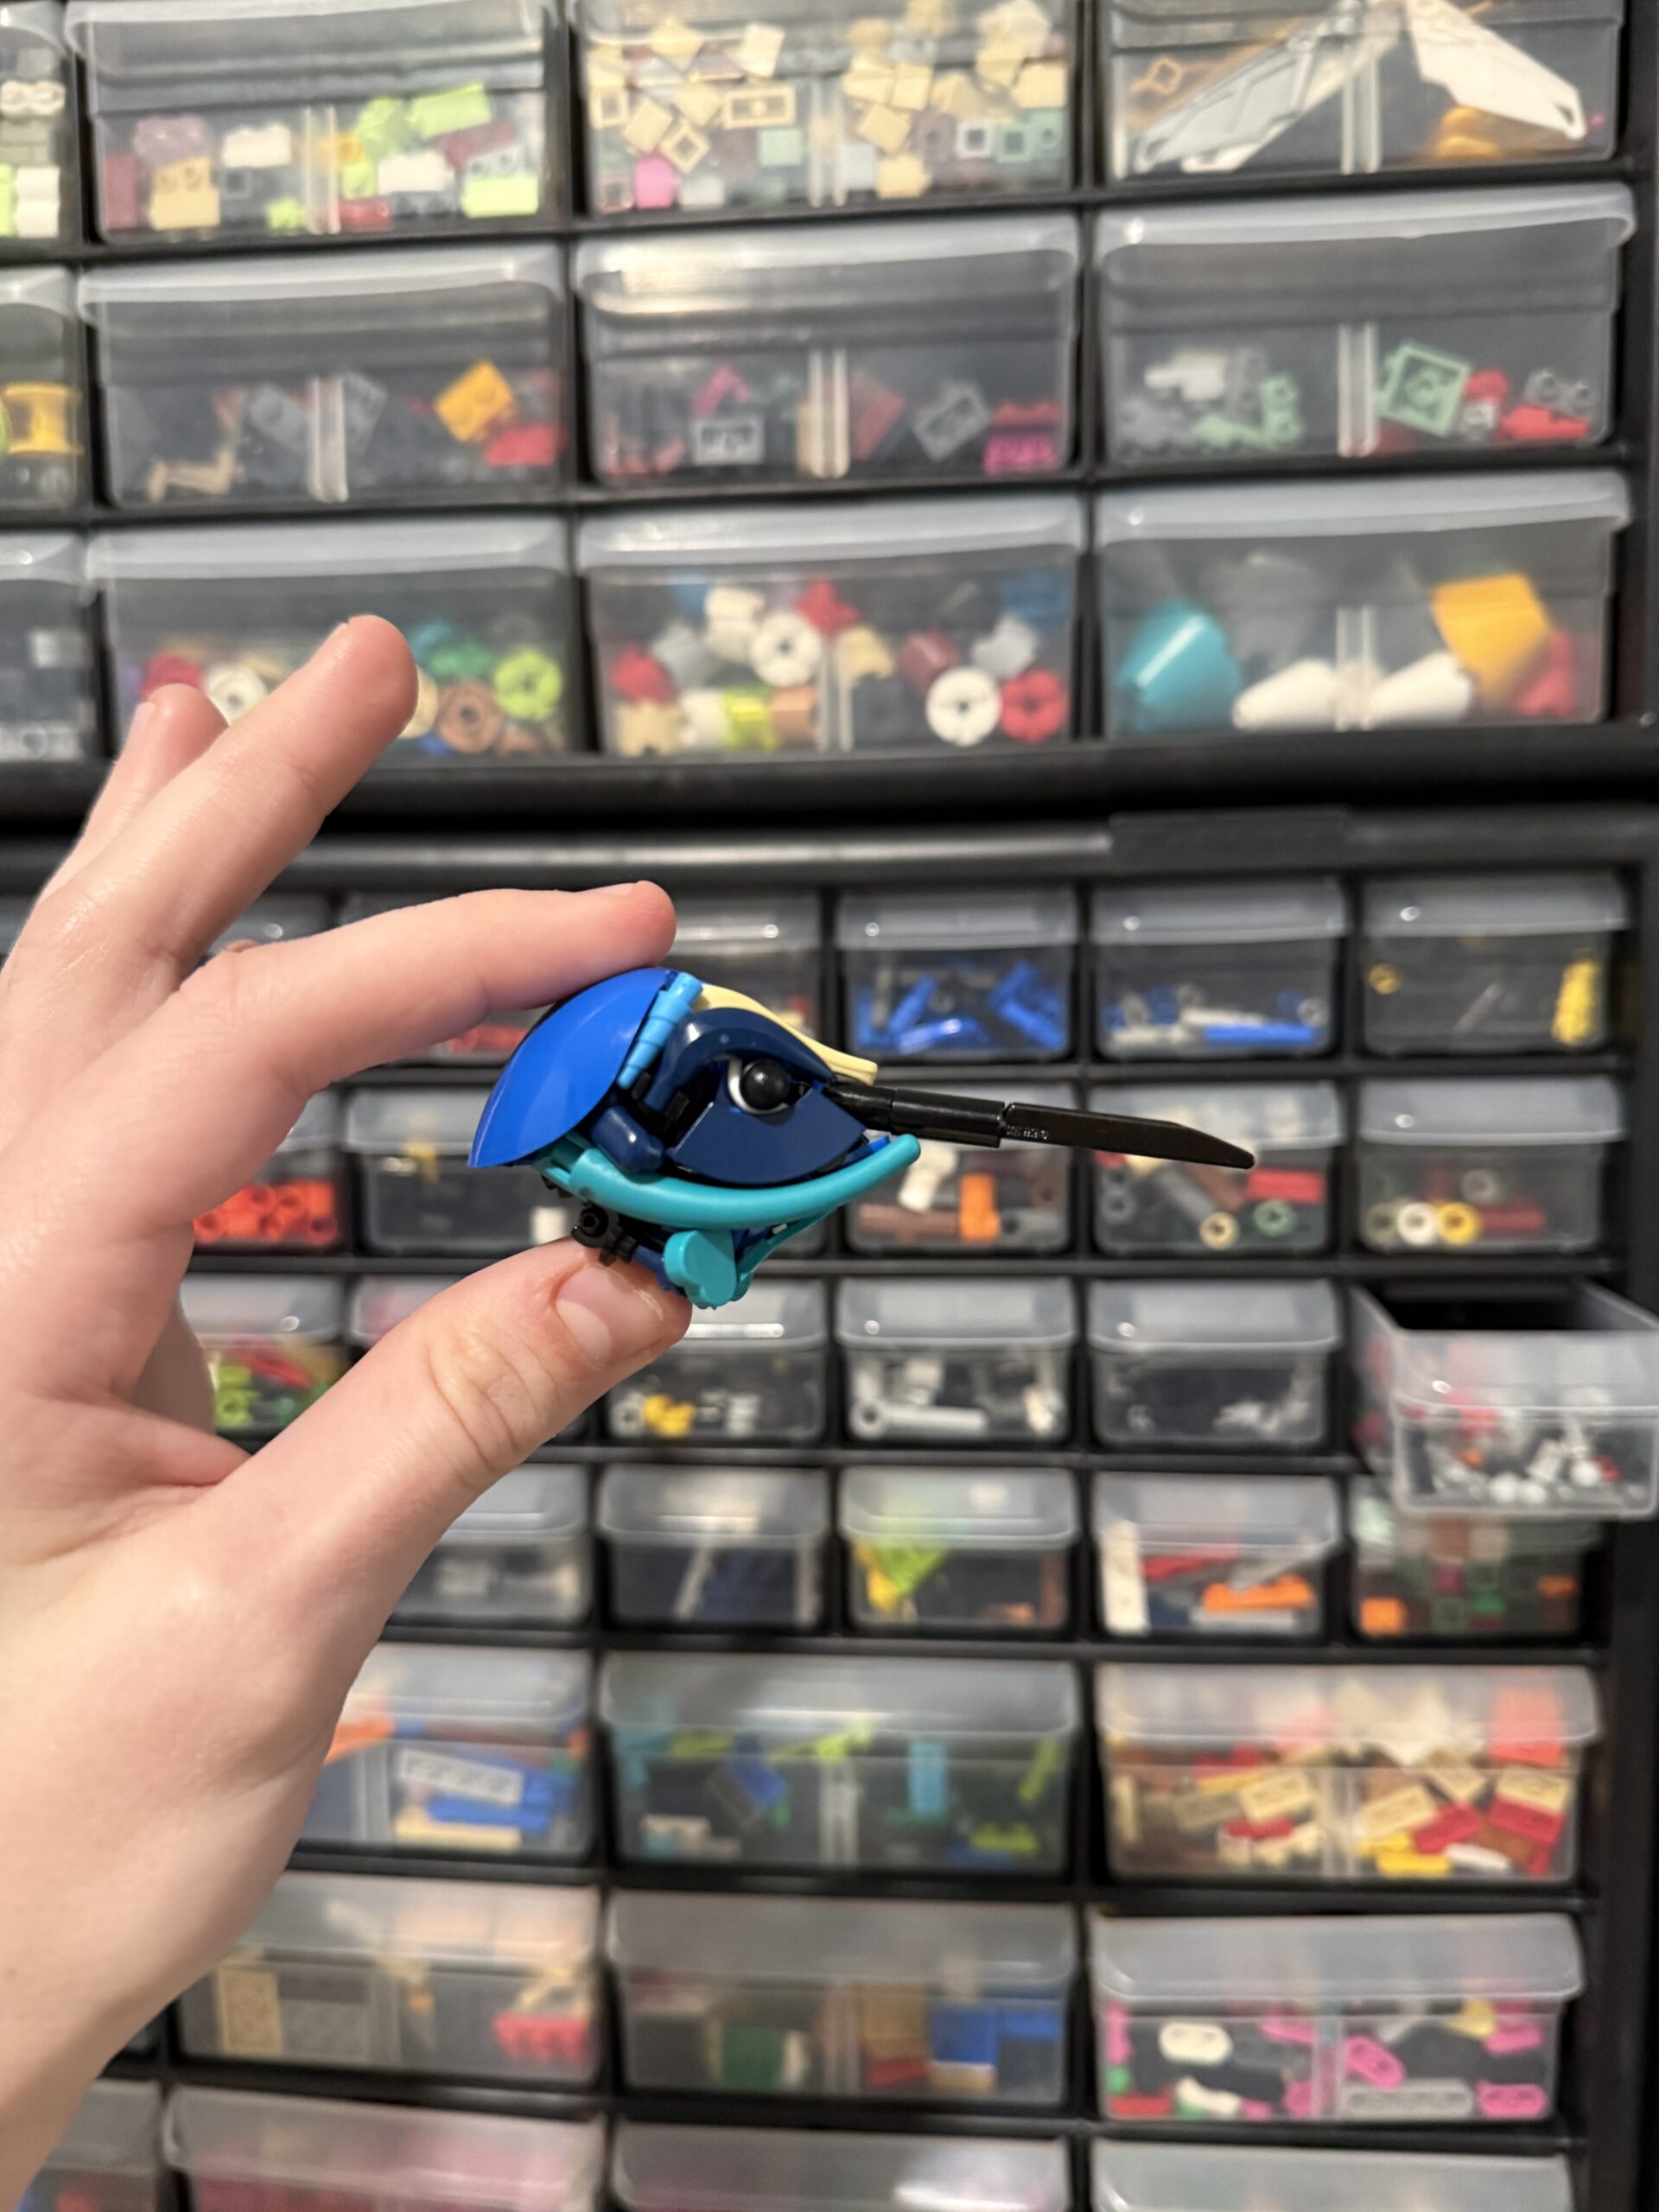
Though I love working on the kingfisher, another bird was on the top of my mind recently. Here is my progress on a white-necked Jacobin (Hummingbird). To be honest, I might’ve found my niche with this whole building bird things. Pat and @skabram.builds better watch out…