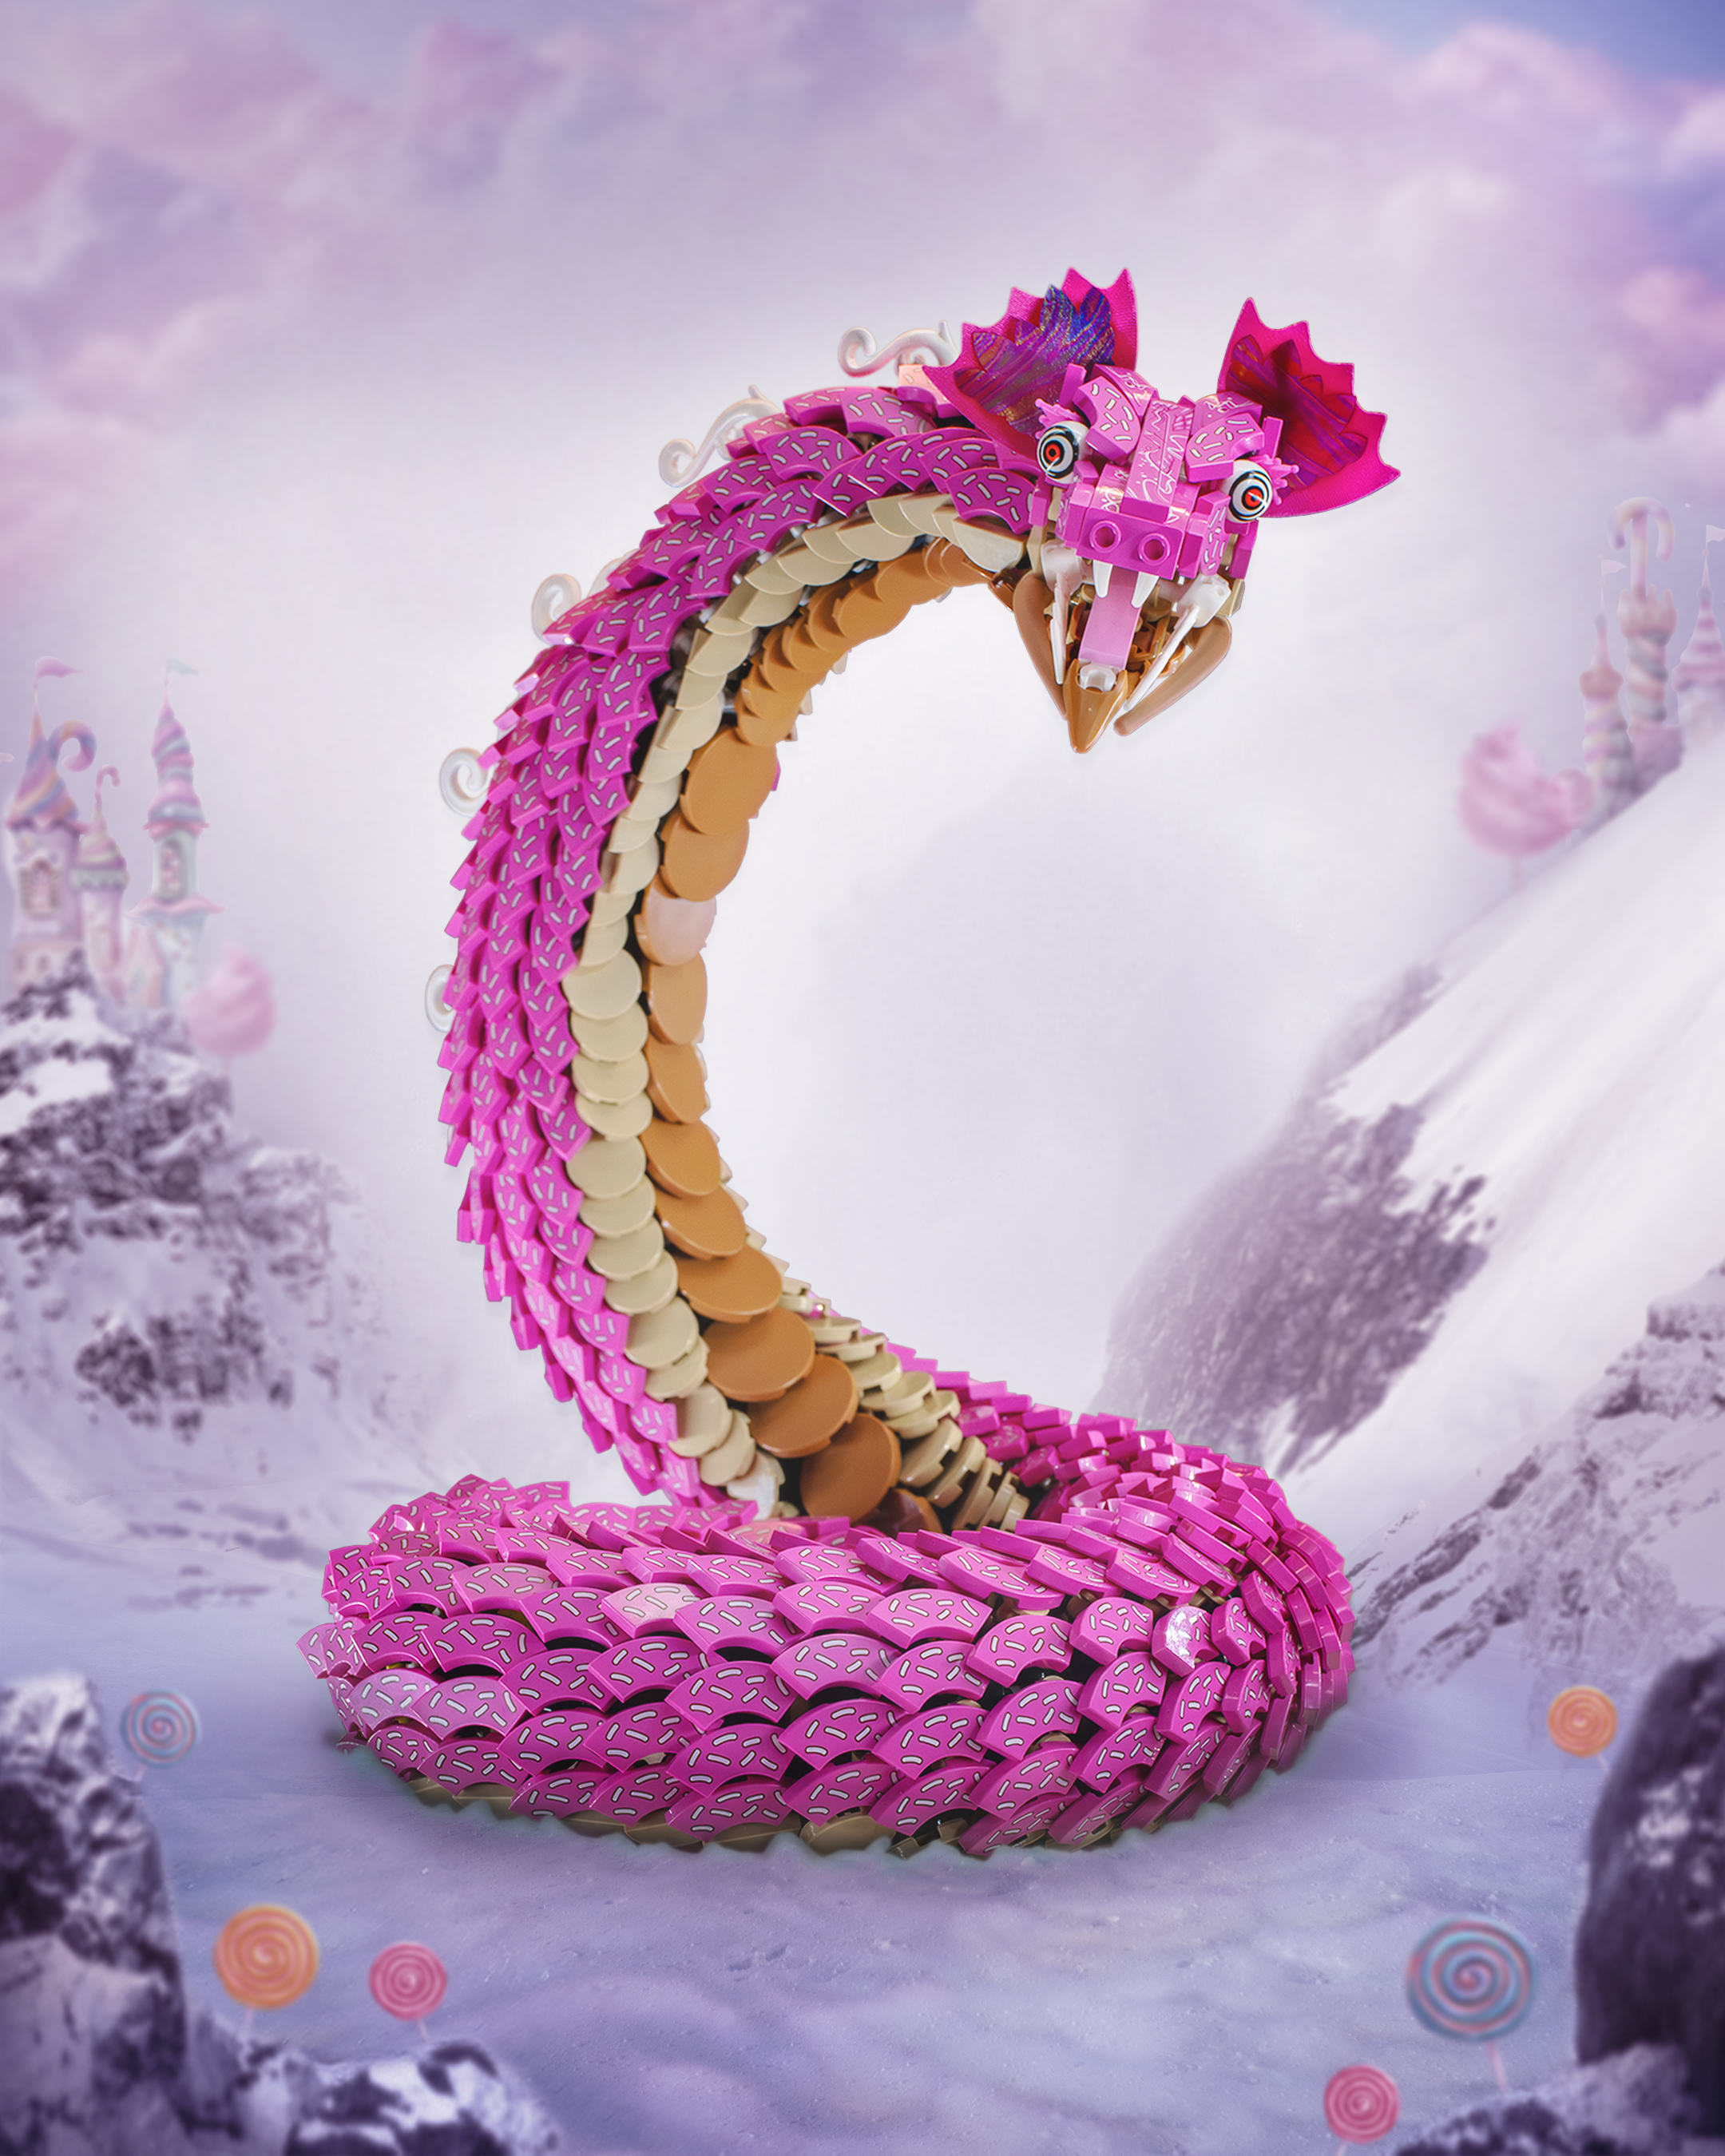
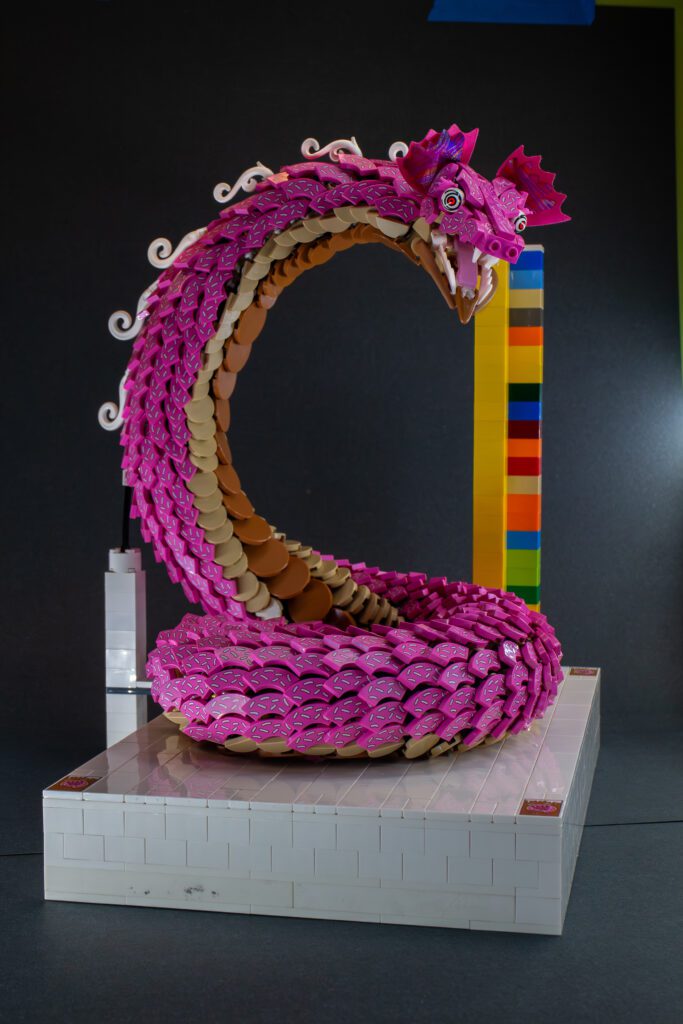
My magnum opus, my masterpiece. Just kidding, but I do really love this build!
This build has been a dream of mine to make for awhile, and I am very proud of how it turned out. I’d also like to start the blog by shouting out Benjamin Anderson for the incredible photo edits. He spent a long time working on them out of the kindness of his heart, I really appreciate you Ben!
Background Info
The biggest motivation for this was a whimsical desire to buy a fun part! Back over the summer, my friend @Aiden.Builds took a trip to the factory store in Germany and gave me the chance to pick up a couple parts through him! Appalled by my request, Aiden reluctantly picked me up around 700 Pink Donut tiles.
Enter Brickscalibur
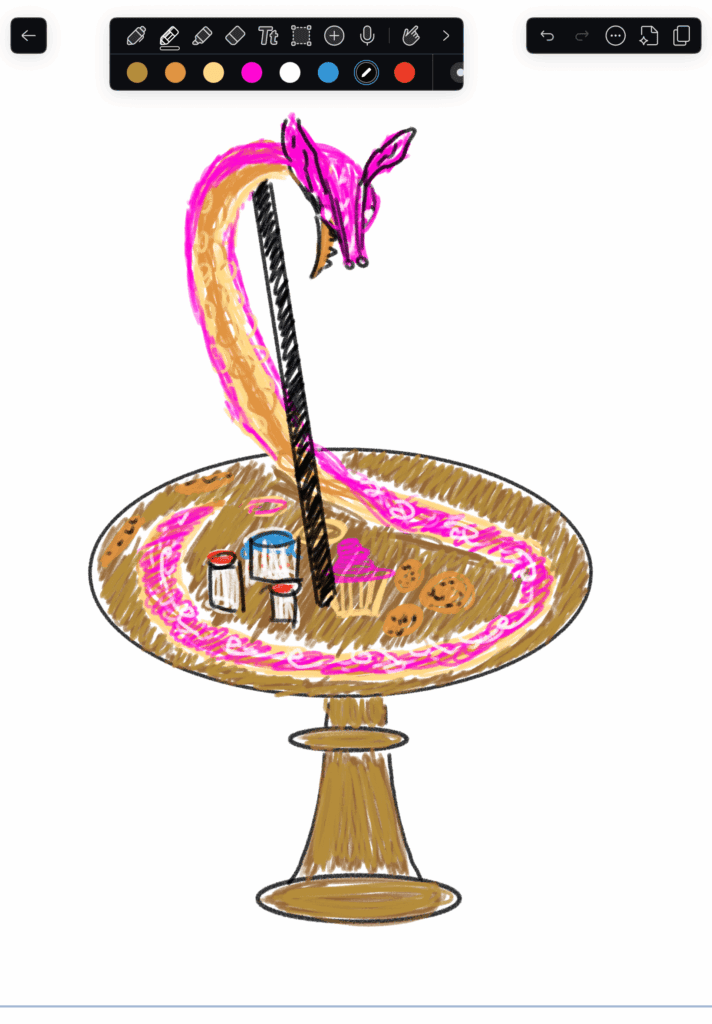
With the donut tiles in hand, I tried a great number of things mostly focused on not using them as a donut. In the end however, all roads lead to donut and it just made the most sense. After putting my table scraps on the back burner for awhile, I woke up one morning to check the category announcements for Brickscalibur. There, I saw the incredible “Cotton Candy Kingdom” category, and immediately knew what to do. It was time to go all out, and fully commit to the donut.
Setting up Structure
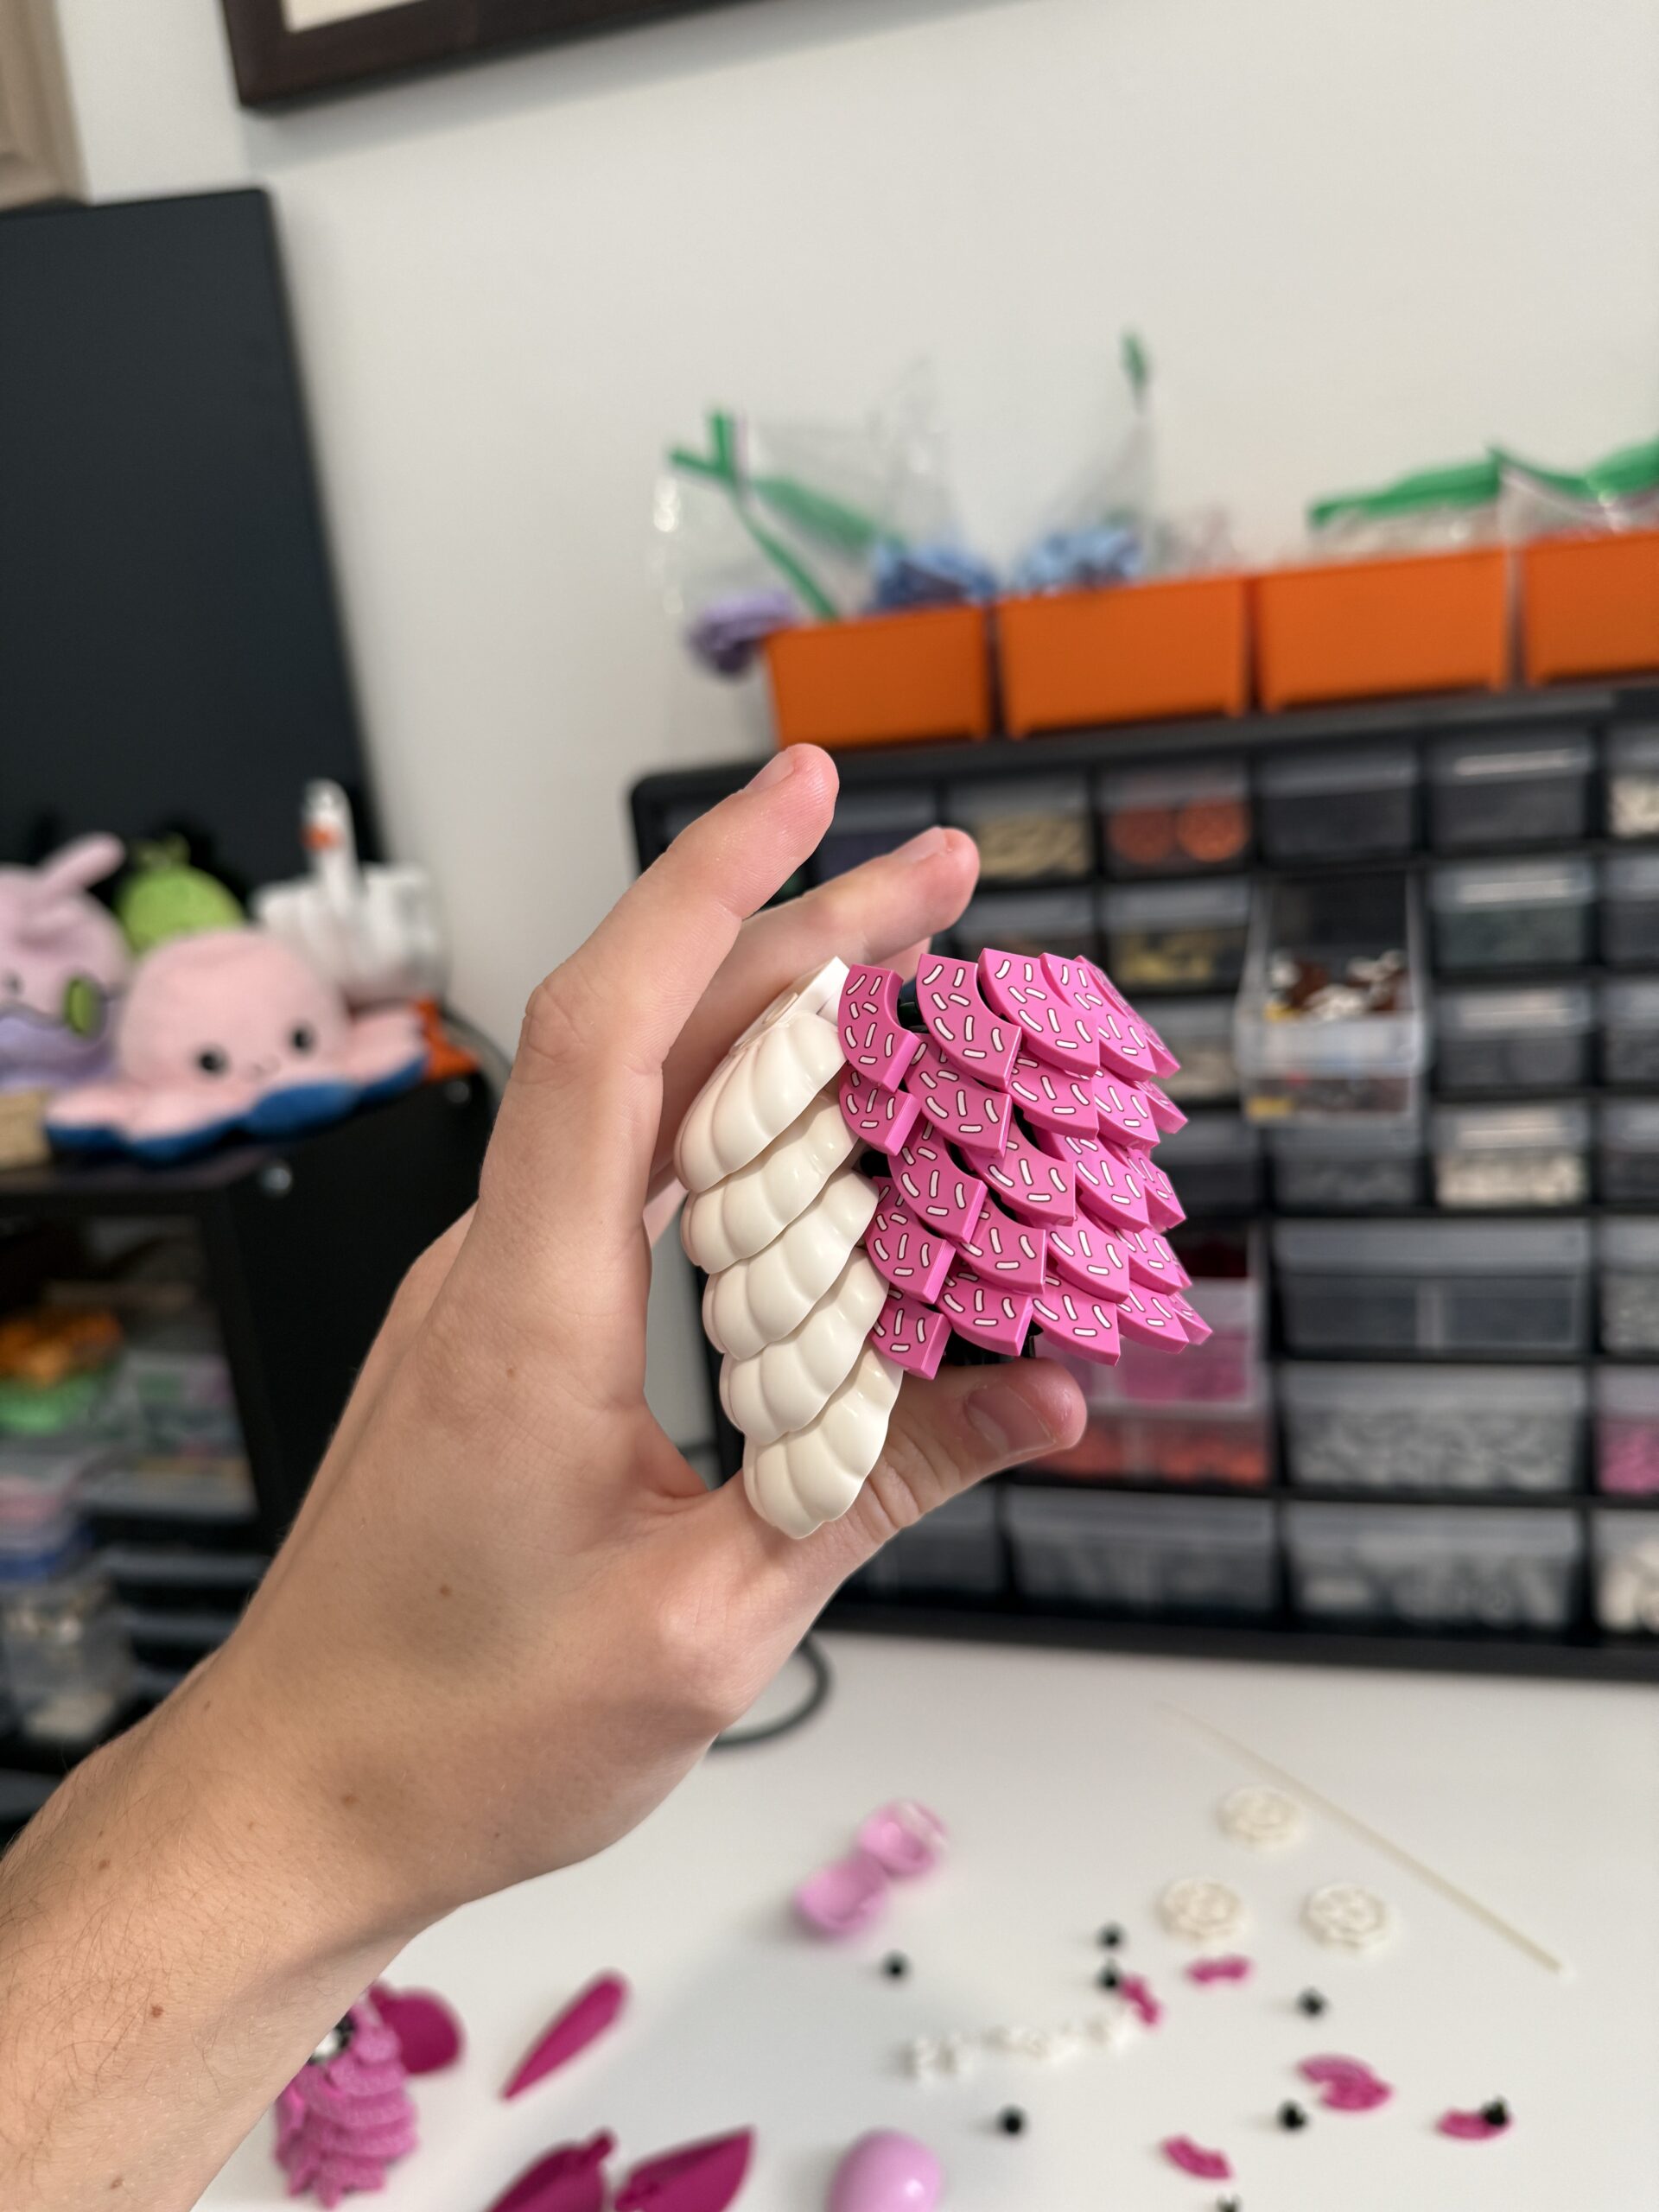
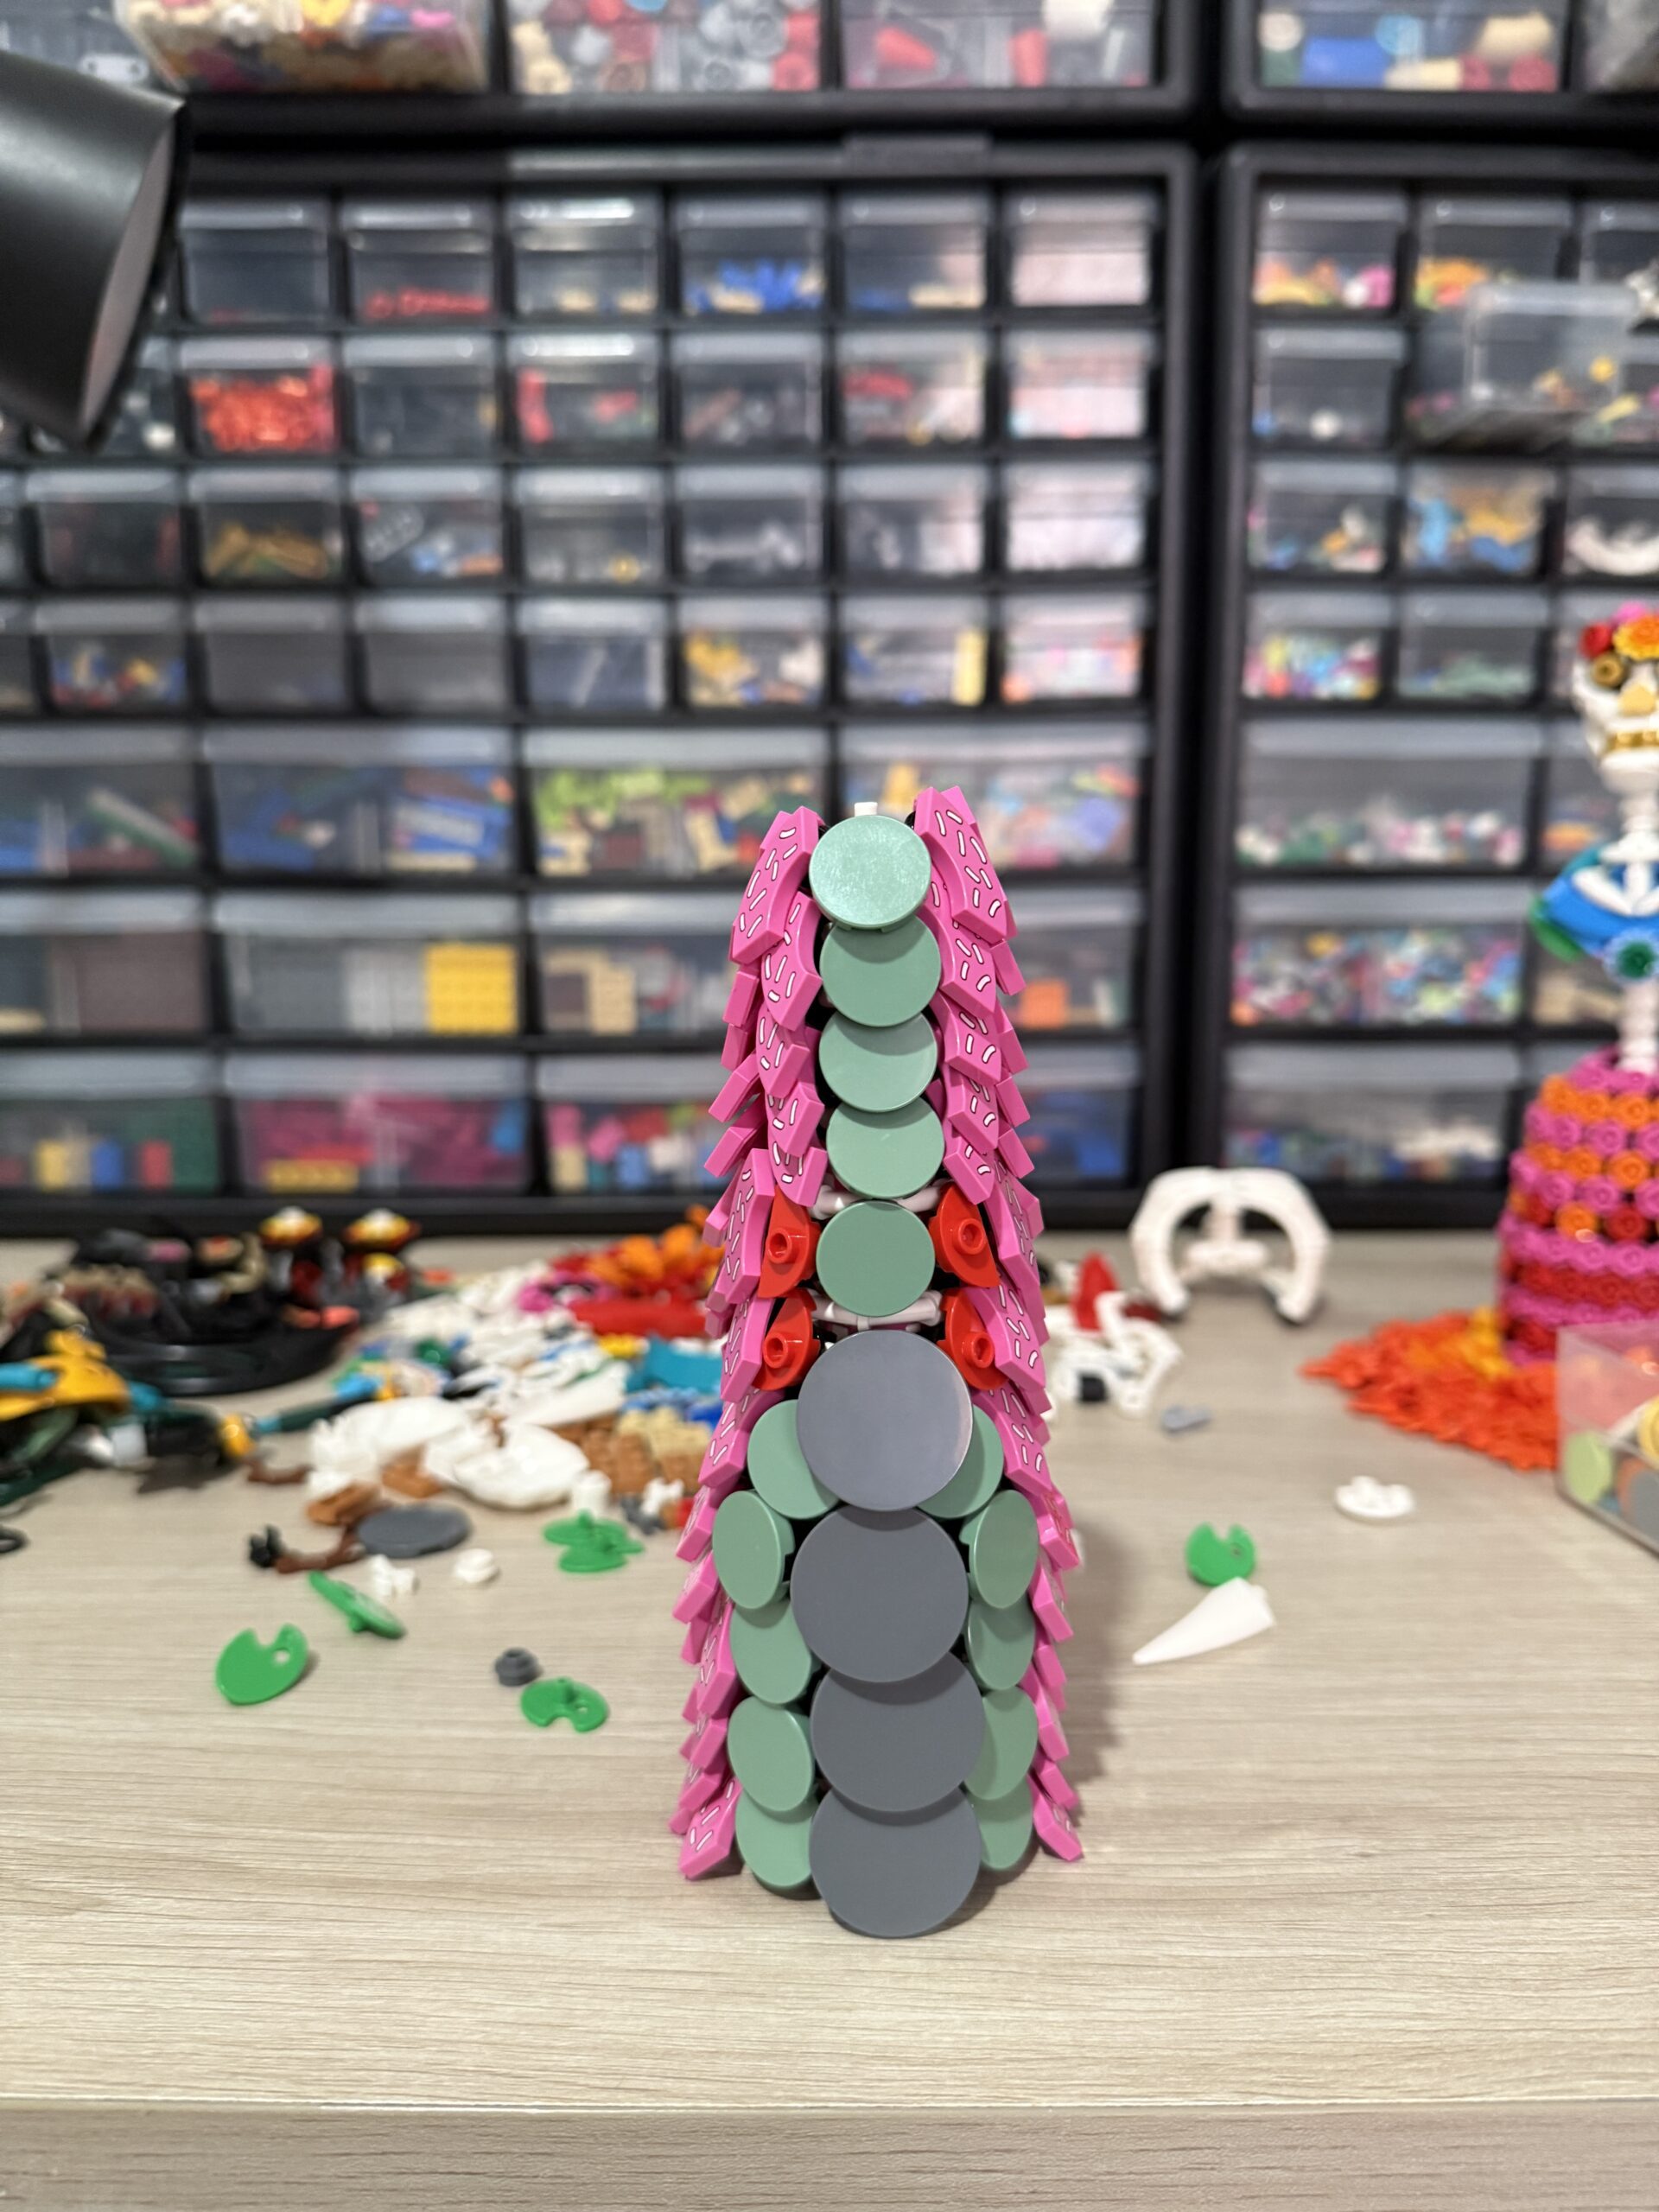
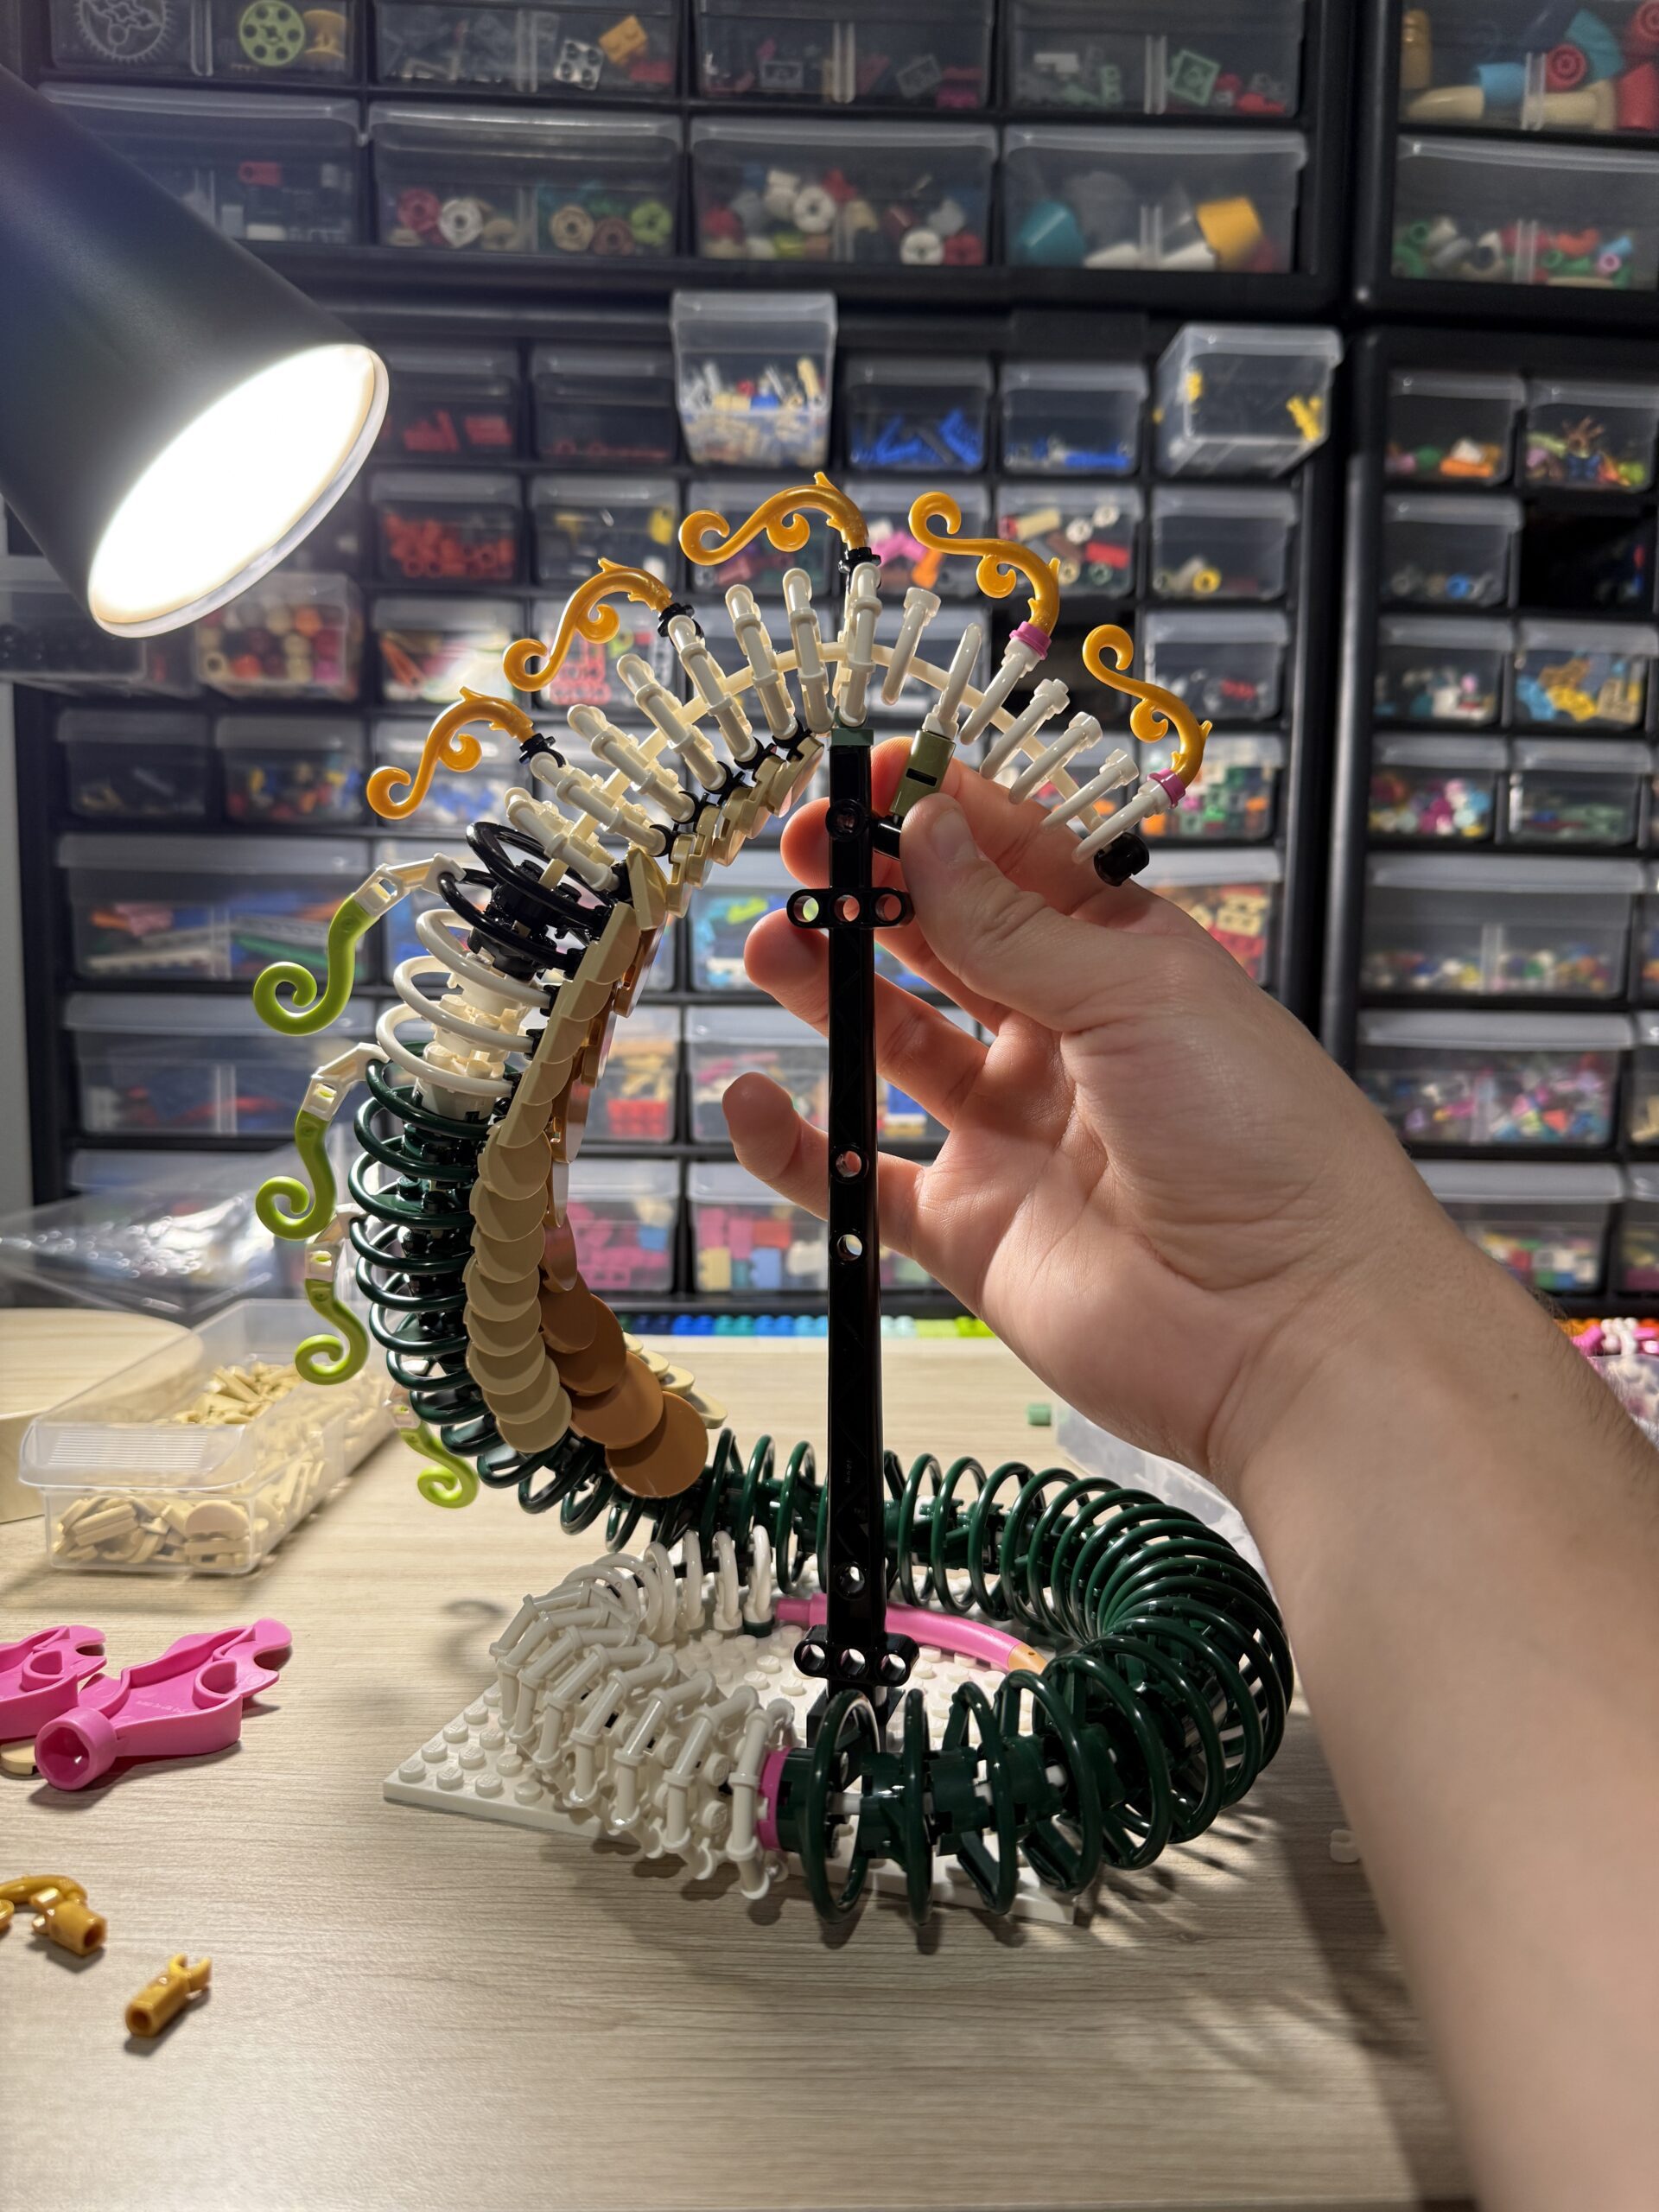
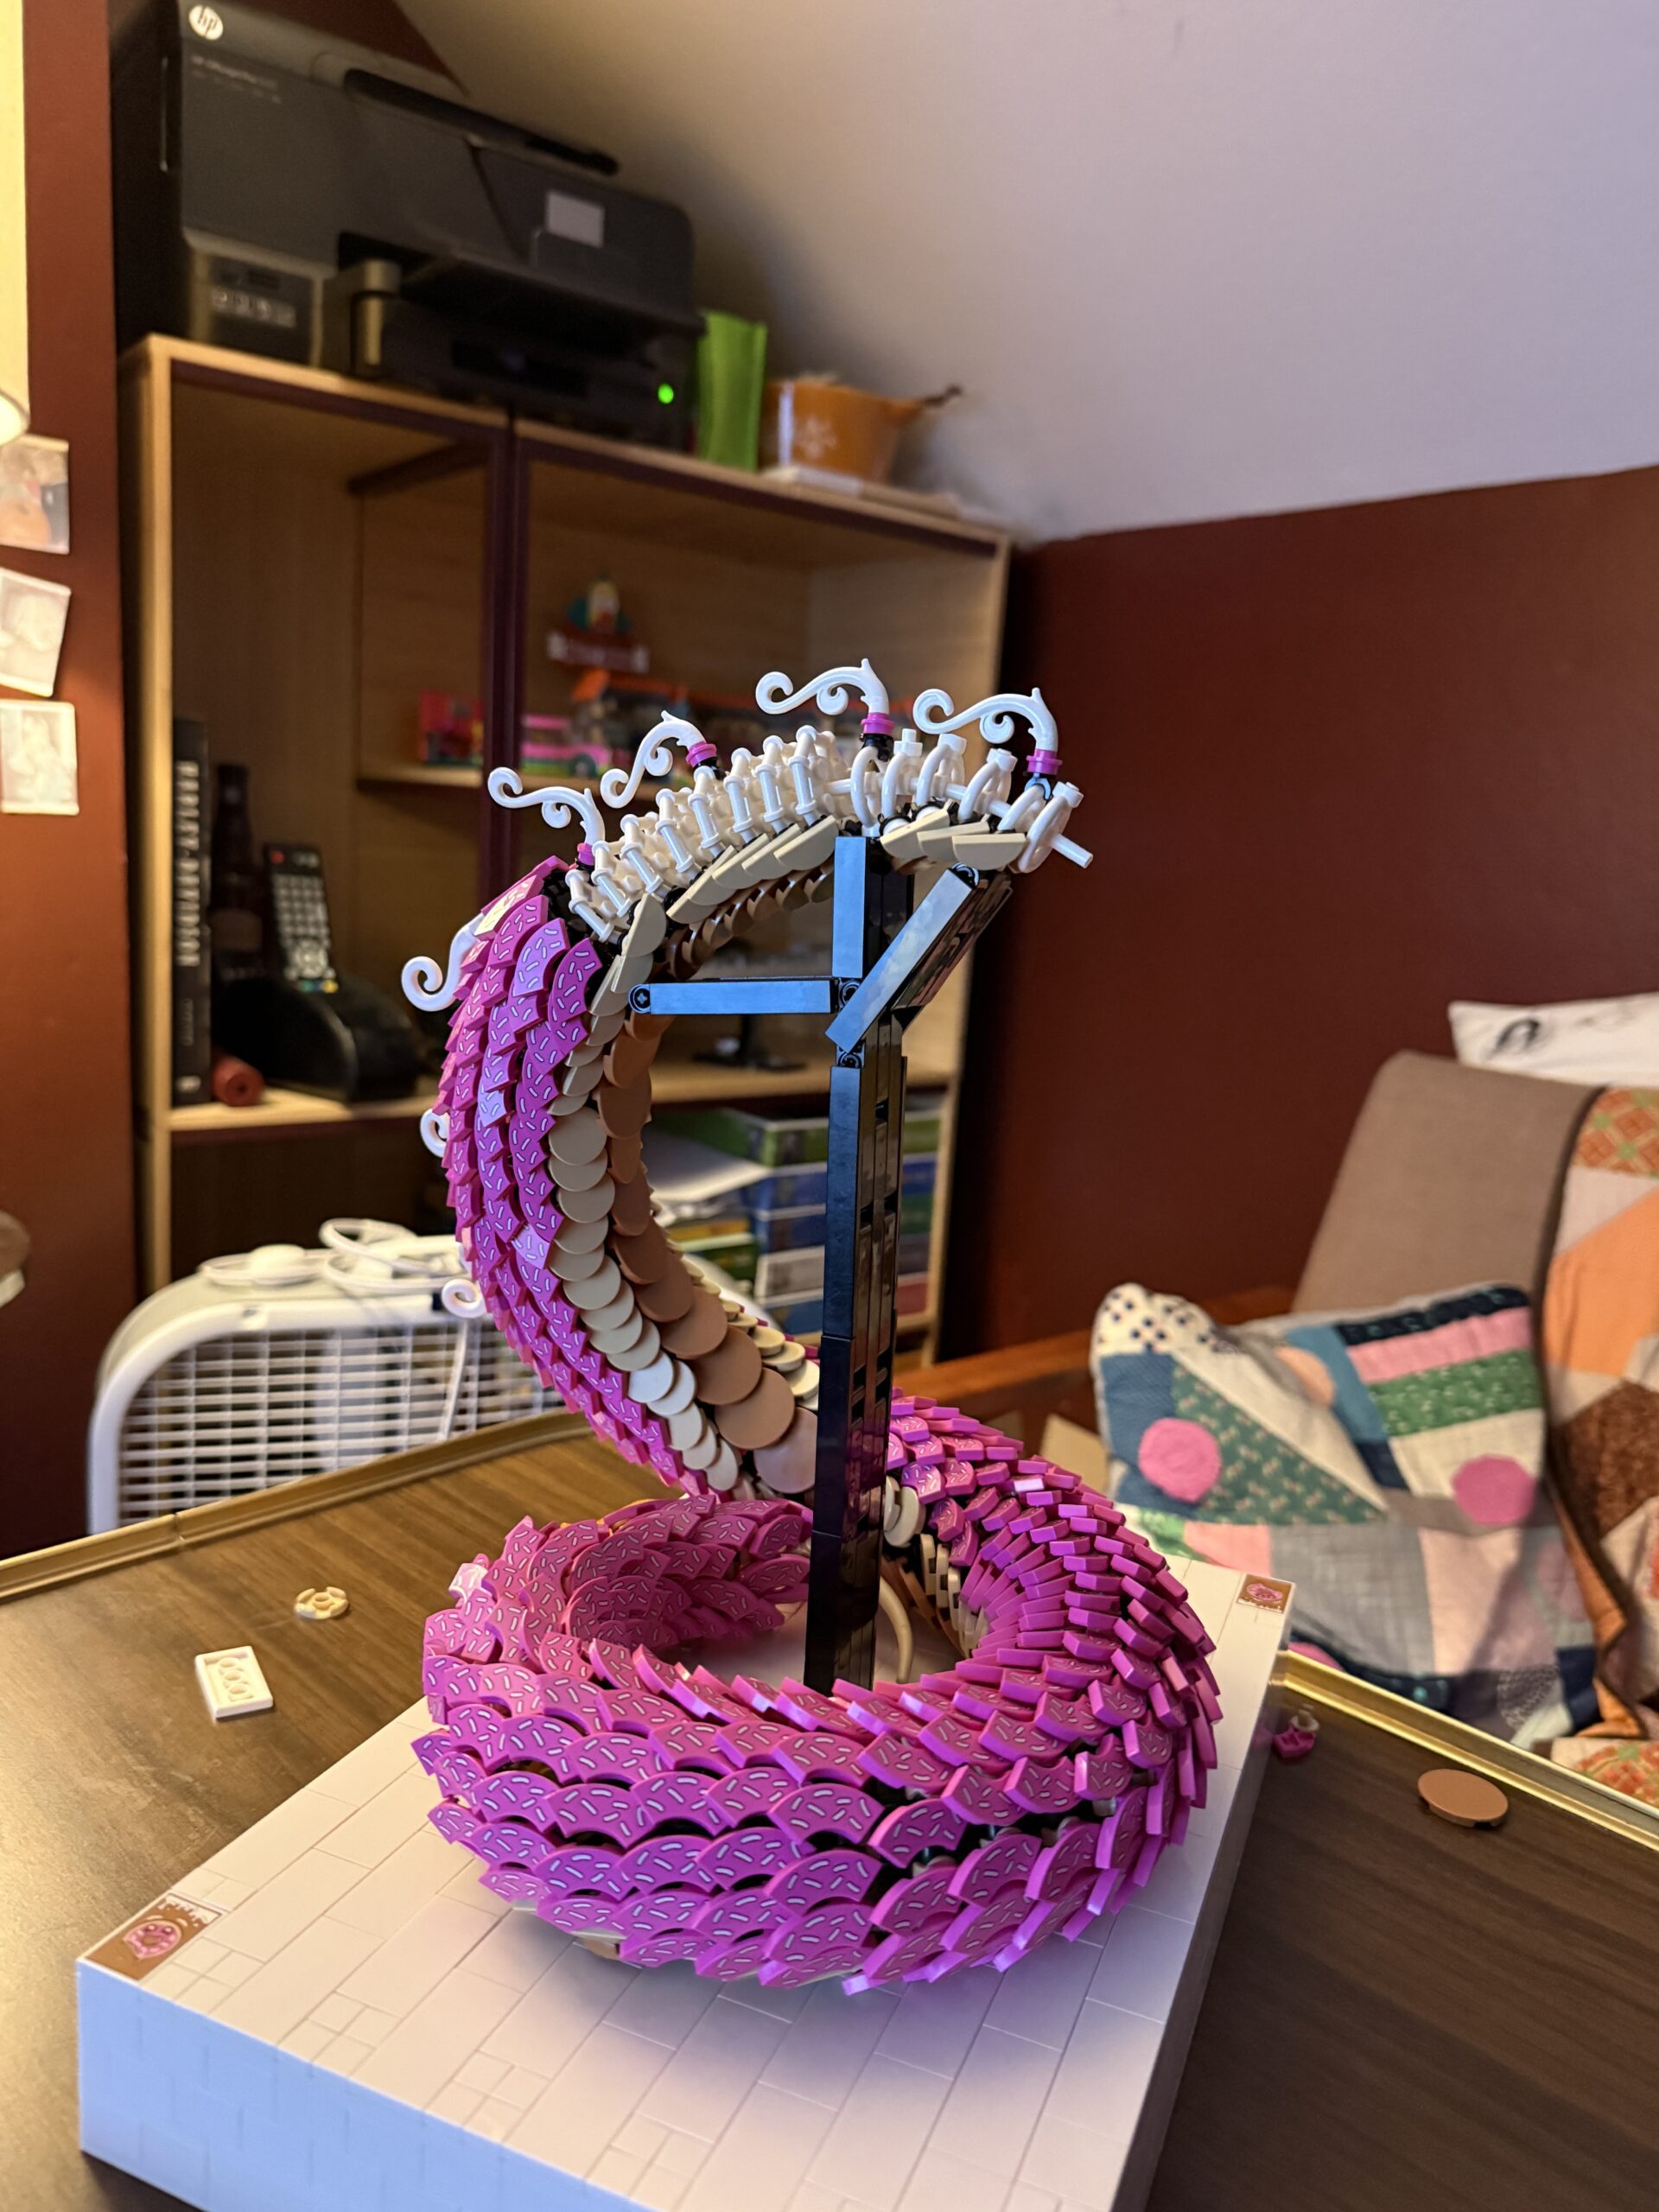
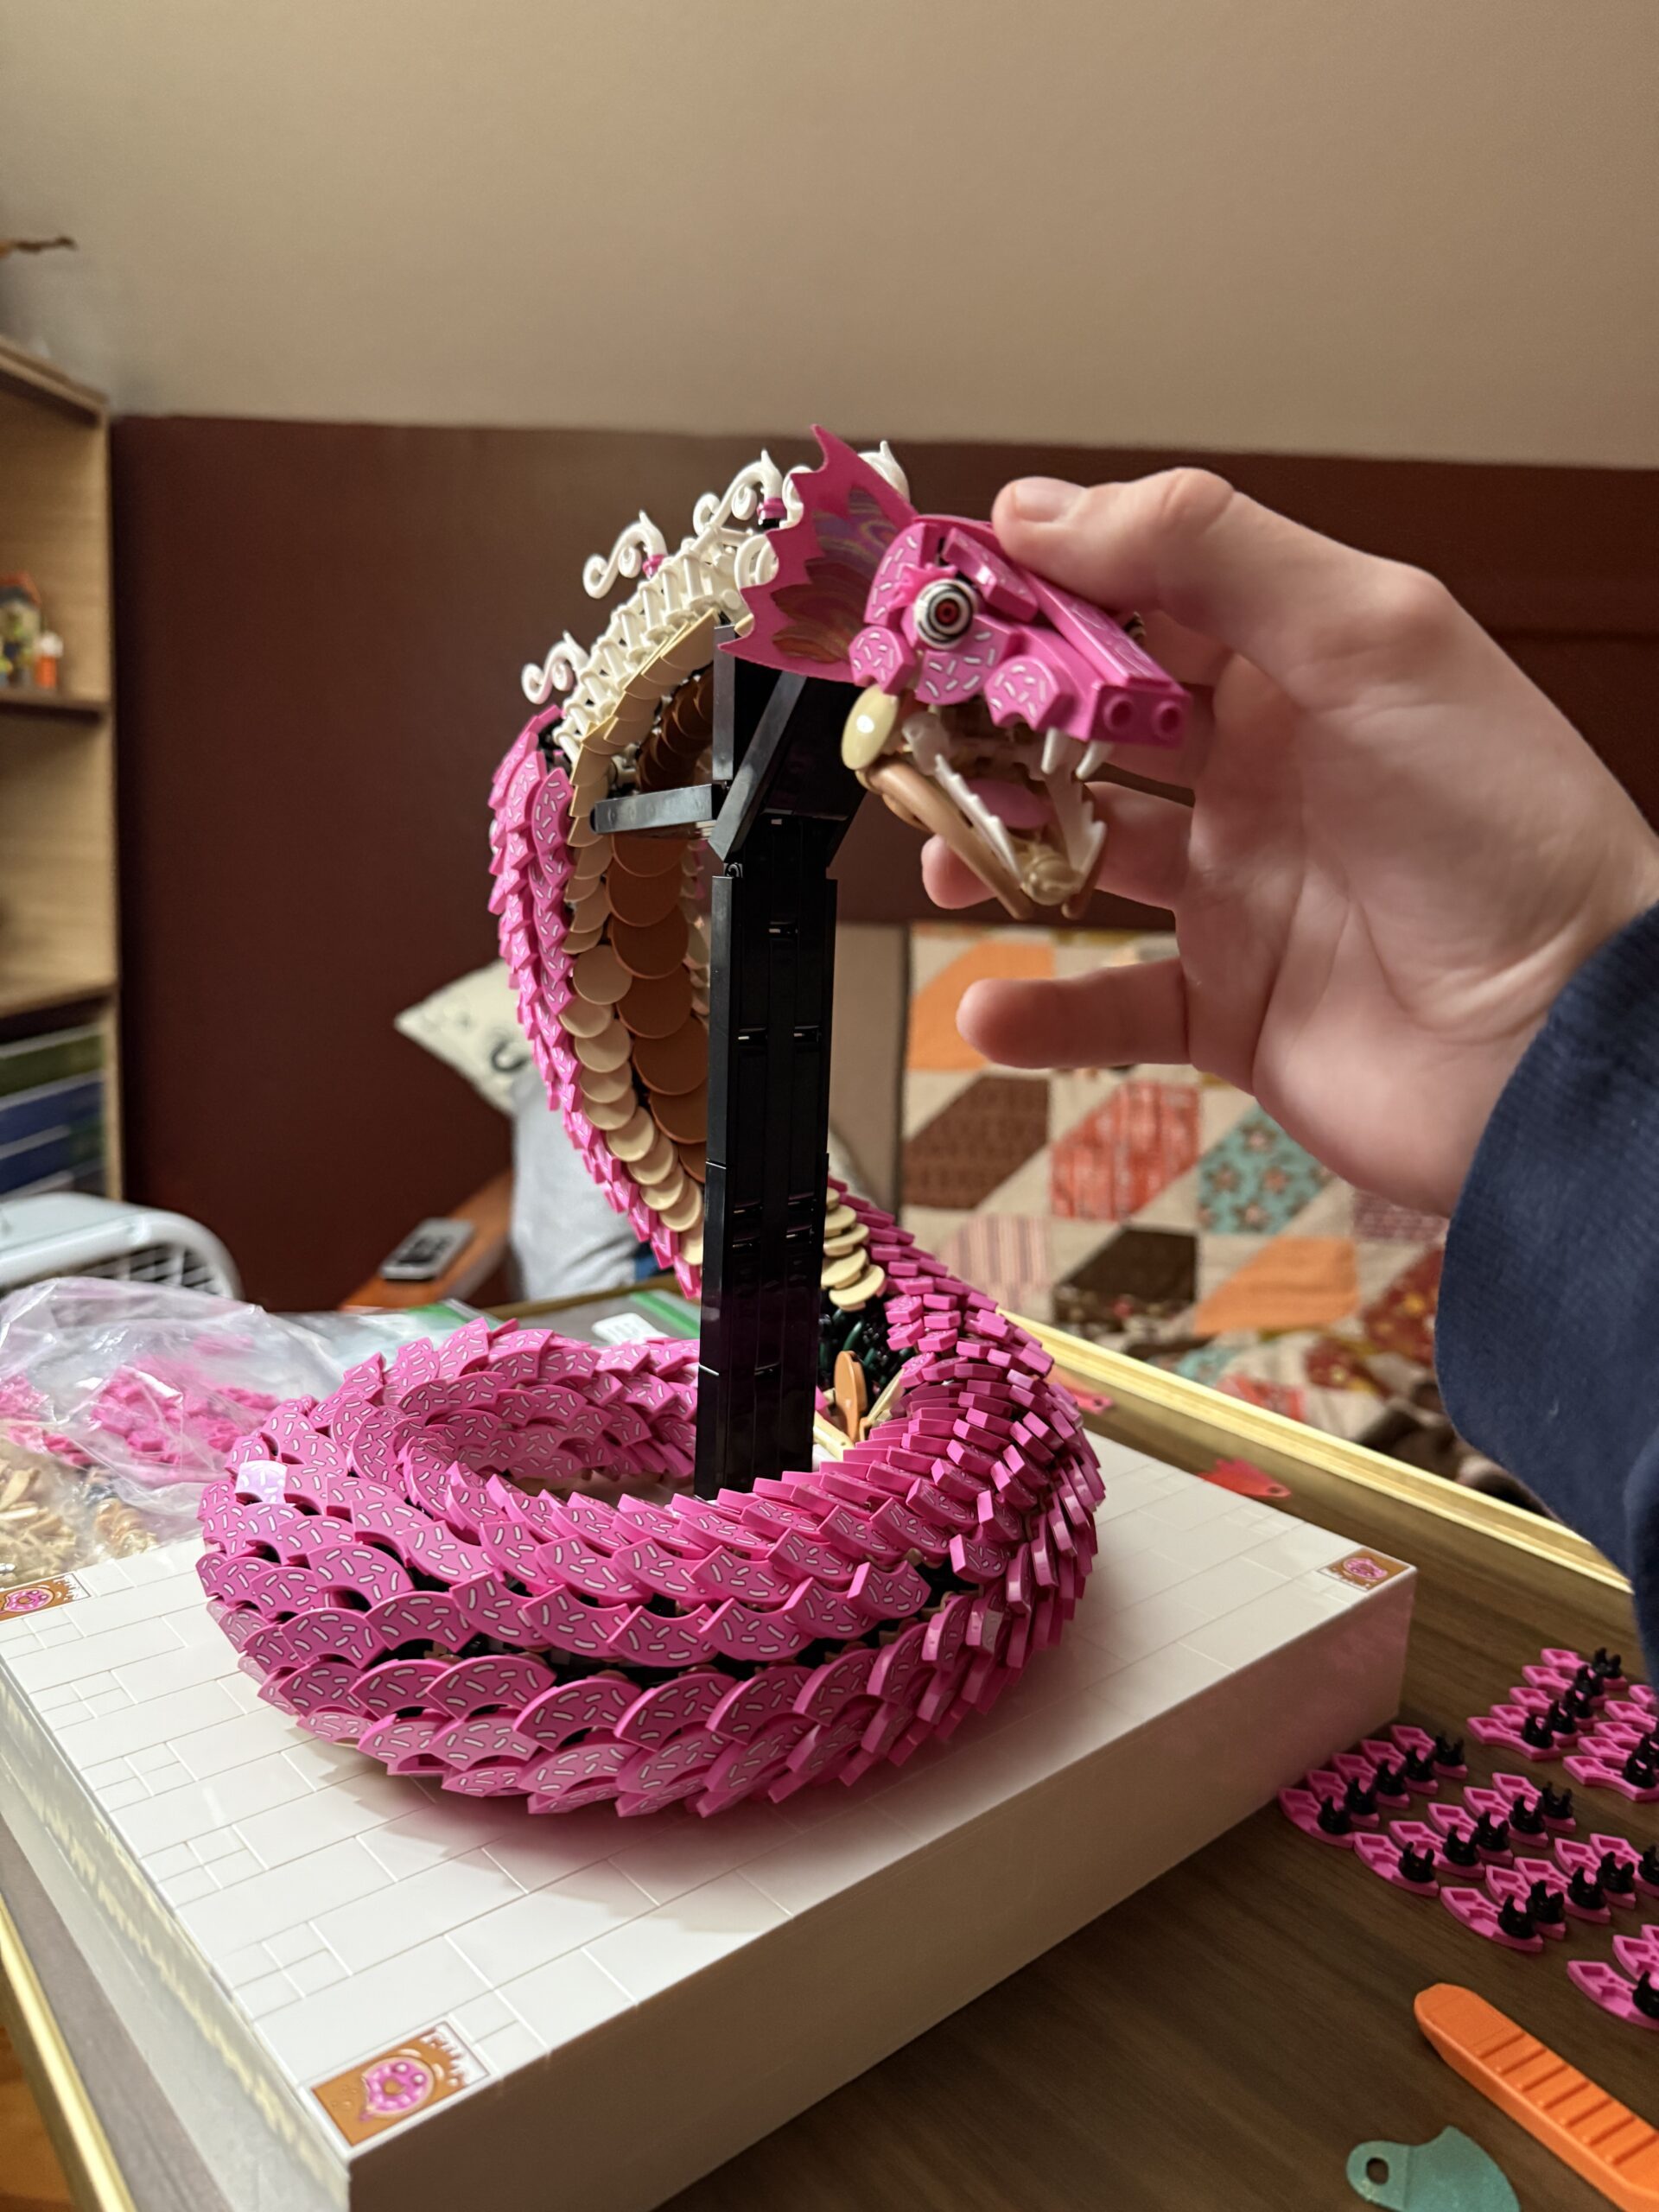
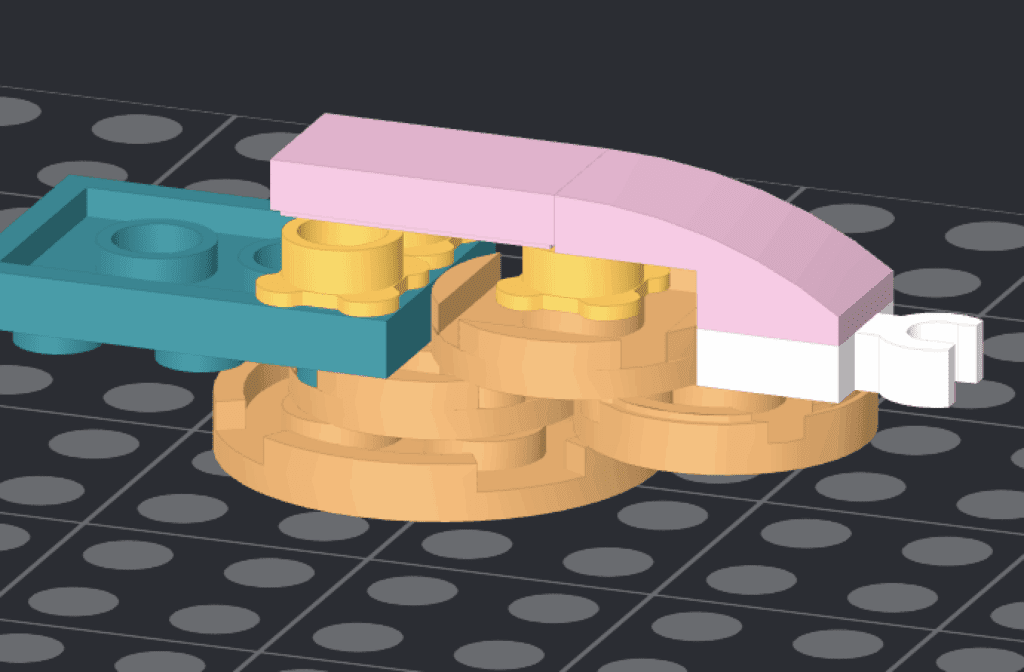
With some scraps and ideas down, it was time to start putting things together. The most important aspect for me here was to make the donut shape well defined at the bottom of the dragon. Thinking lore wise, I imagined people looking at eye level and assuming it was a big donut, before looking up and being terrified. Also for this reason, I wanted the belly scales to match what the fried part of a donut would look like, namely with medium nougat (fully fried) towards the bottom and tan (less fried) towards the middle.
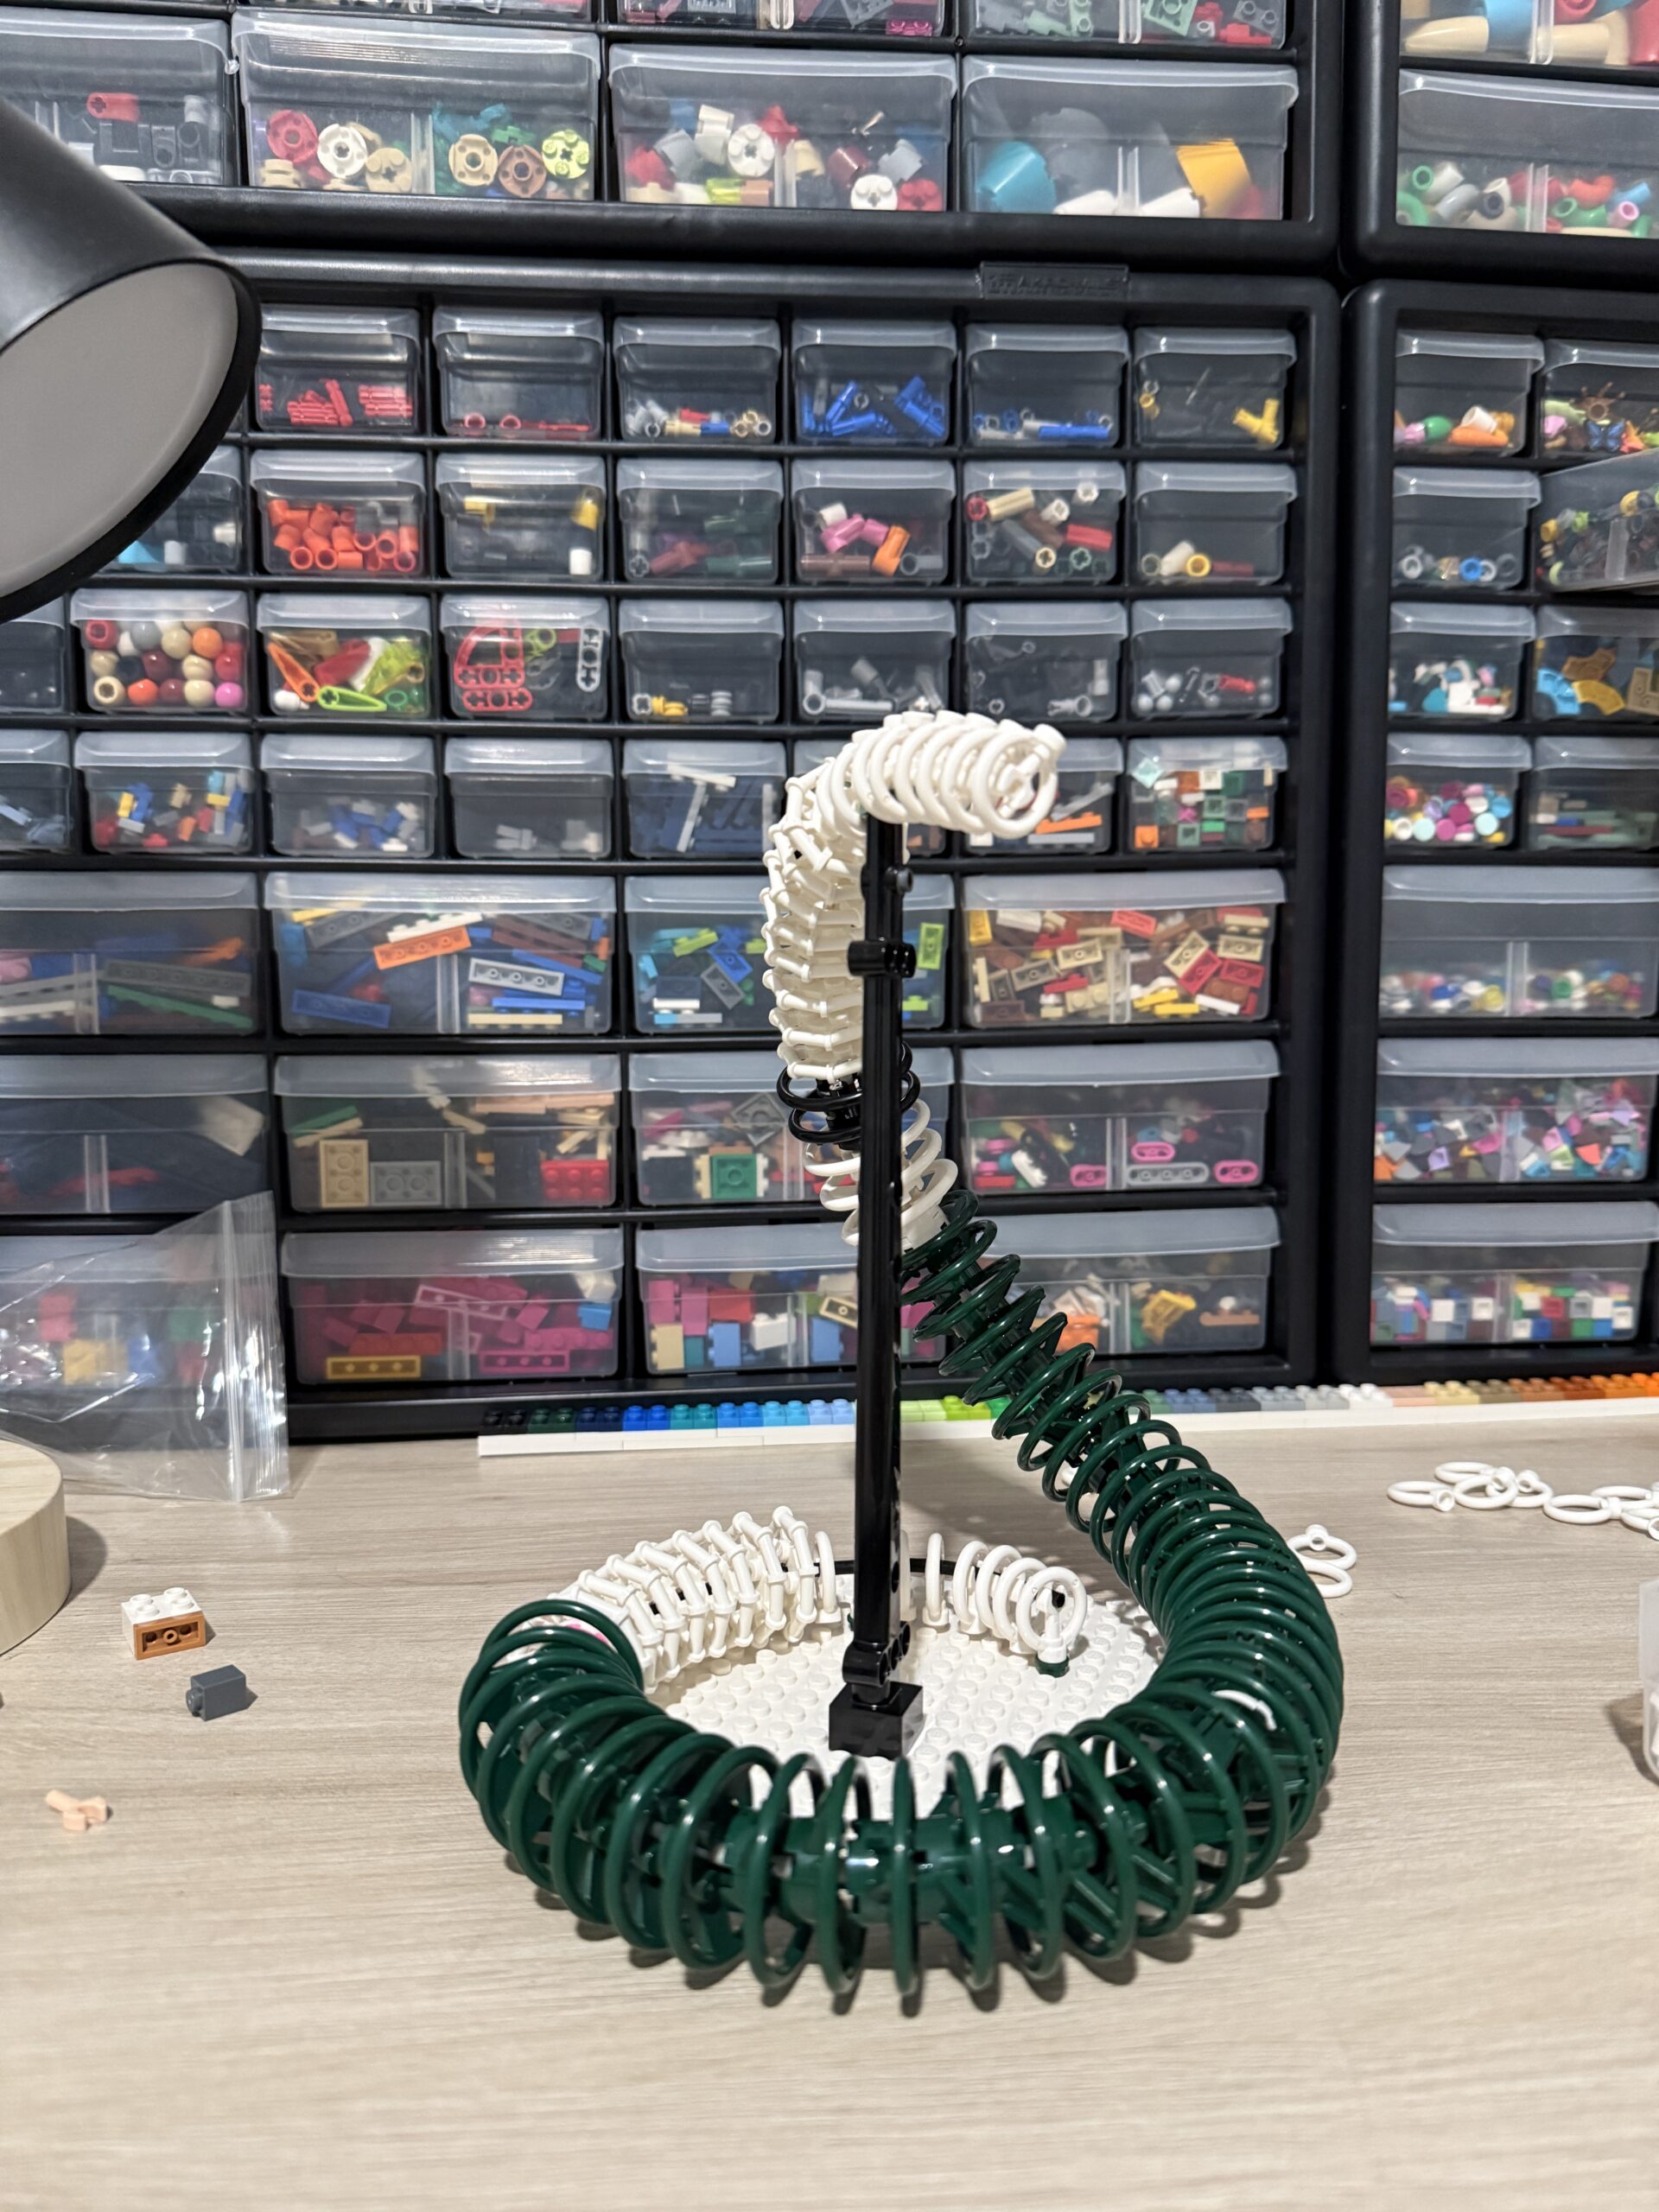
For the basic structure, I took some pointers from Aiden and just focused on getting as many rings as possible on a flex tube. From my experiments, I found the botanical ring width to be the best fit so I wanted to use majority of those. Outside of that, sonic rings also worked really well to get the tiles on, so I assigned that to my smallest size. To span the gap between the two, I was stuck with having to use octagons. These were the least helpful, but necessary for the width.
Scaling Up
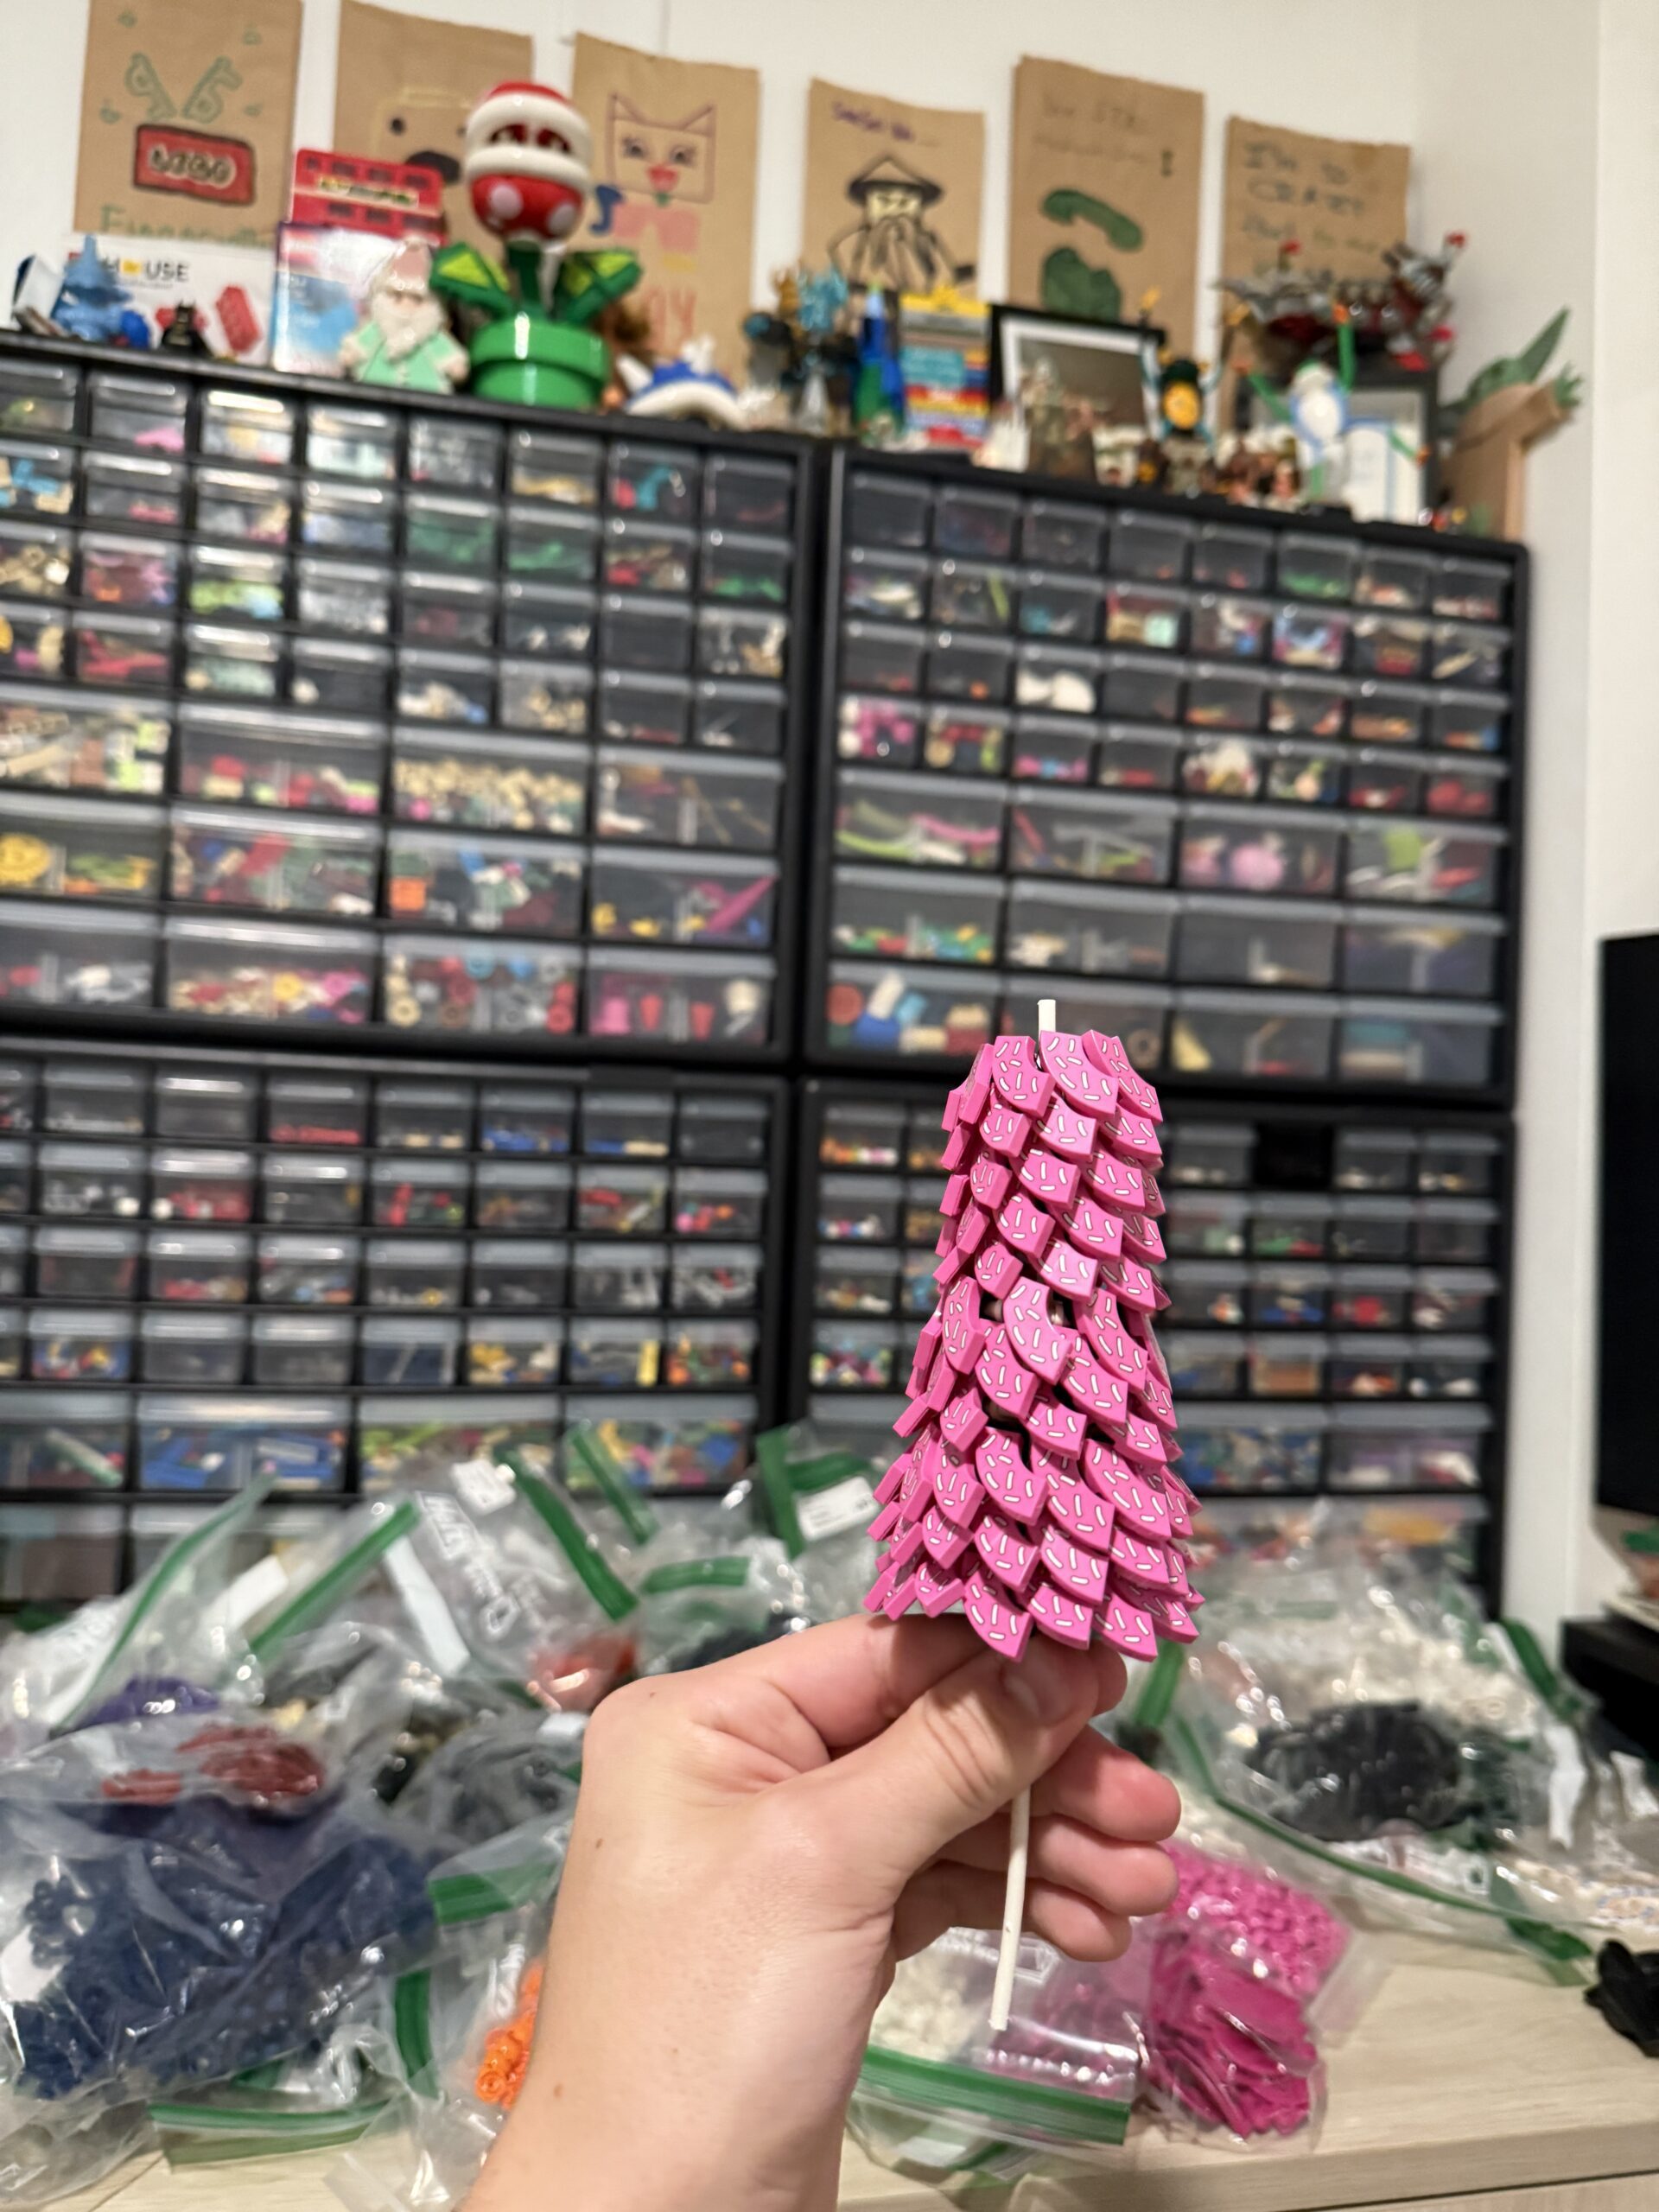
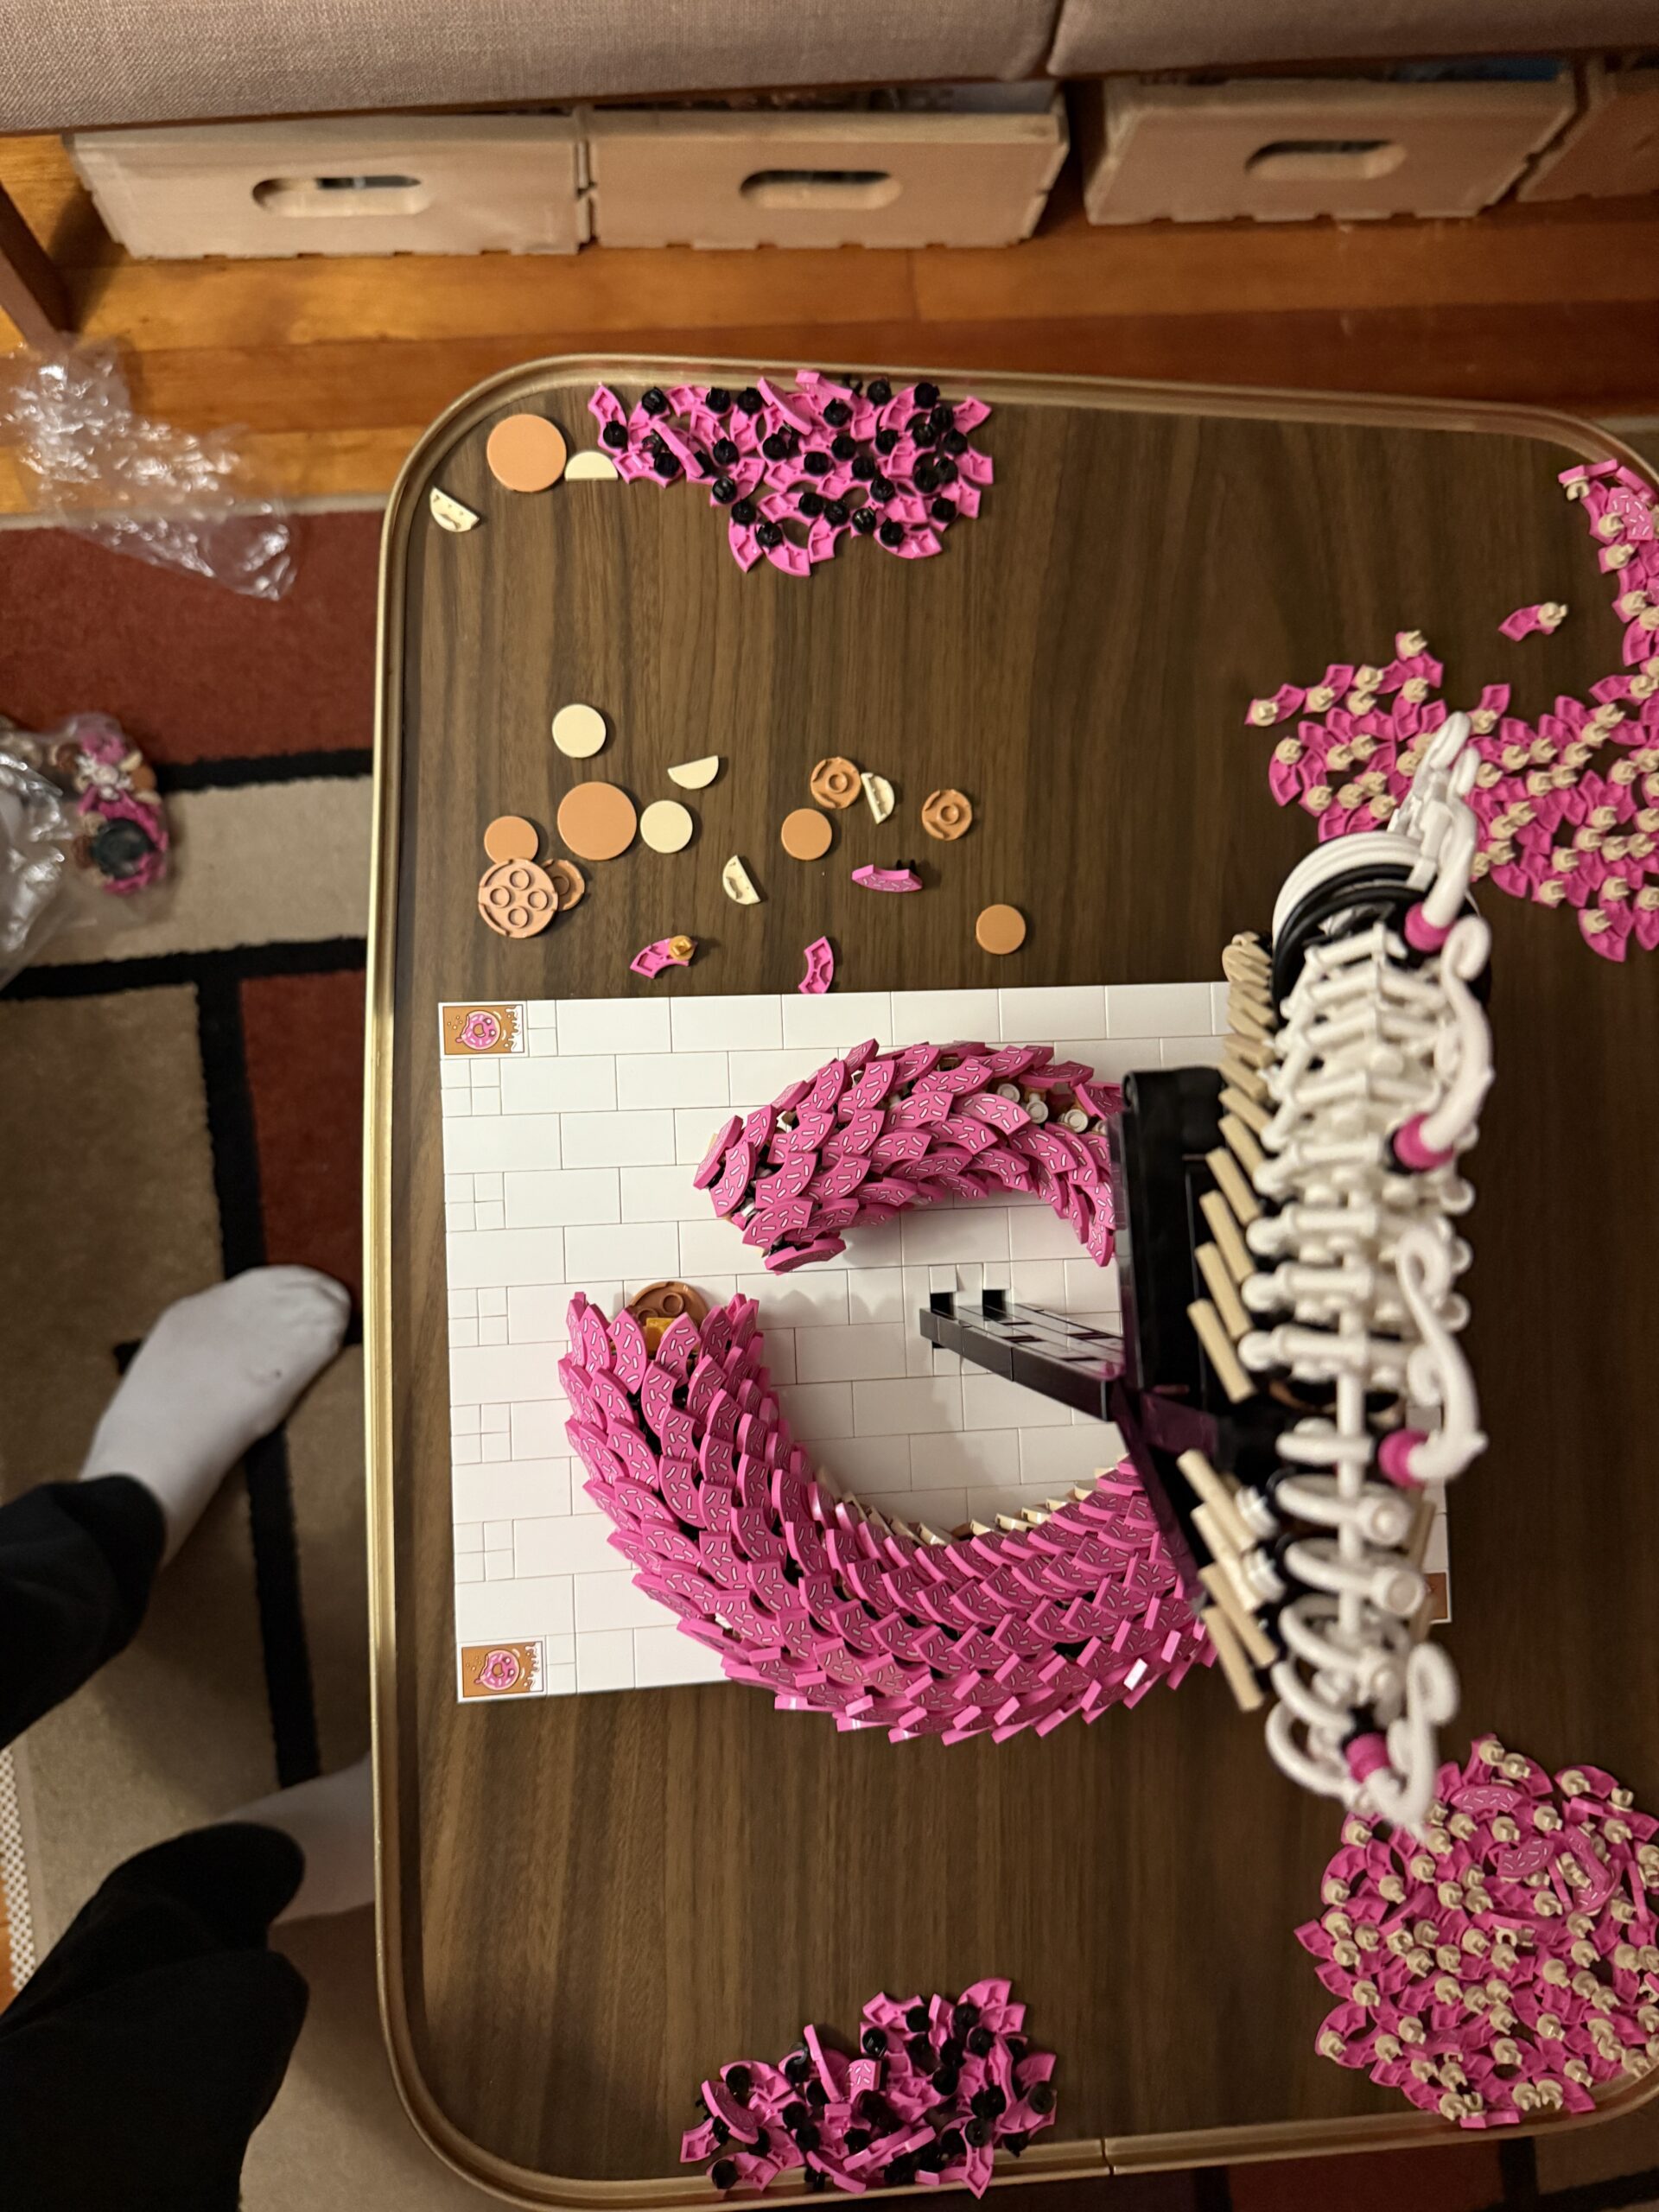
For the scales, I ended up learning some important lessons. Firstly, you lose a lot of rotation when putting on scales. Secondly, you absolutely burn through parts. I was way off on my initial estimate of how many pieces I would need. Fortunately for me, I had bulk of most of these pieces. The ringpops however proved to be a problem. Luckily for me, PAB online finely showed up again in the US, so on the first day it was put up I ordered a bunch of additional tan ringpops. The final lesson I learned was that scales can be super tedious and frustrating. The amount of times one scale popping off led to half an hour of surgery was absolutely brutal.
The Challenge
By far the biggest difficulty with this build was the head design. It went through many iterations with a lot of different ideas throughout. Should it look vicious? Maybe more whimsical? There was a lot of questions. Even less helpful, dark pink is a really limited color. I like to think I have a lot more dark pink than most Lego fans, but even I felt limited. A lot of the bar parts I typically rely on for shaping simply aren’t available in dark pink, so it certainly was a struggle.
In my first draft, I tried the especially whimsical Clickits for eyes. Further, I had always wanted to use my large dark pink duplo flames and I thought this would be a good opportunity. This however did not work, but it gave me an ok place to start.
From there, I moved to put frosting as the horns instead of the duplo flames. Also around this time, I picked up the new dark pink fast and furious car. Along with having a bunch of helpful dark pink parts, I found the prints and stickers to be a great compliment to my donut tiles!
With none of these ideas really working, I knew I had to pivot. The whimsical approach just wasn’t hitting, so I switched to a more aggressive look.
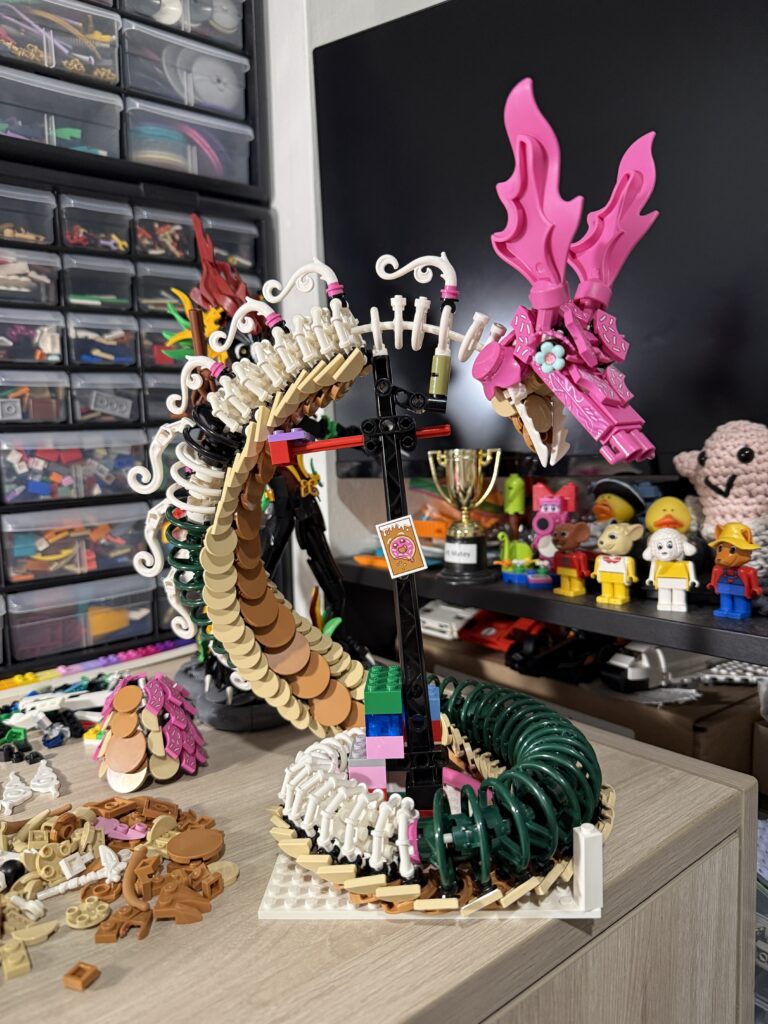
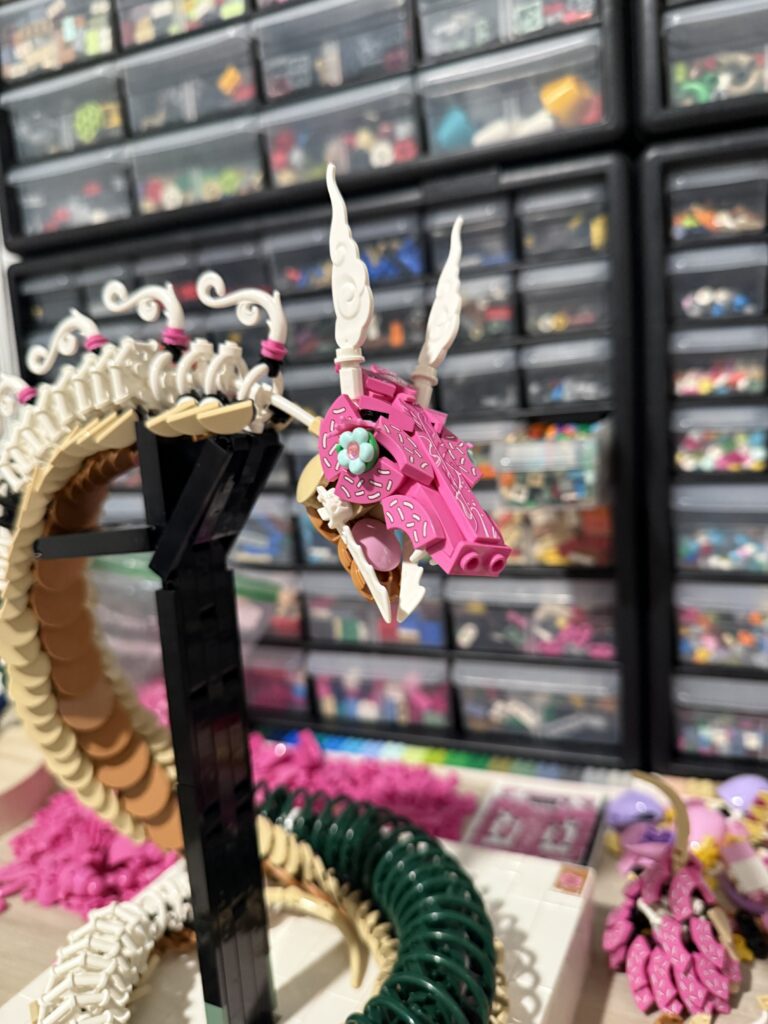
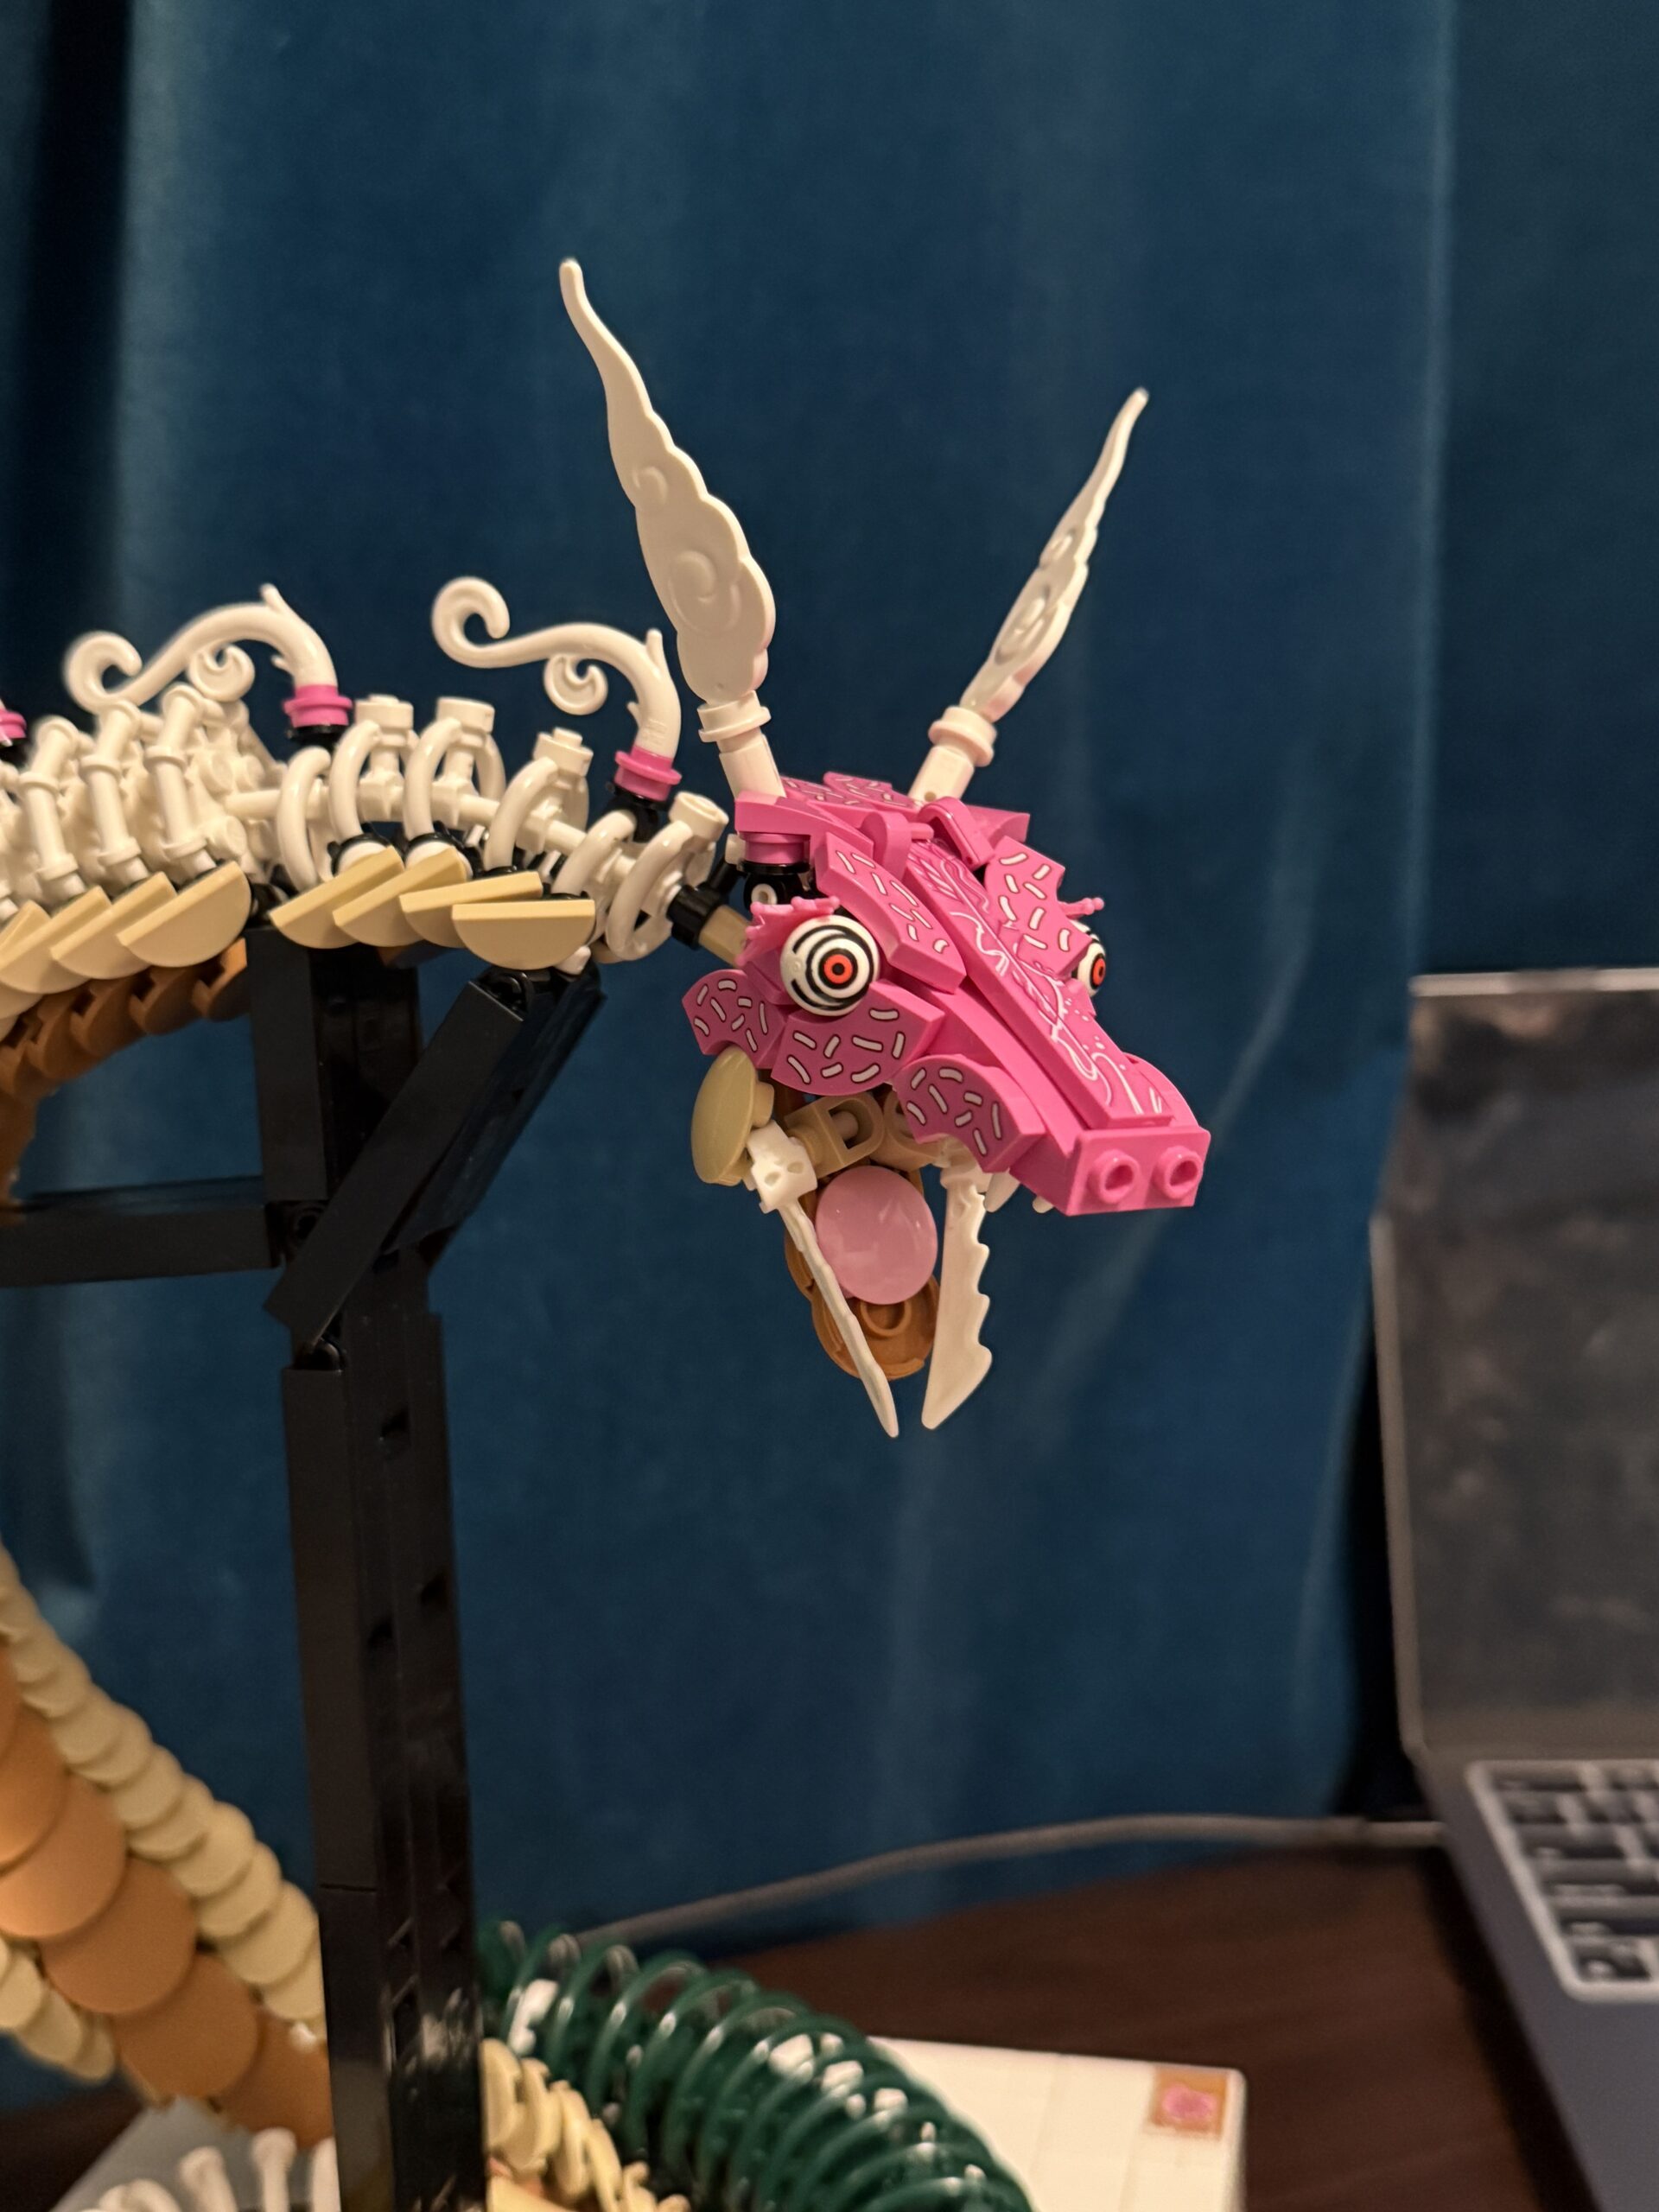
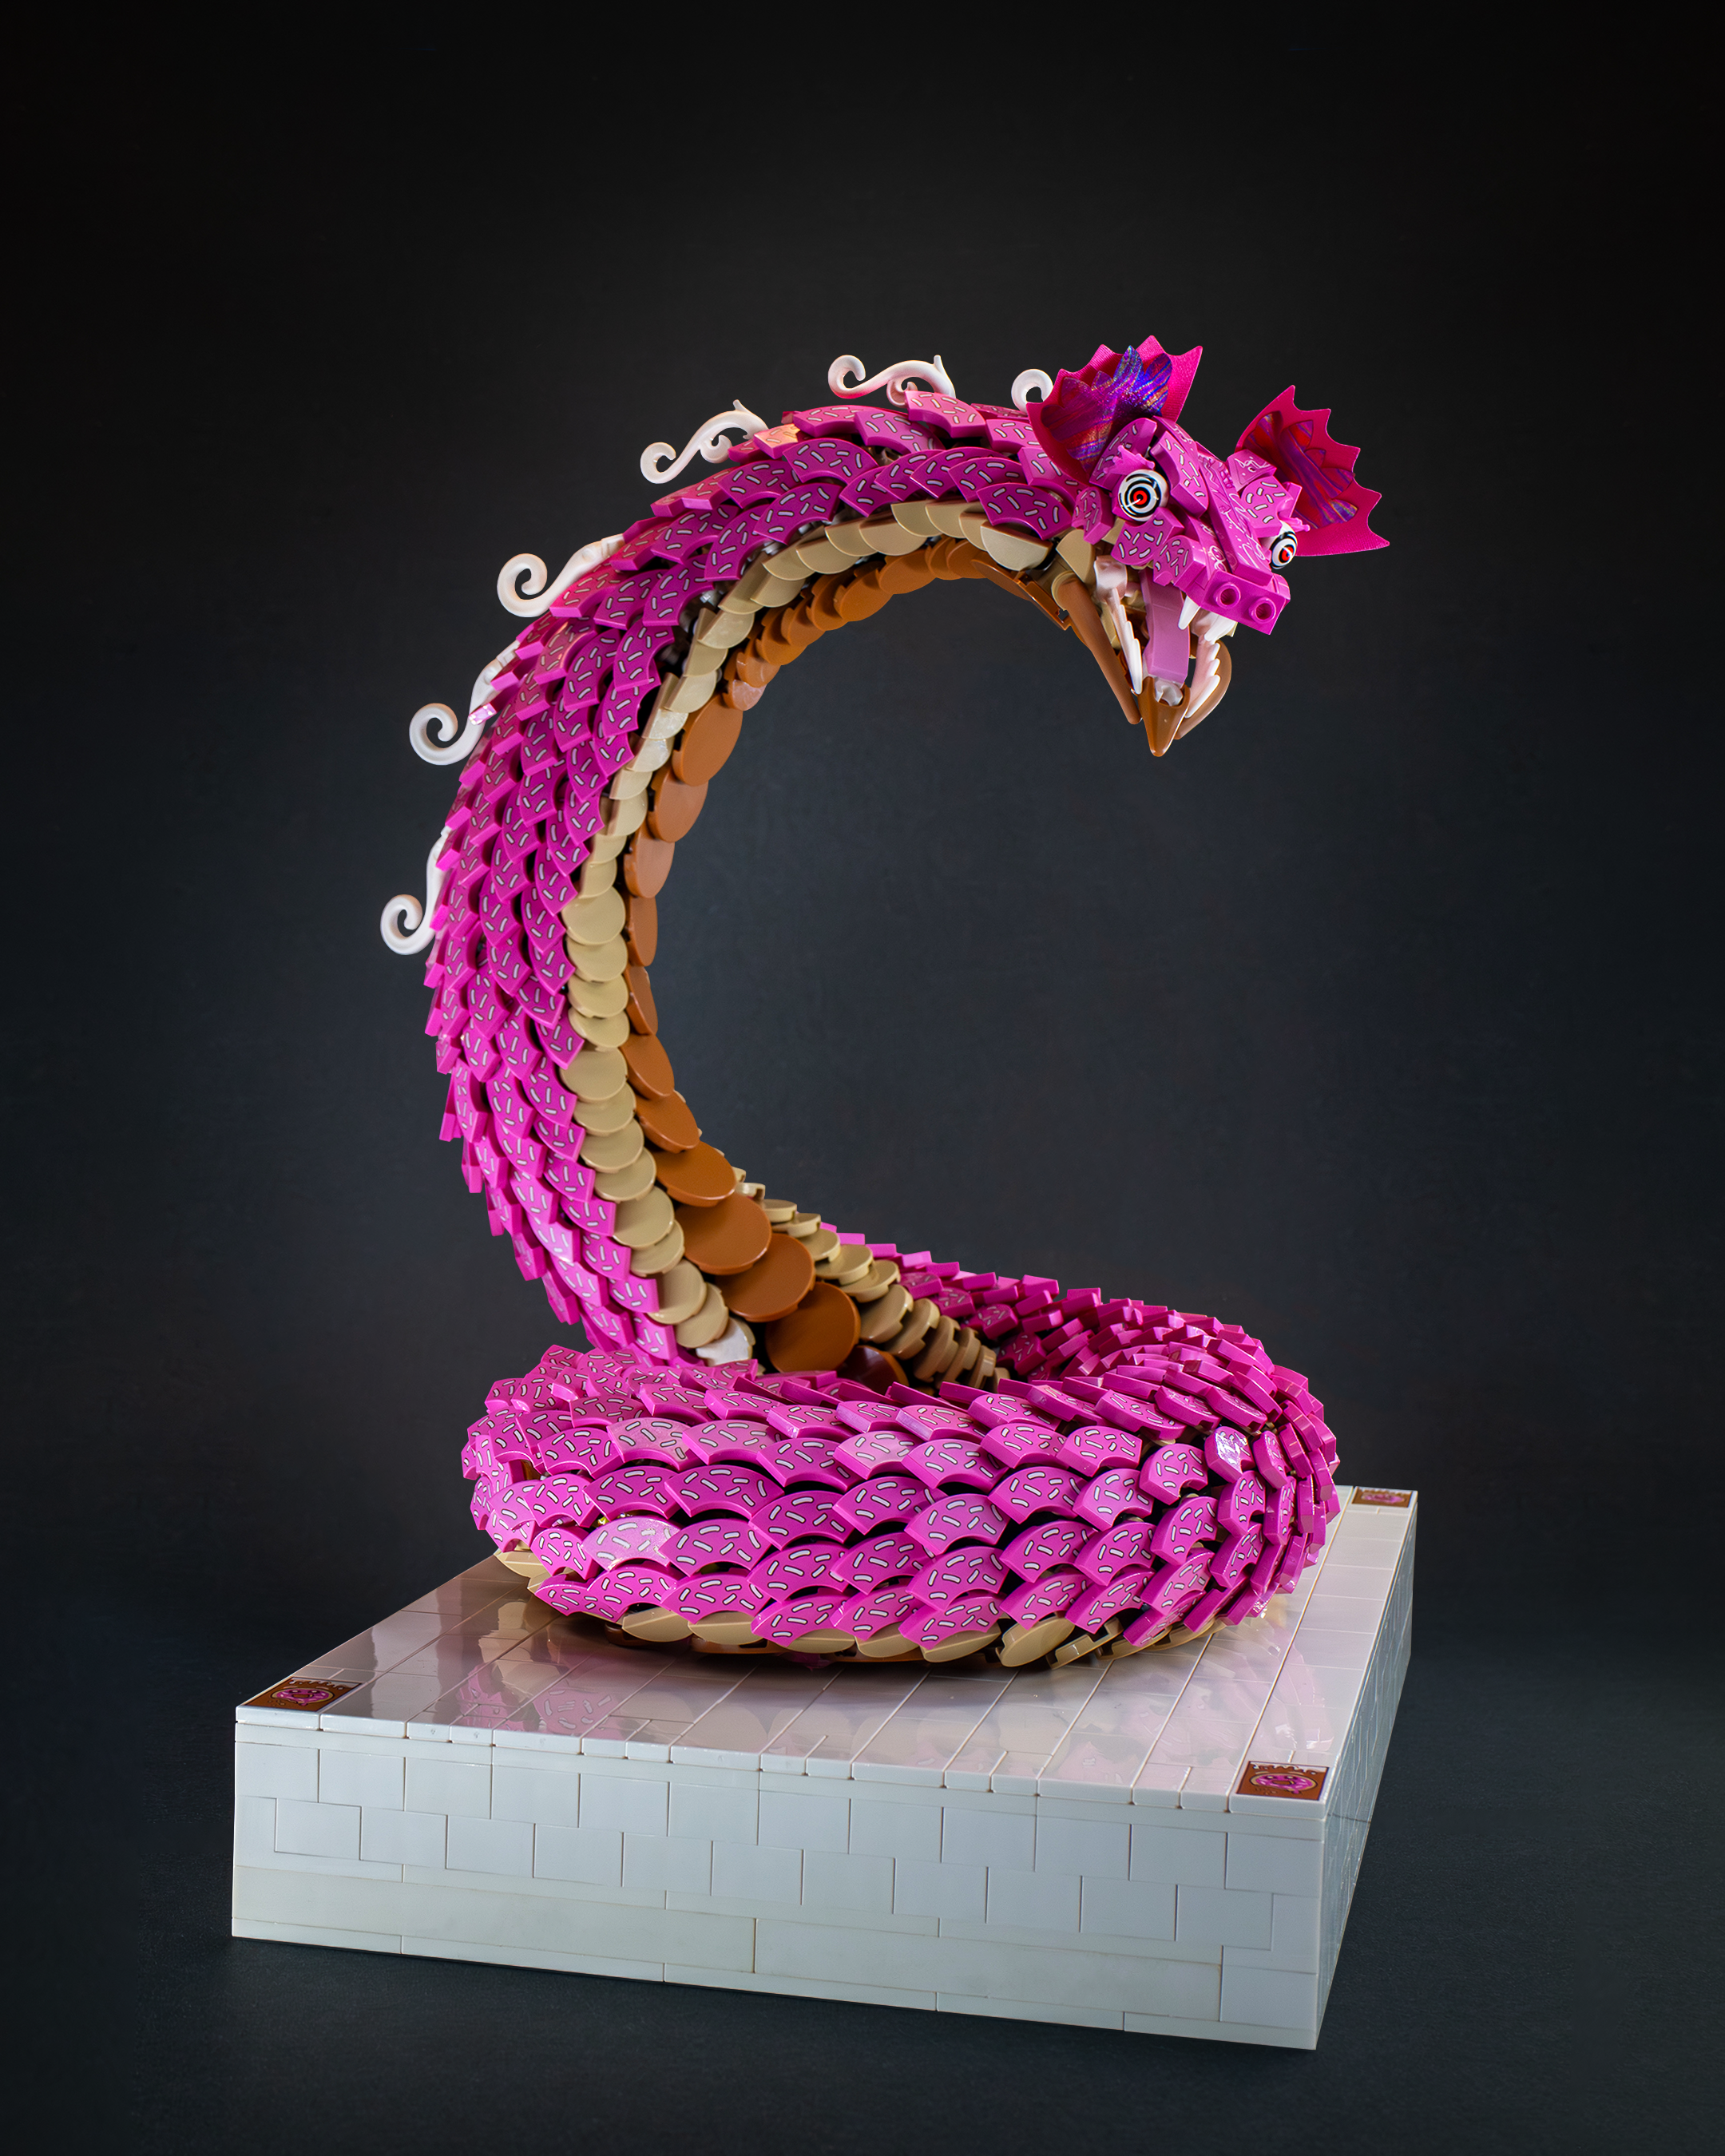
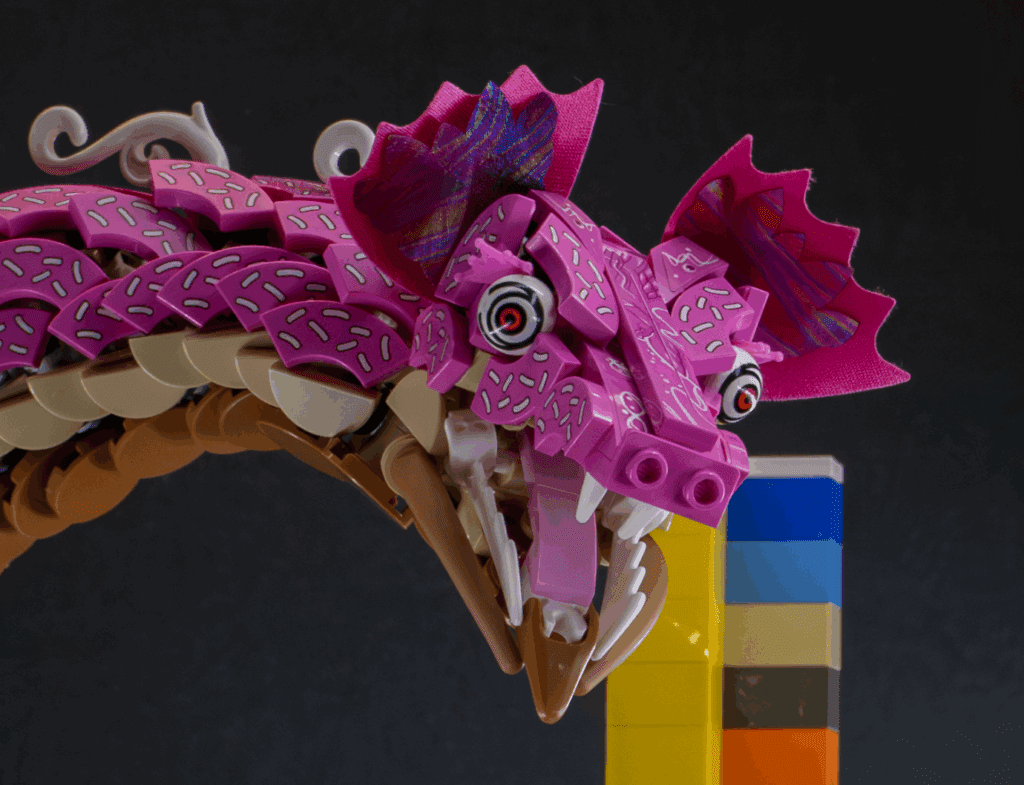
The first part of this look was the eyes. Here, I had long wanted to use the Chinese Lion dance eyes. They gave a much sharper while still crazy look, which was close enough to what I wanted!
Next, the horns just weren’t flying. I have to thank Nathan (@Woomy_World) for the suggestion of using capes as a nice frill detail. I also have to thank Bricks and Minifigs South Everett for their wonderful selection of whimsical capes to do the job! I tried about 10 different options, but the combination of the Pink Power Batgirl cape along with the friends iridescent cape was the option I liked the most.
The last part of the head to focus on was the lower jaw. I spent a long time on this and tweaked it many times, with helpful advice coming from a handful of crit buddies! The best advice I think I got was that because my “body” was medium nougat/tan, I needed to add a sort of cheek to cover up the white of the Ninjago swords. As usual, dino tails were the perfect part for the job. Some personal flair added towards the end I was very proud of was the Gallimimus Jaw. It was the perfect balance between pointy and rounded which complimented the dino tails very well to complete the taper of the jaw. To connect it, I had to use a horizontal clip as after much testing, that was all that worked for a friction connection.
Physics 101
Now for my least favorite part of the build, the stand. Aiden really told me off for using the big technic stand, so after enough convincing, it was time to simplify. This wasn’t easy, and all my crit partners had their eyes blessed by watching the top half of my build completely explode on video. Furthermore, a big part of the decision to switch stands was Ben agreeing to edit my photo for me. This allowed me to build a temporary rig so long as the stand ended up behind the build, as that could all get cropped out. The way I went about doing this was to add one bar connecting where the last frosting add on was in the back, and one clip connecting the flex tube right up by the neck. Surprisingly, just these two clips were enough to support the whole build. So, as much as I hated Aiden’s suggestion, it really helped the build!
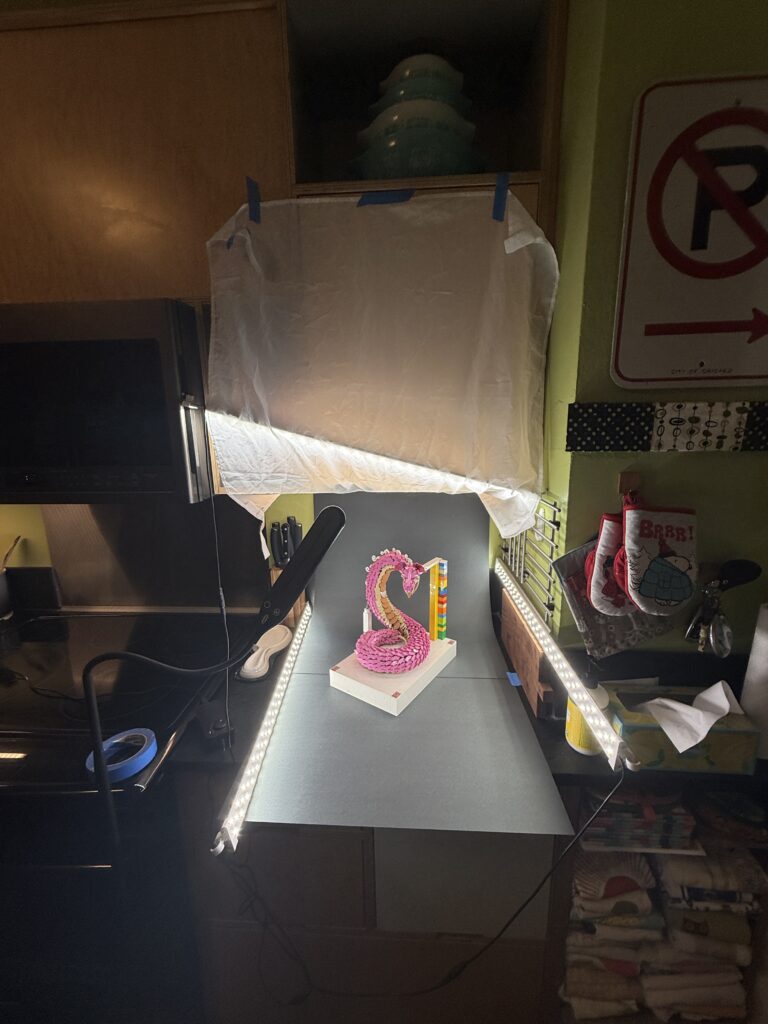
DIY Photography
One of the funny aspects of this build was that since mid December, I have been on break! This means I was away from my collection and down on resources. Although I packed many parts to use, one of the things I couldn’t pack was my entire photobox. So, I rigged up the most precarious setup ever, and said a prayer that it would work! Fortunately, it did the job, and I was able to pass it off to Ben.
A Helping Hand!
*Insert commentary from Ben whenever he wants to write it!*
A Masterpiece
Shoutouts!
As have featured throughout, I first have to shout out my crit partners for all the help! This build wouldn’t look nearly as good without the help of Aiden, Nathan, Ben, and Michael!
Then, thanks to The Brothers Brick for their continued coverage of my builds. Always fun to read their write up!
Lastly thanks to my mom for helping put together 300 clips and donut tiles. A very tedious process!